
If the tiles you currently have installed look old and worn, it may be affecting the mood in your home. Most people avoid tiling projects because they require removing all of the existing tiles first, which is a daunting prospect. The flip side is that this is not always the situation. In many cases, it is possible to update a space without tearing out the old tiles and installing the new ones. This essentially amounts to laying a new layer of tiles over the old one.
Don't worry if you have no idea how to tile over existing tiles; this article will guide you through the process, step by step. Then, you can always hire a professional tiler if you aren't sure you want to do it yourself.
With the help of our user-friendly tiling price guide, it's easy to figure out how much money you'll need to complete your tiling project. You should research all the variables that could affect the final price of your tiling job.
Ceramic tile makes for a durable and opulent floor finish, and it can often be installed directly over an existing floor with no prep work required. Whether the existing tiles should be removed and replaced with new ones or whether the new ones should be laid on top of the old ones is a decision that must be made after careful consideration of the age and condition of the tiles and the stability of the floor joists. What's more, if the existing floor is in good condition, you have a better chance of tiling over it. Before settling on a course of action, make sure you've thoroughly weighed the pros and cons of each option.
The question of whether or not new tiles can be laid over old ones is a common one among homeowners who are planning bathroom renovations. Nonetheless, the condition of the tiles already in place has a significant impact on the success of this method of tiling.
By tiling over the existing tiles, you can update and modernise the design of any space without the expense and hassle of removing the tiles that are already there.
It is much more cost-efficient to tile over already-installed tiles rather than to remove and replace them. By doing this, you won't have to spend money on expensive machinery or hire extra hands to remove the old tiles and adhesive.
Although retiling over old tiles can greatly improve the aesthetic appeal of a room, this approach is not appropriate for every situation.
If you are updating the tiles on the floor or walls because they are old, damaged, or out of style, it is not a good idea to tile over the tiles that are already there. Several situations may prevent you from tiling over existing tiles. Here are a few examples:
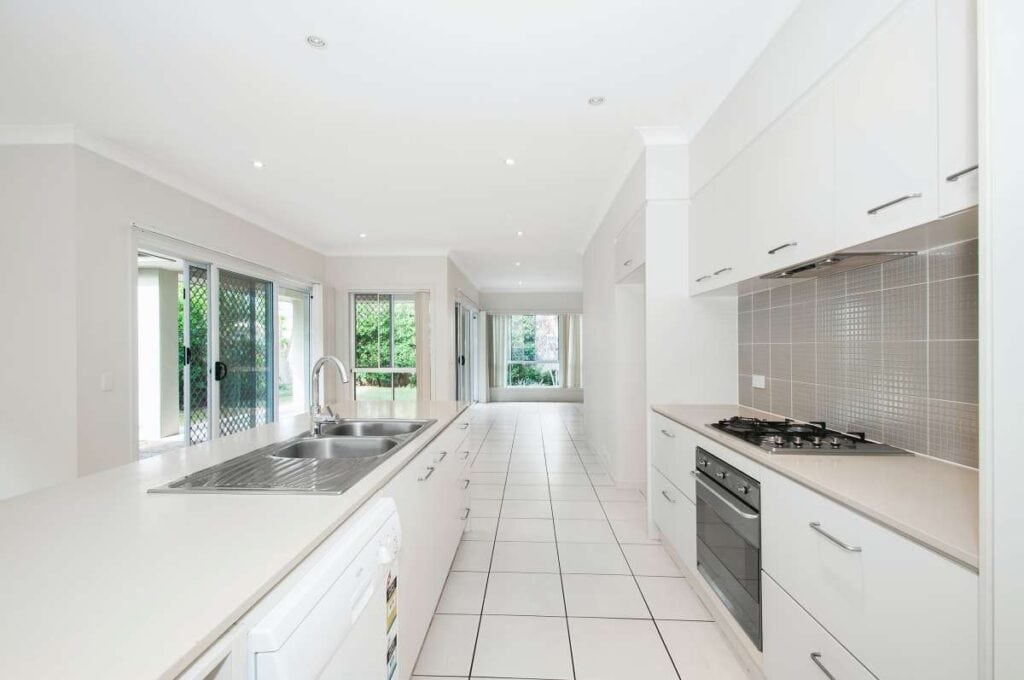
Looking for the best tiling renovations? Look no further! Hitch Property Constructions has you covered.
Old tiles that are loose, sagging, lifting, uneven, or damaged.
If your tiles are chipped or have a drumming quality, it's a sure bet that whatever you put down as flooring or on your walls will have the same problems. Replacing these subpar tiles with new tiles won't fix the problem; it will just make it less obvious for a while longer.
If the added height impairs access or doesn't fit.
When new tiles are installed on top of old tiles, the resulting height difference can be problematic, requiring a sizable step up from the exterior or into your wet areas, and even preventing some doors or cabinets from closing properly. However, these issues can be fixed by making adjustments like cutting down on door and skirt height and building ramps to access problem areas.
The adhesive for the new tiles may not adhere to the existing tiles as well as concrete bedding does due to moisture, movement, or the condition of the existing floor or wall tiles. Perhaps this is the case.
Old Tile Removal
To remove the existing ceramic tiles may prove to be a Herculean task, depending on how well the flooring was installed by the initial flooring contractor. The thinset that was used to bed the tiles formed a bond not only with the tiles themselves but also with the underlayment. In the event that the thickened thin-set cannot be removed from the underlayment using a scraper, the underlayment itself will need to be replaced. To accomplish this, you must first saw through the grout joints and then the underlayment before prying both of them up together. The only way to determine whether the thin-set or the mortar is tenaciously bonded is to chisel away the grout that is surrounding a single tile and then break it out. If the thinset that was used underneath is still adhered to the underlayment, it might be easier to simply use thinset to fill in the space left by the removed tile, and then instal the new tile directly on top of the old tile.
Floor Prep
In order to prepare the floor for tiling over old tiles, the high spots on the existing floor must first be ground down, loose tiles must be removed, and any voids must be filled with thin-set or floor-leveling compound. If there are a significant number of tiles that are missing or loose on the floor, it is probably best to remove the old tiles because the weak bond that exists underneath them may cause the new tile floor to be less stable. In the event that you decide to remove the existing tiles, you will need to scrape and grind away any hardened thin-set in order to level the underlayment before installing the new tiles.
Weight Factor
Because ceramic tile floors are so dense and heavy, installing two layers of them will place additional strain on the subfloor and the structure that supports it. It may not make a significant difference if the area in question is quite compact, such as a bathroom. However, if it is a large floor, such as those found in expansive great rooms, the additional weight might be a problem. Consultation with a structural engineer is the only way to know for certain, as they are the only ones who can examine the floor joist system to determine whether or not it will safely support the additional weight.
Floor Height
Adding a new ceramic floor on top of an existing one will raise the finished floor height by anywhere from 3/8 inch to 1/2 inch, depending on the specifics of the installation. Even though this might not seem like a significant change, it could affect how easily doors open and close, which would necessitate some door planning. If the new floor is installed next to an existing floor that is lower than the new floor, then a discrepancy of half an inch could also create a tripping hazard.
Can I tile over old tiles?
The response to this is quite straightforward: yes, but why would you want to? When new tiles are laid on top of existing tiles, any issues that existed with the original tiles, such as becoming loose, will continue to be a problem with the new layer. In the same vein, the additional thickness may also make it more challenging to accurately instal fixtures and fittings in their respective locations. People are often concerned about removing plaster from the wall when they are removing old tiles, but re-skimming the plaster as a preparation for the new layer is an essential part of producing a quality finish.
It is necessary to take into consideration the condition of the existing tiles in order to ascertain whether or not your floor or wall would benefit from being retiled. Have they deteriorated to a significant degree over time, or are they still in a relatively good state? Your floor is a great candidate for tile replacement if the tiles are in relatively good structural shape and the majority of them are still in tact.
On the other hand, if the majority of your tiles are damaged in some way, whether they are chipped, broken, cracked, or loose, you need to remove all of them. Although it may appear counterintuitive to bother worrying about the old tiles when the objective is to replace them, the old layer is essential to the structural integrity of the project.
Your newly installed tiles will require a stable base, regardless of whether you are tiling over existing tiles on a floor or a wall. If the old tiles are in poor condition, the new tiles will not adhere properly to the surface. When applied to a floor, this could result in both layers of tiles on the floor coming loose. If there are numerous chips and cracks in the top layer of tiles, then the top layer of tiles may even become more fragile over time as a result of the pressure caused by daily foot traffic.
Why Should You Retile?
You shouldn't avoid the retiling process even though it might seem like an overwhelming process to you. Both from an aesthetic and a functional standpoint, it is essential to keep your tiles in pristine condition at all times. Broken, chipped, or lifted tiles will not only be unsightly if you do not take care of them, but they could also lead to additional damage in the future if you do not address the problem.
For instance, if you don't pay attention to the condition of the floor or the walls in the bathroom, water damage could easily occur. Broken tiles or tiles that are literally lifting off your floors or walls create the ideal conditions for water to penetrate your home and cause damage. There is a good chance that moisture and steam from your shower will seep behind these tiles. When something like this takes place, moisture will continue to accumulate, posing a risk to the plaster and dry lining that can be found behind the tile. Even the development of mould is a possibility!
If you find that your tiles are damaged and in need of repair, you should put this task at the top of your to-do list.
Check out our range of tiling renovations Melbourne at Hitch Property Constructions.
Before you start
Materials Required
Overlapping tiles requires special materials made for use on nonstandard substrates.
You can use any non-slump, flexible tile adhesive that has a C2S2TE classification and can be installed in accordance with the Australian Standard if you're tiling over tiles that already have a matt finish.
There will be a slight adjustment to the procedure if you plan to tile over existing tiles that have a glossy finish. Tiles require a tile-specific primer to be applied to the existing surface before installation. The floor must be primed using a roller and left to dry before the tiles can be installed. The next step, after the primer has dried, is to apply a modified adhesive made of rubber.
Inspection
The condition of the existing tiles in the bathroom, whether they are on the floor or the walls, should be carefully inspected, as they will form the foundation for your new tiling project. Applying a sealant and forming a bond with the base are essential steps in any tiling project. There shouldn't be any problems with humidity or hollow gaps under the existing tiles if they were installed correctly and there isn't any water damage.
A rubber or wooden hammer can be used to listen for hollow sounds beneath the existing tiles, allowing you to determine if any of them need to be removed during the surface inspection and preparation process. Cavities, or spaces, between tiles and the subfloor are usually the result of insufficient adhesive between the tiles and the subfloor, though surface movement can also play a role.
Preparation
Verify that the floor and wall tiles are at the same height. Raise-free surfaces should be smoothed out using a right angle grinder fitted with a masonry wheel.
In order to get rid of any glazes that may have been applied to the tiles' surfaces, you should sand them all with a belt or orbital sander. This will make the surface rougher and more porous, allowing the adhesive to better adhere to the preexisting tiles.
If there is any dust, dirt, sealers, or wax on the tiles, you should vacuum them and then wash them with detergent and water. After rinsing the old tiles with clear water, they should be laid out to dry.
Installation
Assuming you've already tiled the bathroom's floor and walls, the final step is simply to glue your newly purchased tiles in place. For such a task, rubber glue is typically recommended by tiling professionals. In the event that the ground or any already installed tiles move slightly throughout the year, this will provide more leeway.
Alternatives to tiling
Tiles are a common option for the walls and floors of bathrooms, and for good reason: Not only are they long-lasting, but they are also simple to clean, and they are available in a wide variety of colours, sizes, textures, and shapes to perfectly complement your décor.
However, if you're thinking about the kind of wall and floor coverings you want in your bathroom, you don't have to restrict yourself to tiles at all. There are plenty of other options.
Wall panels
If you are looking for an alternative to tiles that is less expensive, then an acrylic wall panel might be the answer you are looking for.
Wall panels can be quickly and easily cut to size, and they can be installed in one go. Wall panels are designed to fit over tiles or almost any other existing wall covering. Because of this, you won't need as much time to tile because you won't have to deal with the challenges of grouting.
Shower wall panels
Wall panels, which come in a variety of colours and patterns and provide a finish that is almost seamless and is simple to clean, are available. In addition, because there is no grout between the tiles, there is no place for mould to grow.
Check out these different price points:
- Wall panels made of acrylic by Orchard Bathrooms
- Wall panels made of zeolite acrylic
- Acrylic wall coverings composed of multiple panels
Vinyl flooring
When laid on bathroom floors, tiles not only look great but also provide a sturdy surface that can easily withstand the wear and tear that comes with being in a frequently used bathroom. The only drawback is the amount of time required to properly align and grout your tiles in order to achieve a professional appearance.
Vinyl flooring is an interesting alternative that could save you both time and money. It is also an attractive option.
When you think of vinyl flooring, you might picture something similar to linoleum, but Krono Xonic vinyl flooring is nothing like that at all. They have a stunning range of wood effect finishes, making them look every bit as elegant and beautiful as a hardwood floor would, but the best part is that you won't need a professional to instal them. Simply laying each plank down and clipping them together eliminates the need for grout or adhesives, which can be messy.
Doing your tiling
When it comes to anything having to do with your bathroom, we would always and unequivocally advise you to work with a fully qualified and experienced professional. Nevertheless, tiling is a job that you might want to attempt on your own if you are skilled in the art of do-it-yourself projects.
Solved! Yes, You Can Tile Over Tile
Assess the existing tile.
The subfloor should be thoroughly inspected before tile is laid over it to find any surface irregularities that could cause structural problems down the road. Signs of an absorption issue include mould growth and a marked discoloration of the grout. This indicates that trapped water has harmed the grout, which may eventually cause the new tile to rot from the bottom up. If the tiles are covered, the absorption issue will only get worse over time. Similarly, if the original tiles weren't set in place correctly, the new tiles set on top of them won't align properly or lie flat. If you notice either of these issues, you should start the tiling project over instead of covering the existing floor.
Prepare the surface for installation.
Make sure the surface is flat by sanding away any clumps of hardened grout and re-adhering any loose tiles before you start tiling. If you tile over an uneven surface, you can expect less than stellar results. Afterward, you can begin laying out your new tiles and cutting them to size around any obstacles, such as walls or fixtures. Following the completion of tile cutting, the tiles must be removed so that the subfloor can be cleaned with a grease-cutting soap. Do not start taping off the project area with painter's tape or laying down plastic sheets to protect the surfaces around the project area until the surface is completely dry.
Lay the groundwork for the new tile in stages.
Thin-set adhesive (or thin-set mortar) is great for setting tiles in humid environments like bathrooms and kitchens, while mastic adhesive (or mastic mortar) is better suited to dry environments. To begin, use a trowel to scoop adhesive out of its container and spread it thinly across a small tiled area, no wider than a few feet. Take it slow and don't try to tile an entire room's floor or backsplash at once. Since the bonding agent's drying time will affect how well each tile adheres, you'll want to set them all before the timer runs out. If you try to cover too much ground at once, you might end up with bare spots. To hasten the drying and adhering processes, score the surface adhesive with the toothed edge of your trowel, making straight lines across the wet surface. The surface adhesive will adhere more strongly if these grooves are present.
Position the tile as you go.
After each tile has been placed over the scored adhesive, it should be pressed firmly into place. After these are in place, tile installation can begin by systematically scoring the area, applying adhesive, and laying tiles.
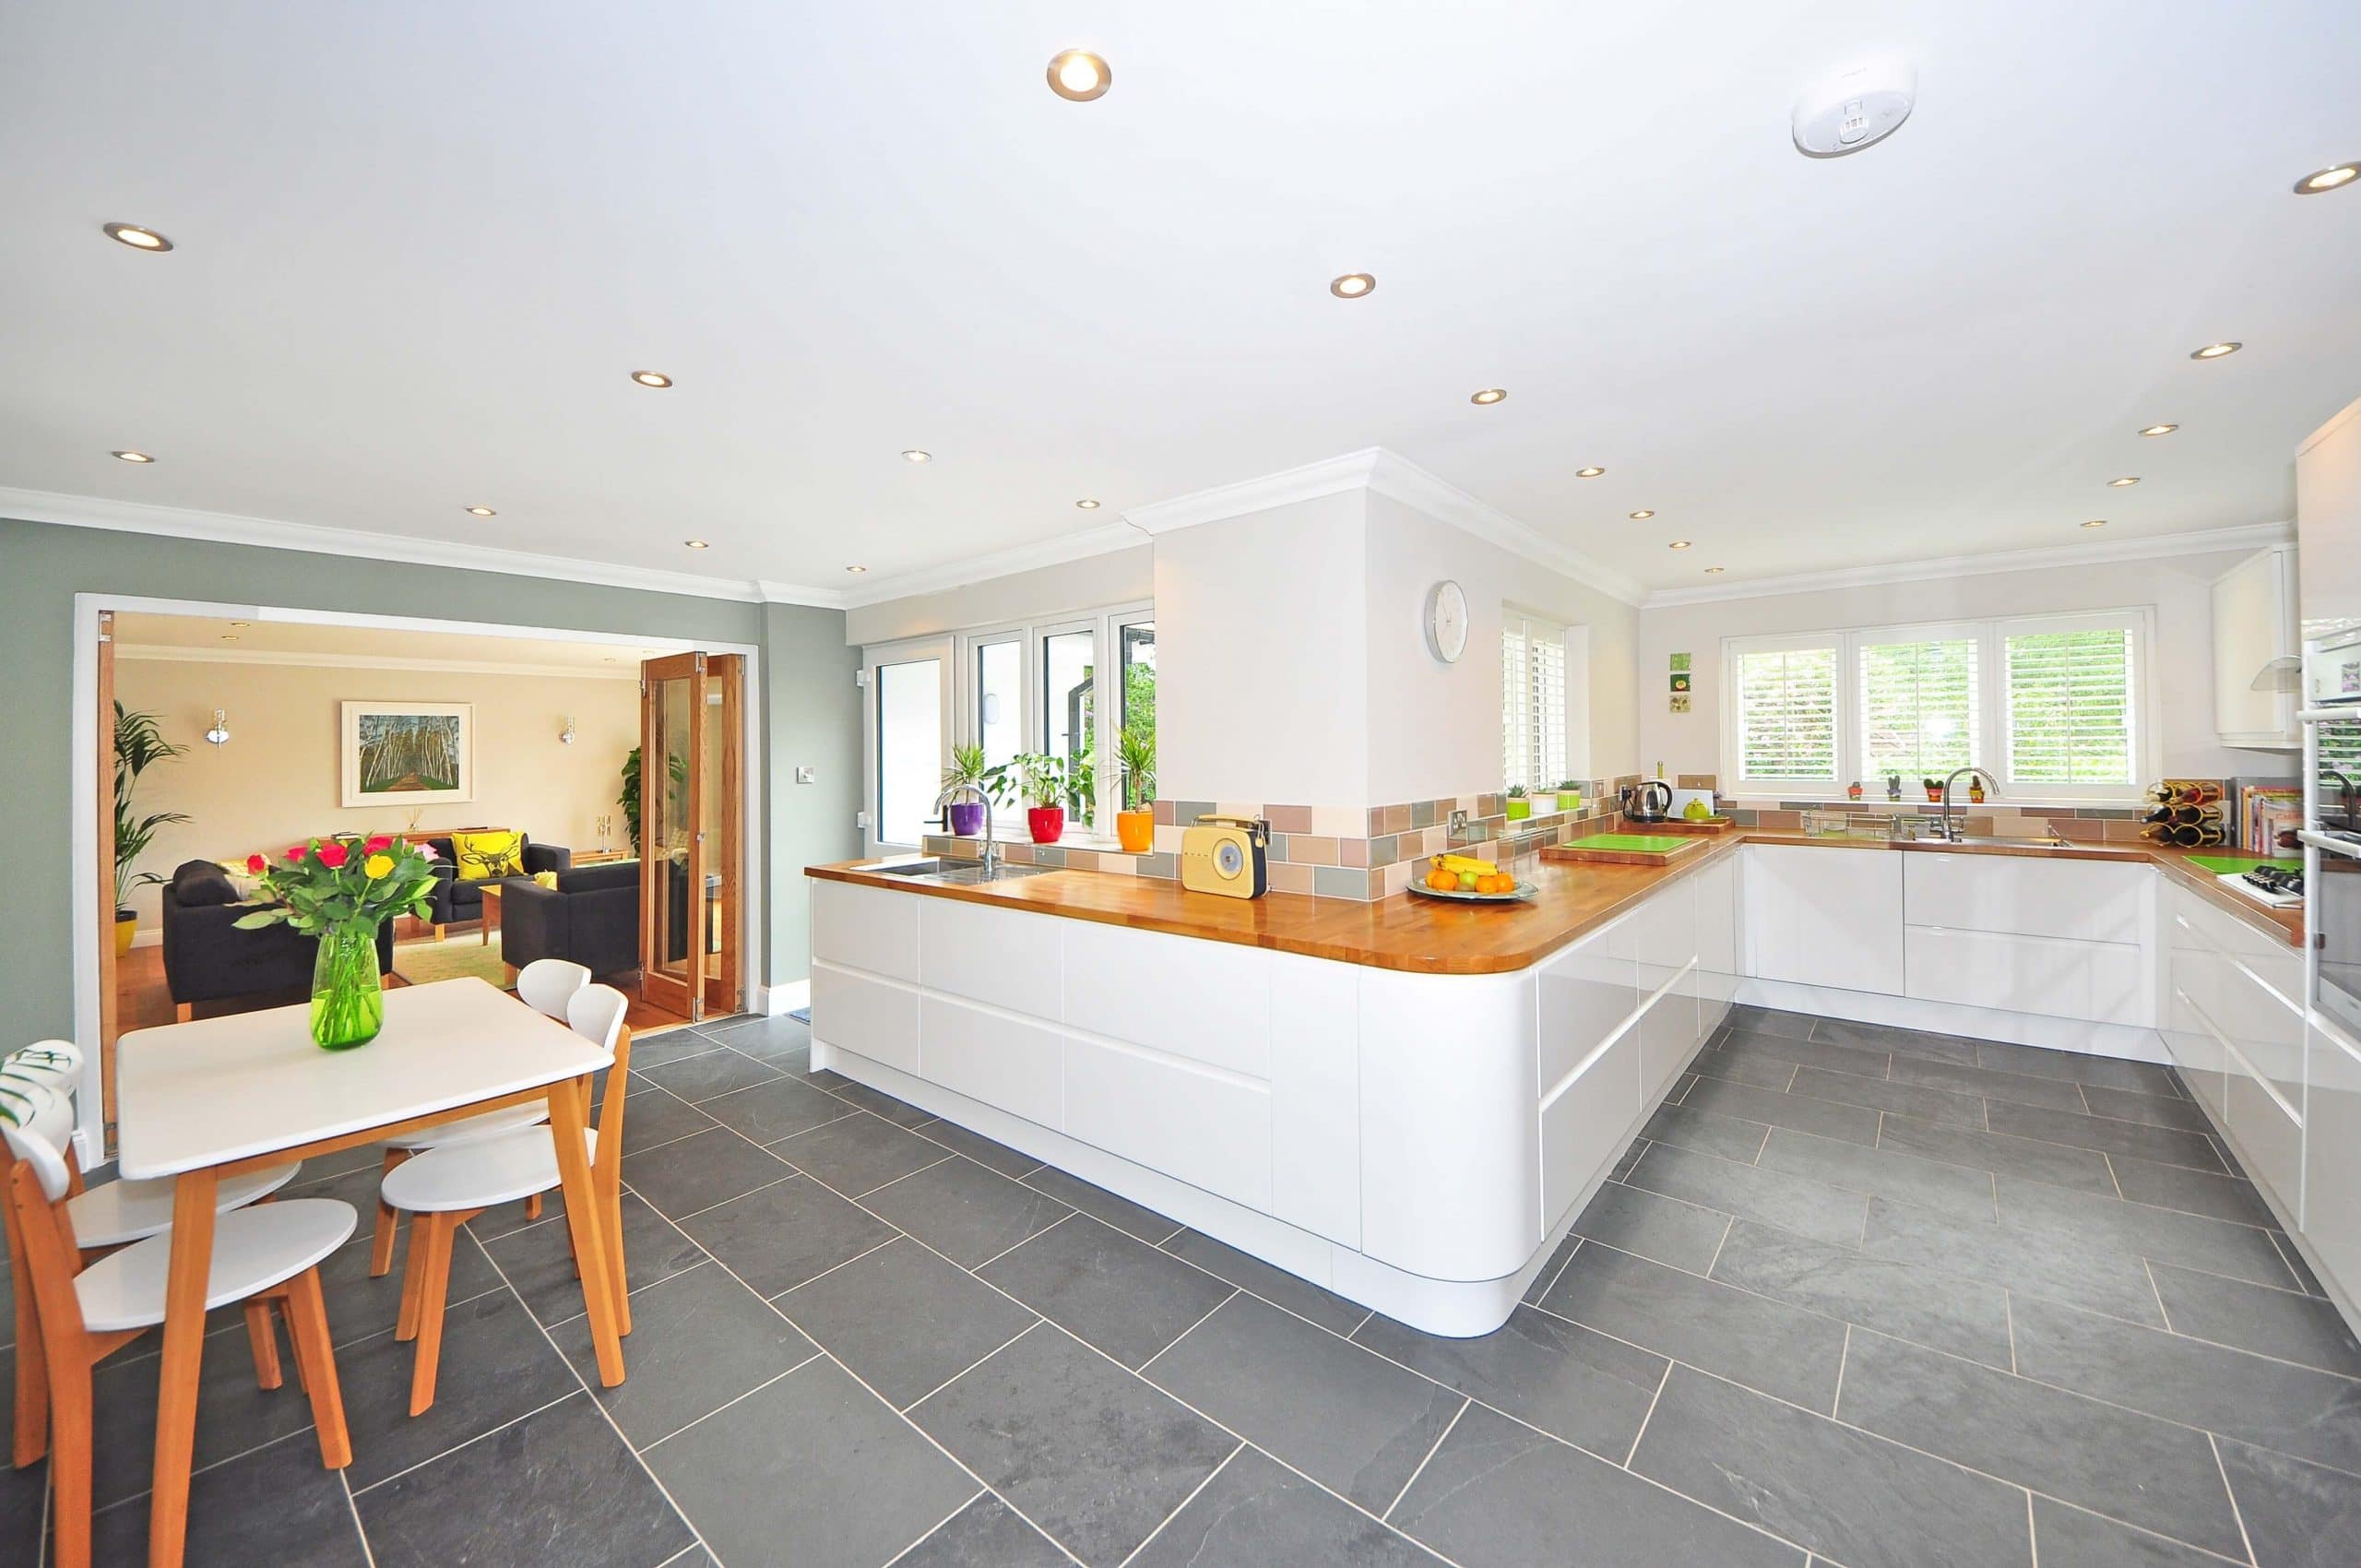
Our extensive range of tiling refurbishments in Melbourne will help you give your home a new feel and look.
Finally, seal off your work.
Even if you used a different kind of adhesive for the tiles in the layer below, you will still need to grout the grooves between the new layer of tiles. The entire surface is protected from water damage or mould growth invisibly caused by moisture seeping into the joints between the tiles thanks to this measure. If you want to get the job done quickly, use pre-mixed grout from the hardware store and spread it in one swift motion. Another option is to mix the grout yourself, in which case you'll need an application tube with a small enough opening to fit into the troughs.
Put simply, tiling over tile is possible on any level, stable surface. No mildew or mould should be present on the surface of the existing tile; the surface should be completely level (including the grout); and there should be no warping or oddly placed tiles that could disrupt the smooth application of a new layer. It is also important to remember that unless the subfloor beneath both sets of tiles is concrete, it is not a good idea to lay heavy new tile over existing tile floors. Because the old tiles might crack under the added weight of the new ones. Problems with the structure can arise if the issue of excess weight is not addressed. You can finally step outside and admire your tile work now that it is complete.
Conclusion
Because of the time and effort required to remove the old tiles before installing the new ones, most people avoid tiling projects. In many cases, it is possible to update a space without tearing out the old tiles and installing new ones. This essentially amounts to laying a new layer of tiles over the old one. Though retiling over previously installed tiles can greatly enhance a space's aesthetic appeal, it is not always the best option. You may not be able to tile over existing tiles if they are damaged, loose, sagging, lifting, uneven, or if they have settled over time.
There is no way to fix the issue by simply replacing the tiles with new ones. It might be a Herculean task to get rid of the current ceramic tiles. The thinset that was used to bed the tiles formed a bond with the tiles themselves. The only reliable way to find out is to consult with a structural engineer and have them inspect the floor joist system. Depending on the thickness of the underlayment, installing a ceramic tile floor over an existing floor can increase the final floor height by 3/8 inch to 1/2 inch.
Depending on the specifics of the installation, the increased thickness may also make it more difficult to precisely instal fixtures and fittings in their respective locations. Overlapping tiles requires special materials made for use on nonstandard substrates. Tiles with a matt finish can be tiled over with any non-slump, flexible adhesive that has a C2S2TE classification and can be installed in accordance with the Australian Standard. To prepare the surface for tiling, a tile-specific primer must be applied. The floor must be primed using a roller and left to dry before the tiles can be installed.
An important part of tiling is sealing the edges and adhering the tiles to the base. Bathroom walls and floors are typically tiled. Wall panels and vinyl flooring are just two examples of the many alternatives available. Finding a suitable replacement for tiles could save you both time and money. Find out what you can get for your money when it comes to bathroom flooring and wall covering options.
If you're handy around the house, tiling might be a project you tackle on your own. Before tiling, the subfloor must be inspected carefully for any flaws that could compromise the floor's integrity later on. When installing tiles in a moist space, such as a bathroom or kitchen, a thin-set adhesive is the best choice. Scoring the surface adhesive with a trowel will speed up the curing and adhering processes. To tile over an existing tile, all you need is a level, stable surface without any mildew or mould. Heavy new tile should not be laid over old tile floors due to the risk of the old tiles cracking under the added weight.
Content Summary
- By tiling over the existing tiles, you can update and modernise the design of any space without the expense and hassle of removing the tiles that are already there.
- If you are updating the tiles on the floor or walls because they are old, damaged, or out of style, it is not a good idea to tile over the tiles that are already there.
- Several situations may prevent you from tiling over existing tiles.
- Old tiles that are loose, sagging, lifting, uneven, or damaged.
- In the event that you decide to remove the existing tiles, you will need to scrape and grind away any hardened thin-set in order to level the underlayment before installing the new tiles.
- Adding a new ceramic floor on top of an existing one will raise the finished floor height by anywhere from 3/8 inch to 1/2 inch, depending on the specifics of the installation.
- It is necessary to take into consideration the condition of the existing tiles in order to ascertain whether or not your floor or wall would benefit from being retiled.
- Your floor is a great candidate for tile replacement if the tiles are in relatively good structural shape and the majority of them are still in tact.
- Your newly installed tiles will require a stable base, regardless of whether you are tiling over existing tiles on a floor or a wall.
- Both from an aesthetic and a functional standpoint, it is essential to keep your tiles in pristine condition at all times.
- Even the development of mould is a possibility!If you find that your tiles are damaged and in need of repair, you should put this task at the top of your to-do list.
- Tiles require a tile-specific primer to be applied to the existing surface before installation.
- The condition of the existing tiles in the bathroom, whether they are on the floor or the walls, should be carefully inspected, as they will form the foundation for your new tiling project.
- Assuming you've already tiled the bathroom's floor and walls, the final step is simply to glue your newly purchased tiles in place.
- However, if you're thinking about the kind of wall and floor coverings you want in your bathroom, you don't have to restrict yourself to tiles at all.
- Wall panelsIf you are looking for an alternative to tiles that is less expensive, then an acrylic wall panel might be the answer you are looking for.
- If you notice either of these issues, you should start the tiling project over instead of covering the existing floor.
- Prepare the surface for installation.
- Lay the groundwork for the new tile in stages.
- To hasten the drying and adhering processes, score the surface adhesive with the toothed edge of your trowel, making straight lines across the wet surface.
- Position the tile as you go.
- Finally, seal off your work.
- Put simply, tiling over tile is possible on any level, stable surface.
- No mildew or mould should be present on the surface of the existing tile; the surface should be completely level (including the grout); and there should be no warping or oddly placed tiles that could disrupt the smooth application of a new layer.
- It is also important to remember that unless the subfloor beneath both sets of tiles is concrete, it is not a good idea to lay heavy new tile over existing tile floors.
Tiles Floor FAQs
A small bathroom can actually benefit from a large tile. With fewer grout lines the walls and floor are less cluttered and the room visually expands.
It's always advisable to start tiling your grid in the centre of the wall, as it's easier to make sure your pattern is symmetrical. It also means any half-tiles you may need can go at the end of each row and will be of matching size.
Should a bathroom be fully tiled? No, it doesn't have to be. Traditionally, tiles are used in wet areas of a bathroom (around the bath and within the shower enclosure) as a means to waterproof walls but there are now alternative materials to add a decorative, waterproofing to bathroom walls.
The bathroom fitters are unanimous—if you're looking for a high quality finish, with a better seal against water damage, then always tile the floor first.
The three toughest tiles are granite, ceramic, and porcelain with porcelain winning hands down as the toughest. However, porcelain can be hard to work with when installing, so it's possible you'll have uneven cuts in some sections.
If your Old Tiles are Loose, Drummy, Lifting, Uneven or Damaged.
If your tiles are broken or have a drummy quality, this indicates that any flooring or wall material that is placed on top of the existing tiles will have the same issues. Covering up these substandard tiles with new tiles won't solve the problem; it will just hide it for a little while longer.
If the Added Height on Top of The Existing Tiles Impedes Access or Does Not Fit.
The height of new tiles placed on top of existing tiles can cause a height issue, which can potentially block doors or cupboards and also result in a significant step up from the exterior or into your wet areas. These problems, however, are amenable to resolution through the trimming of doors and skirting, as well as the creation of falls or ramps into areas of concern.
Because of the moisture, movement, or condition of the existing floor or wall tiles, the adhesive for the new tiles might not stick to the existing tiles as well as concrete bedding does. This could be the case.
Old Tile Removal
To remove the existing ceramic tiles may prove to be a Herculean task, depending on how well the flooring was installed by the initial flooring contractor. The thinset that was used to bed the tiles formed a bond not only with the tiles themselves but also with the underlayment. In the event that the thickened thin-set cannot be removed from the underlayment using a scraper, the underlayment itself will need to be replaced. To accomplish this, you must first saw through the grout joints and then the underlayment before prying both of them up together. The only way to determine whether the thin-set or the mortar is tenaciously bonded is to chisel away the grout that is surrounding a single tile and then break it out. If the thinset that was used underneath is still adhered to the underlayment, it might be easier to simply use thinset to fill in the space left by the removed tile, and then instal the new tile directly on top of the old tile.
Floor Prep
In order to prepare the floor for tiling over old tiles, the high spots on the existing floor must first be ground down, loose tiles must be removed, and any voids must be filled with thin-set or floor-leveling compound. If there are a significant number of tiles that are missing or loose on the floor, it is probably best to remove the old tiles because the weak bond that exists underneath them may cause the new tile floor to be less stable. In the event that you decide to remove the existing tiles, you will need to scrape and grind away any hardened thin-set in order to level the underlayment before installing the new tiles.
Weight Factor
Because ceramic tile floors are so dense and heavy, installing two layers of them will place additional strain on the subfloor and the structure that supports it. It may not make a significant difference if the area in question is quite compact, such as a bathroom. However, if it is a large floor, such as those found in expansive great rooms, the additional weight might be a problem. Consultation with a structural engineer is the only way to know for certain, as they are the only ones who can examine the floor joist system to determine whether or not it will safely support the additional weight.
Floor Height
Adding a new ceramic floor on top of an existing one will raise the finished floor height by anywhere from 3/8 inch to 1/2 inch, depending on the specifics of the installation. Even though this might not seem like a significant change, it could affect how easily doors open and close, which would necessitate some door planning. If the new floor is installed next to an existing floor that is lower than the new floor, then a discrepancy of half an inch could also create a tripping hazard.
Can I tile over old tiles?
The response to this is quite straightforward: yes, but why would you want to? When new tiles are laid on top of existing tiles, any issues that existed with the original tiles, such as becoming loose, will continue to be a problem with the new layer. In the same vein, the additional thickness may also make it more challenging to accurately instal fixtures and fittings in their respective locations. People are often concerned about removing plaster from the wall when they are removing old tiles, but re-skimming the plaster as a preparation for the new layer is an essential part of producing a quality finish.
It is necessary to take into consideration the condition of the existing tiles in order to ascertain whether or not your floor or wall would benefit from being retiled. Have they deteriorated to a significant degree over time, or are they still in a relatively good state? Your floor is a great candidate for tile replacement if the tiles are in relatively good structural shape and the majority of them are still in tact.
On the other hand, if the majority of your tiles are damaged in some way, whether they are chipped, broken, cracked, or loose, you need to remove all of them. Although it may appear counterintuitive to bother worrying about the old tiles when the objective is to replace them, the old layer is essential to the structural integrity of the project.
Your newly installed tiles will require a stable base, regardless of whether you are tiling over existing tiles on a floor or a wall. If the old tiles are in poor condition, the new tiles will not adhere properly to the surface. When applied to a floor, this could result in both layers of tiles on the floor coming loose. If there are numerous chips and cracks in the top layer of tiles, then the top layer of tiles may even become more fragile over time as a result of the pressure caused by daily foot traffic.
Why Should You Retile?
You shouldn't avoid the retiling process even though it might seem like an overwhelming process to you. Both from an aesthetic and a functional standpoint, it is essential to keep your tiles in pristine condition at all times. Broken, chipped, or lifted tiles will not only be unsightly if you do not take care of them, but they could also lead to additional damage in the future if you do not address the problem.
For instance, if you don't pay attention to the condition of the floor or the walls in the bathroom, water damage could easily occur. Broken tiles or tiles that are literally lifting off your floors or walls create the ideal conditions for water to penetrate your home and cause damage. There is a good chance that moisture and steam from your shower will seep behind these tiles. When something like this takes place, moisture will continue to accumulate, posing a risk to the plaster and dry lining that can be found behind the tile. Even the development of mould is a possibility!
If you find that your tiles are damaged and in need of repair, you should put this task at the top of your to-do list.
Check out our range of tiling renovations Melbourne at Hitch Property Constructions.
Before you start
Materials Required
When tiling over existing tiles, you will need to use unique materials that have been developed specifically for use on nontraditional surfaces.
If you are going to be tiling over tiles that have a matt finish, then the adhesive that you should use is any non-slump, flexible tile adhesive that has a C2S2TE classification and that can be installed in accordance with the Australian Standard.
In the event that you will be tiling over tiles that already exist and have a glossy finish, then the method will be slightly altered. Before you can instal the tiles, you will need to prime the existing surface of the tiles with a tile-specific primer. This primer must be rolled onto the floor using a roller, and it must be allowed to dry completely before you can instal the tiles. After the primer has had enough time to dry, the next step is to apply a rubber-based modified adhesive.
Inspection
Because they will serve as the basis for your new tiling project, it is essential that you thoroughly examine the condition of any existing tiles that are located in the bathroom, including those that are located on the floor or the walls. Any job that involves tiling needs to have a proper seal applied and a bond formed with the base. If your current bathroom tiles are properly installed, there are no hollow gaps underneath them, and there are no issues with humidity, then it should be fine to lay the new bathroom tiles.
To inspect and prepare the surface properly, you can check for cavities in the existing tiles by gently tapping on them with a rubber or wooden hammer to search for hollow sounds. These spaces, also known as cavities, are typically brought on by a deficiency in adhesive that exists between the existing tiles and the subflooring; however, movement in the surface may also be to blame.
Preparation
Make sure that the tiles on the floor and the walls are levelled. Any areas that are elevated should be ground down with a right angle grinder that has a masonry wheel attached to it.
Sand all of the tiles using a belt or orbital sander to remove any surface glazes that might have been applied. This will create a surface that is rougher and more porous, which will assist the adhesive in bonding to the tiles that are already there.
To get rid of any grime, dirt, sealers, or wax that may be on the tiles, vacuum them and clean them with some detergent and water. Clear water should be used to rinse the surface of the old tiles, and then they should be allowed to dry.
Installation
After you have finished preparing the floor, all that is left for you to do is to glue your newly purchased tiles to the already installed tiles on the floor and walls of your bathroom. Tiliers typically advise using a glue made of rubber for projects like this one. This will allow for greater flexibility in the event that the ground or any existing tiles shift slightly over the course of the year.
Alternatives to tiling
Tiles are a common option for the walls and floors of bathrooms, and for good reason: Not only are they long-lasting, but they are also simple to clean, and they are available in a wide variety of colours, sizes, textures, and shapes to perfectly complement your décor.
However, if you're thinking about the kind of wall and floor coverings you want in your bathroom, you don't have to restrict yourself to tiles at all. There are plenty of other options.
Wall panels
If you are looking for an alternative to tiles that is less expensive, then an acrylic wall panel might be the answer you are looking for.
Wall panels can be quickly and easily cut to size, and they can be installed in one go. Wall panels are designed to fit over tiles or almost any other existing wall covering. Because of this, you won't need as much time to tile because you won't have to deal with the challenges of grouting.
Shower wall panels
Wall panels, which come in a variety of colours and patterns and provide a finish that is almost seamless and is simple to clean, are available. In addition, because there is no grout between the tiles, there is no place for mould to grow.
Check out these different price points:
- Wall panels made of acrylic by Orchard Bathrooms
- Wall panels made of zeolite acrylic
- Acrylic wall coverings composed of multiple panels
Vinyl flooring
When laid on bathroom floors, tiles not only look great but also provide a sturdy surface that can easily withstand the wear and tear that comes with being in a frequently used bathroom. The only drawback is the amount of time required to properly align and grout your tiles in order to achieve a professional appearance.
Vinyl flooring is an interesting alternative that could save you both time and money. It is also an attractive option.
When you think of vinyl flooring, you might picture something similar to linoleum, but Krono Xonic vinyl flooring is nothing like that at all. They have a stunning range of wood effect finishes, making them look every bit as elegant and beautiful as a hardwood floor would, but the best part is that you won't need a professional to instal them. Simply laying each plank down and clipping them together eliminates the need for grout or adhesives, which can be messy.
Doing your tiling
When it comes to anything having to do with your bathroom, we would always and unequivocally advise you to work with a fully qualified and experienced professional. Nevertheless, tiling is a job that you might want to attempt on your own if you are skilled in the art of do-it-yourself projects.
Solved! Yes, You Can Tile Over Tile
Assess the existing tile.
Before you begin tiling over tile, you should conduct an in-depth inspection of the base layer to identify any surface irregularities that may lead to foundational issues in the future. Mold and a deep discoloration in the grout are often indicators of an absorption problem. This means that water that has been trapped has damaged the grout, which could lead to the new tile rotting from below. When the tiles are covered up, an absorption problem will continue to fester and become worse. In a similar vein, if the initial tiles were not correctly installed, the new tiles that are being installed on top of them won't lie flat or line up properly. In the event that you find either of these problems, it is best to begin the tiling project from the beginning rather than tile over the floor that is already there.
Prepare the surface for installation.
Before you begin your tiling project, make sure the surface is level by smoothing out any globs of dried grout with a sander and adhering any loose tiles with new tile adhesive. The results of your project will be less than stellar if you tile over an uneven surface. The next step is to lay out your new tiles and cut them to size around any walls or fixtures that they will need to fit around. After you have cut each piece of tile to the appropriate size, you will need to move it out of the way so that you can use a soap designed to remove grease to clean the base layer. Wait until the surface is totally dry before beginning to tape off the edges of the project area with painter's tape and lay out plastic sheets to protect the surfaces around the project area.
Lay the groundwork for the new tile in stages.
In a general sense, thin-set adhesive, which is also known as thin-set mortar, is excellent for setting tiles in areas that are prone to moisture, such as bathrooms, whereas mastic adhesive is ideal for use in areas that are more dry, such as kitchens. To begin, remove the adhesive of choice from its bucket using a trowel, and apply it in a layer that is only a few millimetres thick to a section of tiles that is only a few feet wide. Do not try to cover an entire floor or backsplash at once. Because the curing times may vary, you will want to set each tile before the bonding agent is too dry to do its job. Attempting to cover a large area at once may result in uneven coverage. To speed up the drying and adhesion process, score the surface adhesive with the toothed edge of your trowel by drawing straight lines along the wet surface. These grooves will help the surface adhesive stick better.
Position the tile as you go.
Place each tile over the scored adhesive, and then firmly press it into position to secure it in place. After these have been set up, you can proceed to tile installation by alternating between scoring, spreading adhesive, and laying tile until the area has been completely covered.
To assist you in developing a fresh look for your home, we offer a comprehensive selection of tiling renovations in Melbourne from which you can choose.
Finally, seal off your work.
You will need to apply grout in the grooves between the new layer of tiles, and it doesn't matter what kind of adhesive you used for the layer of tiles that came before the new one. This step safeguards the entirety of the surface against the possibility of moisture seeping into the joints between the tiles, which could result in water damage or the covert growth of mildew. Utilize pre-mixed grout purchased from a hardware store, and apply it in a single swift pass for the sake of maximising your efficiency. You also have the option of mixing the grout on your own, in which case you will need an application tube that has a hole that is narrow enough to fit into the troughs you are filling.
To summarise, you can tile over tile as long as you're working on a surface that is relatively stable. There should be no mould or mildew on the surface of the existing tile, it should be completely level (including the grout), and there should not be any warping or strangely placed tiles that could otherwise interfere with a smooth new layer. Also, keep in mind that it is best not to lay heavy new tile over existing tile floors unless the foundation beneath both sets of tiles is concrete. This is because the weight of the new tile could damage the existing tile floors. If this is not addressed, excess weight can lead to structural problems. Now that you've finished installing your tile surface, you can go out and enjoy it!