
Grout is a popular substance used in the installation of tiles, and its major function is to maintain a consistent visual gap size between tiles. Grout is used to attain this goal.
Wear and tear on this material makes it likely that it will need some sort of repair to be restored to its former condition.
If you run into the problem of cracked grout, there are some easy solutions you can try on your own.
The beautiful beauty of your backsplash, floors, and feature walls may be restored with just a few basic tools and a few minutes of training on how to repair damaged grout.
Are you interested in regrouting services in Melbourne for your property maintenance needs? No need to look any further! You have nothing to worry about when you use Hitch Property Constructions.
Grout that is breaking away around otherwise perfect tiles is one of the few things more unpleasant to look at. Perhaps only this or a few other items are equally horrifying to the eye.
If you're not afraid to get your hands dirty and put in some work, this is the kind of job you can tackle on your own. Having to call someone else to come and fix it for you is the only thing that could make the situation more intolerable. Given that, how is it possible?
Prior to moving on to the next step, check that you have selected appropriate supplies. Choose from unsanded grout, sanded grout, acrylic grout, and epoxy grout before beginning.
To sum up, if the space between your tiles is more than 1/8 inch wide (save for glass, metal, or marble tiles), you should use sanded grout, and if it's less than 1/8 inch wide, you should use unsanded grout. Tiles composed of marble, glass, or metal should not have sanded grout applied to them. Marble, glass, and metal tiles should not have sanded grout applied to them. As a means of zeroing in on the one variety that is most suited to your requirements.
Home Repair FAQs
To begin, transfer a solution consisting of water and vinegar at a ratio of 1 to 1 into a spray bottle. Next, spray the solution all over the area, paying particular attention to the grout and any trouble areas. After allowing it to sit for five minutes, scrub the area using a grout brush or an old toothbrush in a circular motion.
Mixing baking soda and one part water will effectively remove everyday grime and debris. A mixture of two parts baking soda and one part vinegar can be used to clean stained or discoloured grout.
In addition, if you have gritty or brittle tiles, you should combine baking soda and hydrogen peroxide in a ratio of two baking soda to one part peroxide.
Baking soda, hydrogen peroxide, and dish soap are the ingredients typically combined to make the most efficient DIY grout cleaner. The greatest solution for whitening teeth using only natural ingredients is cream of tartar and lemon juice. It's best to steer clear of very acidic liquids like vinegar, which can eat away at grout over time.
Vinegar should not be used to clean grout that has not been sealed, grout that has to be resealed, or grout that is in bad condition. This is because vinegar can work its way into the grout's pores, further reducing the strength of the material. In addition, the state of the grout will deteriorate over time due to vinegar's ability to etch or otherwise wear it away.
Applying a small amount of white toothpaste that does not contain gel to tile grout can help eliminate dirt and grime from the grout. Next, use a toothbrush to scrub the area. After you are finished, rinse a cloth with liquid dish soap and water, and then use the cloth to wipe down the surface.
Crack Repair With Grout

Cleaning up the damaged grout and applying a new coat of grout will result in a uniform and polished look. Grout deteriorates with time due to wear and tear since it is porous.
Grout can be used to fill in cracks, restoring its once-glory look, and spot repairs can be made as needed.
Using fresh grout to replace old, cracked grout requires the following measures to ensure success:
Use a knife, a screwdriver, a bamboo skewer, or anything else you choose to gently drag along the grout line. If there is broken or fractured grout, this will loosen it. The use of a vacuum with a hose attachment might help you get rid of any loose grout.
Mix the new grout and water in a small container. A bowl or a cup will do just nicely. To ensure a successful outcome, read and follow all product instructions before starting to mix.
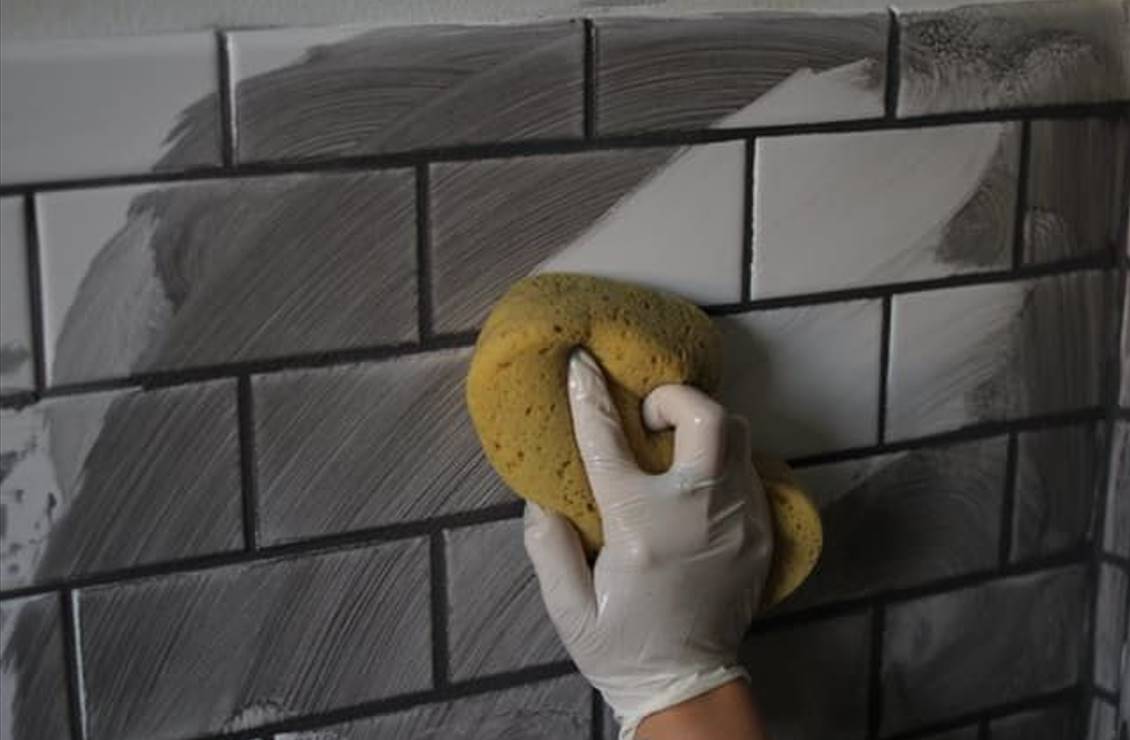
Carefully fill in the lines in the old grout with the fresh grout. Using a grout float, make sure the application is uniform. Drag the float slowly in a variety of ways across the grout lines to clean it. If you do this, the new grout will be packed into the crevices without the formation of air bubbles.
If there is any excess grout on the tiles, scrape it off using the edge of the grout float.
Please give the new grout a few minutes to settle. To clean your tiles, dampen a sponge with tap water and allow it to dry halfway. To remove a cloudy buildup from the tiles, simply rub them with a dry rag or microfiber cloth.
Use A Grout Saw To Remove Damaged Grout And Reapply It
If you opt to fully remove the old, ruined grout prior to applying the new grout, you will achieve the best possible results with this procedure. It's important to use a specialised grout saw to remove the damaged grout without damaging the tiles themselves.
Always proceed with extreme caution and gentleness when using the saw. If at all possible, steer clear of cutting into the tile itself and instead aim the saw at the grout lines.
Use smooth, steady motions and plunge the saw right into the grout to chip away at the old mortar. Wearing protective eyewear will add an extra layer of safety.
Use a grout cleaner made specifically for grout to get rid of any leftover dirt once the old grout has been entirely cleaned. To clean grout at home, simply combine vinegar and water in the right ratios.
Tiles can be easily scratched by using abrasive cleaners, therefore avoid using them. After the grout has been cleaned, it must be rinsed thoroughly with clean water.
It is possible to remove any surplus moisture by using a towel or some paper towels. Keep in mind that the grout needs a small amount of moisture in order to hold together and cure correctly, so don't let it dry out completely.
When you're ready to apply new grout, simply repeat the procedures described above. Keep in mind that you'll need more grout than if you were simply filling in existing cracks. If you don't want to introduce too much water into the grout, wring off the sponge often while you clean it.
To ensure the grout cures properly after application, it's important to let it dry for the full amount of time specified by the manufacturer. At Hitch Property Constructions, we offer a wide range of home renovations.
If you want the appearance of your grout to be pristine for a long time, you should seal it. Once the grout has completed setting, you may begin applying the sealer and let it dry.
The sealer will prevent further deterioration to the grout and prevent the grout from soaking up stains and debris.
Your tiles may have a haze on them once you seal them. They only need to be buffed with a soft cloth to eliminate the haze. Grout should be resealed at least every six months for the greatest effects.
Removing And Replacing Grout From Tile
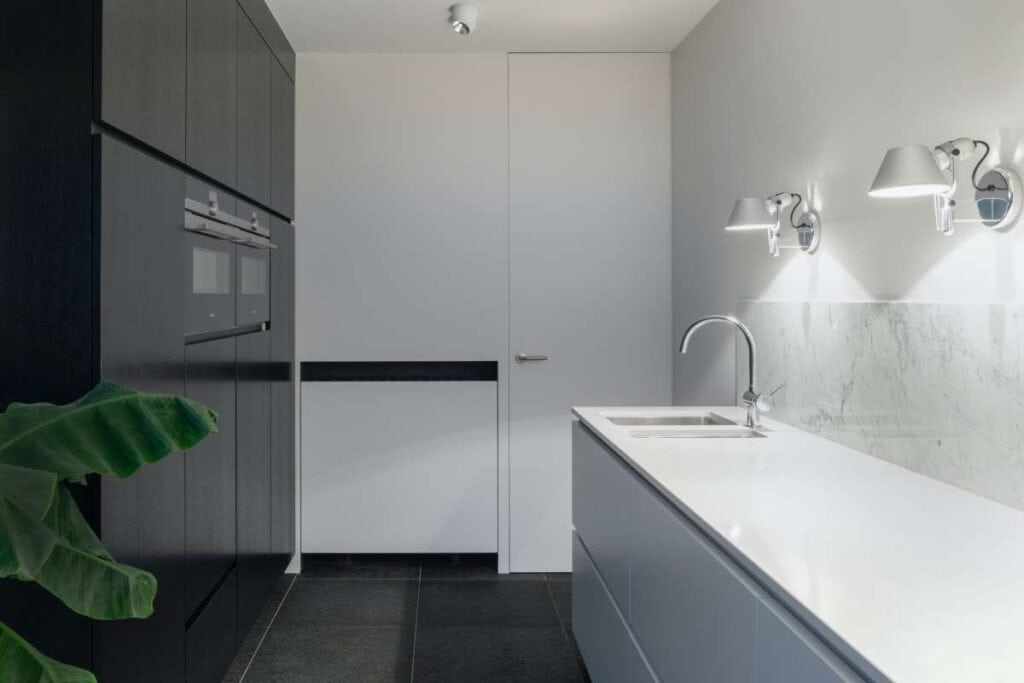
Tiles are a fantastic material for wet and humid environments, such as the bathroom and the kitchen because they are durable, easy to clean, and adaptable.
Grout is often what makes a side look less than its best, even though the tiles themselves take little upkeep or care to keep them looking fantastic for years.
Tiles can get stained, mouldy, and discoloured if they have grout, a paste-like substance used to cover the spaces between them.
The warm, damp conditions of a bathroom are ideal for this. It is not necessary to start over completely if the grout is dirty and broken; in fact, it is a quick and easy job that can be done without removing any tiles from the wall.
Can It Be Salvaged?
Before you decide that your current grout must be replaced, think about whether it may be salvaged by using some clever cleaning products and putting in a little bit of extra effort.
One of the most prevalent causes of dirty and ugly grout is the growth of black mould and mildew, which may be removed by spraying a specialised mould and mildew spray all over the tiles and waiting for it to work its magic overnight.
Another option is to use a cleaning solution for cloth diapers that contains bleach or vinegar mixed with baking soda. Attempt using one of the commercially available "grout revivers" if the grout still seems dirty after cleaning.
You may revitalise your grout by simply painting on one of these treatments over the old one. You may be left with no choice but to replace the grout if you've exhausted all other possibilities and are still dissatisfied with the results.
Getting Rid Of The Old Grout
It is recommended that you use a drill or a small multi-tool with a revolving blade to scrape up the old grout from between your tiles.
A grout saw is an alternative method. When using an electric drill to scrape away excess grout, be sure to keep the blade attachment well away from the tiles themselves.
Wear safety eyewear to prevent grout fragments from scratching your corneas.
When the power tools have been used up to their full potential, the residual grout can be chipped away with a screwdriver, or a Stanley-type knife fitted with a blunt blade.
Vacuuming the entire bathroom floor is the last step in getting rid of the mess you produced. This will tidy up your work area and get rid of any lingering dust or debris.
Selecting A New Grout
There are many different kinds of tile grout, including those designed for use on the floor, those designed for use on the wall, coloured grouts, ready mixed grout, and grout that you have to mix yourself. Look for an antibacterial and antifungal grout if you're experiencing mould growth in your grout and need to replace it.
Ready-mixed grout is far more user-friendly than the kind that needs to be made on the spot. To achieve the desired look, think about the grout's colour alongside the tile's hue while making your selection. Pick a good colour that stands out against the tiles for a more eye-catching display.
Applying The Grout
You'll need a rectangular instrument called a grout float to spread the grout on the wall, a trowel to mix the grout and apply it in smaller sections, and a scraper to get rid of any extra grout.
All of these kinds of tools may be found in large home improvement stores. After fully mixing the grout, you should push it into the tile joints with a grout float. You can be careless as you use the edge of the float to remove extra grout because the tiles can be cleaned once the grout has dried.
Carefully continue until all the tiles on the wall are grouted, at which point you can wipe away any excess with a sponge dipped in water.
How To Repair Cracked Grout Fast: A Simple Step-By-Step Guide
Step 1: Select The Appropriate Multi-Tool Blade To Remove Your Cracked Grout.
It looks like a blade made for cutting grout out of tiles will be necessary. Thanks to your advice, we were able to save another blade from being dulled when re-tiling the fireplace.
This blade was spherical, rougher than the rest, and helped to grind into the grout at an angle rather than straight down (where you run the danger of breaking or lifting a tile).
It's a great bonus that this multi-tool also has a flashlight embedded in it. These multitools are, in all seriousness, the Do-It-version Yourselfers of the Swiss army knife. They have everything imaginable in order to accomplish any repair, no matter how unusual.
Step 2: Between Tiles, Grind Down Broken Grout
Removing the cracked and crumbling grout will necessitate grinding it down until it is reduced enough to remove all of the shards.
While it's running, lean your multitool to the side and begin slitting in the thickest groove. First, use your blade to make a cut down each side of the adjacent tiles, and then use it to hone down the grout.
Moving from side to side and downward, you'll need to grind out a little valley within the grout as you make your way along the length of the tiles.
Keep chipping away at the fractured areas of grout until only the smallest fragments remain. Though it's not required, you can leave some grout in the spaces between tiles to help the new grout stick.
Additionally, the roughness of the old grout between the tiles should be minimised as much as feasible. If the edges are uneven or jagged, the new grout will have a harder time filling all of the cracks and setting. Check out our range of tiling renovations in Melbourne at Hitch Property Constructions.
Step 3: Repeat Grinding After Removing Old Grout
You should stop grinding down the tile grout for a moment so that you may clean up the shards and dust with a vacuum or a small dust buster.
This will show you how far into the old grout you have gotten and how much more you need to grind it down.
Photographs taken at the outset show that our tile grout was cracked, and photos taken after we finished grinding reveal that we needed to remove more grout than simply the shattered bits.
This is due to the fact that, in most instances, the damage to the grout goes beyond the original break. This means you shouldn't stop polishing it until the surface is completely flawless and there are no visible cracks smaller than a hairline.
Step 4: Set Up The New Tile Grout
Before applying fresh tile grout, you must clean the surface thoroughly. It's essential that you do this. It should be sufficient to simply run the vacuum cleaner over the grout lines once more and clean the tiles with a damp, soft tile cleaning sponge before installing the new grout.
There is a vast variety of grouts to pick from, but we went with the one we had on hand because it was already mixed and sanded.
Pre-mixed versions are preferable for quirky and often difficult repair jobs like this one, albeit being a bit more expensive.
Also, you can save the hassle of measuring and mixing a very small amount to get the right consistency. What's more, it's easy to reuse; just put the cap back on after you're done.
Step 5: Use The New Tile Grout
The end is in sight. Grout can be applied to the spaces between tiles by scooping a tiny bit onto the edge of the tile float and spreading it throughout the spaces.
Make sure you use a lot of grout and fill all of the empty spaces between the tiles. In case you're worried about not having enough grout or having too much of it, it's better to have too much than too little.
Wiping away the extra grout is a certain technique to get rid of it. You need to pack it down tightly into the gaps between the tiles so that it bonds to the existing grout and seals the joints.
You could be wondering why our new grout doesn't look like the old grout or how big of a deal it is.
As part of the cost-effective bathroom makeover we're undertaking, we want to clean and afterwards paint over the grout. It used to upset me a lot more than it does now that the colours don't match.
Step 6: Wash The Tile Surface And Let The Grout Set
Your final task is to clean your tile of any excess grout that may have formed since you last grouted.
Tiles should be cleaned with a damp, clean tile sponge, but the fresh grout lines should be treated with care by being gently glidden over rather than scrubbed. You may need to rinse and repeat this process multiple times before the tile surface is clean.
That's all there is to it! Your new grout will need time to set before you can do anything else, but other than that, you'll be good to go.
Step 7: Have Fun With Your Hard Work
Repairing everything took us only twenty minutes. As a whole, it was much easier than we had imagined.
Save this easy-to-follow instructions to repairing grout on Pinterest and see the dramatic improvement in the look of our tiled floor that resulted from painting the grout.
Conclusion
Tile projects use grout to maintain regular tile spacing. Unfortunately, due to typical wear and tear, porous grout deteriorates. Removing and restoring broken grout creates a uniform, glossy look. Before mixing grout, follow the manufacturer's instructions. A grout saw safely removes old grout.
Tiles are low maintenance, but grout can make a side seem bad. Resealing grout every six months is best. Hitch Property Constructions offers many house services. Grout saws can remove excess grout between tiles. Bleach and baking soda clean cloth diapers.
Replace mouldy grout with antimicrobial/antifungal grout. Cleaning broken grout. Grating grout until it's manageable removes shattered fragments. Leave some of the old grout before applying the new grout. You can buy pre-mixed and sanded grout or measure your own. Filling tile gaps requires lots of grout.
Content Summary
- If you run into the problem of cracked grout, you can try some easy solutions on your own.
- The beautiful beauty of your backsplash, floors, and feature walls may be restored with just a few basic tools and a few minutes of training on how to repair damaged grout.
- Before moving on to the next step, check that you have selected the appropriate supplies.
- To sum up, if the space between your tiles is more than 1/8 inch wide (save for glass, metal, or marble tiles), you should use sanded grout, and if it's less than 1/8 inch wide, you should use unsanded grout.
- As a means of zeroing in on the one variety most suited to your requirements, cleaning up the damaged grout and applying a new coat of grout will result in a uniform and polished look.
- Mix the new grout and water in a small container.
- Carefully fill in the lines in the old grout with the fresh grout.
- Drag the float slowly in various ways across the grout lines to clean it.
- If there is any excess grout on the tiles, scrape it off using the edge of the grout float.
- Please give the new grout a few minutes to settle.
- To clean your tiles, dampen a sponge with tap water and allow it to dry halfway.
- Using a specialised grout saw is important to remove the damaged grout without damaging the tiles themselves.
- Use a grout cleaner made specifically for grout to eliminate any leftover dirt once the old grout has been entirely cleaned.
- Tiles can be easily scratched by using abrasive cleaners; therefore, avoid using them.
- Remember that the grout needs a small amount of moisture to hold together and cure correctly, so don't let it dry out completely.
- When ready to apply new grout, repeat the procedures described above.
- To ensure the grout cures properly after application, it's important to let it dry for the full amount of time specified by the manufacturer.
- If you want the appearance of your grout to be pristine for a long time, you should seal it.
- Once the grout is set, apply the sealer and let it dry.
- The sealer will prevent further deterioration of the grout and prevent the grout from soaking up stains and debris.
- Your tiles may have a haze on them once you seal them.
- Before you decide that your current grout must be replaced, consider whether it may be salvaged by using innovative cleaning products and putting in a little extra effort.
- One of the most prevalent causes of dirty and ugly grout is the growth of black mould and mildew, which may be removed by spraying a specialised mould and mildew spray all over the tiles and waiting for it to work its magic overnight.
- Using a drill or a small multi-tool with a revolving blade would be best to scrape up the old grout between your tiles.
- A grout saw is an alternative method.
- Vacuuming the entire bathroom floor is the last step in removing the mess you produce.
- There are many different kinds of tile grout, including those designed for use on the floor, those designed for use on the wall, coloured grouts, ready-mixed grout, and grout that you have to mix yourself.
- You'll need a rectangular instrument called a grout float to spread the grout on the wall, a trowel to mix the grout and apply it in smaller sections, and a scraper to eliminate any extra grout.
- All of these kinds of tools may be found in large home improvement stores.
- You can be careless as you use the edge of the float to remove extra grout because the tiles can be cleaned once the grout has dried.
- Carefully continue until all the tiles on the wall are grouted, at which point you can wipe away any excess with a sponge dipped in water.
- It looks like a blade made for cutting grout out of tiles will be necessary.
- Removing the cracked and crumbling grout will necessitate grinding it down until it is reduced enough to remove all the shards.
- While it's running, lean your multitool to the side and begin slitting in the thickest groove.
- First, use your blade to make a cut down each side of the adjacent tiles, and then use it to hone down the grout.
- Moving from side to side and downward, you'll need to grind out a little valley within the grout as you make your way along the length of the tiles.
- Keep chipping away at the fractured grout areas until only the smallest fragments remain.
- Though it's not required, you can leave some grout in the spaces between tiles to help the new grout stick.
- Additionally, the roughness of the old grout between the tiles should be minimised as much as feasible.
- It would be best if you stopped grinding down the tile grout for a moment so that you may clean up the shards and dust with a vacuum or a small dust buster.
- Photographs taken at the outset show that our tile grout was cracked, and photos were taken after we finished grinding reveal that we needed to remove more grout than simply the shattered bits.
- This is because, in most instances, the damage to the grout goes beyond the original break.
- It should be sufficient to run the vacuum cleaner over the grout lines and clean the tiles with a damp, soft tile-cleaning sponge before installing the new grout.
- Grout can be applied to the spaces between tiles by scooping a tiny bit onto the edge of the tile float and spreading it throughout the spaces.
- Make sure you use a lot of grout and fill the empty spaces between the tiles.
- If you're worried about not having enough grout or too much of it, it's better to have too little than too little.
- Wiping away the extra grout is a certain technique to get rid of it.
- You could wonder why our new grout doesn't look like the old grout or how big of a deal it is.
- As part of the cost-effective bathroom makeover we're undertaking, We want to clean and paint over the grout afterwards.
- Your final task is to clean your tile of any excess grout that may have formed since you last grouted.
- You may need to rinse and repeat this process multiple times before cleaning the tile surface.
- Your new grout will need time to set before you can do anything else, but other than that, you'll be good to go.
- Save these easy-to-follow instructions for repairing grout on Pinterest, and see the dramatic improvement in the look of our tiled floor that resulted from painting the grout.