
Grout is a common tile-related material, and its major purpose is to keep the joints between tiles looking smooth. Wear and tear on this material is inevitable over time, and it will almost certainly require repair to go back to its original state.
If your grout has become ruined, there are a few simple solutions you can try on your own. With the right equipment and a little bit of practice, you can rapidly fix damaged grout and restore the beautiful appearance of your floors, backsplash, and accent walls. You may also accomplish this in far less time.
Each and every tiled area in your house was also grouted, and you may want to think about having it renewed in the not-too-distant future. Grout is a crucial part of every tile installation as it protects the tiles' edges and stops water from seeping through to the substrate.
Unfortunately, there are numerous issues that might arise throughout the grout installation procedure. Incorrect grout consistency of grout that dries too rapidly are two common grout faults that must be addressed immediately to ensure a long-lasting installation. We have a wide range of property Melbourne regrouting services at Hitch Property Constructions.
When correctly combined, grout has the texture of slightly runny but still creamy peanut butter. It can be scooped onto the end of a grout float without dripping or running back into the bucket. Instead, it ought to be left where it is. Too much water is used in the grout mixture, which delays the curing process.
When grout is overly wet, the completed joints become brittle and more prone to cracking and crumbling. Efflorescence, characterised by a powdery white colour, may also result from this. If your grout is too moist, try mixing in a little drier grout. Keep repeating this until the mixture has the right consistency.
Home Repair FAQs
Yes. You can replace the grout if you are confident in your abilities and know what you are doing. However, if you need more confidence in your abilities or have any questions about your ability, it is best to leave the grout replacement to specialists. Finding out whether the existing grout needs to be removed and replaced or re-grouted is the initial stage in either of these processes.
The grout will cure and begin to crumble away if you try to add it just inside cracks or regions of separation. In addition, you'd see that replacing the grout wouldn't improve the look of the tile because the new layer would be too thin.
Grout can be removed by hand, although a power tool is strongly advised. This simplifies and speeds up a chore that could otherwise take time, effort, and frustration.
Different shades of grey may form in the grout as it dries if not all joints are filled to the same depth. Avoiding it can be as simple as ensuring adequate depth in your grout joints. However, cleaning the joints with a broom before grouting can lead to a more-than-even cure.
If the grouting is done well, it is generally possible to hide defects in the tile installation. Still, if it is done poorly, it can detract from an otherwise excellent tile installation. The grout must be smoothed out to create an even border around each tile to get a pleasing appearance.
Typical Tiles And Grout Problems
Tile floors and walls should be regularly cleaned to ensure a safe and healthy atmosphere at home or at work. Tiled floors, walls, and countertops in damp environments like kitchens and bathrooms are fertile breeding grounds for mould, mildew, and other tile-specific problems. This microflora can then spread to humans, leading to illnesses like the common cold, influenza, and gastrointestinal illness (enteritis).
Stains And White Residue On Tiles
It is typical for tiles to develop a white film or stain after being exposed to certain substances. This occurs because water can seep in through the tiles, causing the water's minerals to precipitate out. You can also refer to this as "Efflorescence" if you choose.
Porous tile is often to blame for the efflorescence issue. However, crystal clusters on the grout joints are not unusual because of the grout's high porosity. A tile and grout specialist can diagnose what's causing the efflorescence and offer a solution.
Attempting to remove the ugly white residue and the stains on your own may be both a costly and time-consuming endeavour; therefore, it is advised that you seek the services of professionals as soon as possible. It's crucial to use the correct materials when treating tiles and grout yourself to avoid making the situation worse.
Hollow Tiles
When tile glue fails to securely adhere tiles to a wall or floor, tiles may become loose or hollow. When there are spaces under the tiles as a result of insufficient glue, this is usually an indication of a faulty installation.
Hollow tiles are more prone to damage and failure, such as cracking and detaching from the floor. Injecting adhesive under the tiles by a tile repair expert is the best solution to this issue. However, in the vast majority of cases, re-tiling the area is the sole answer to this problem.
Milky Or Cloudy Tile Surface
Tiles that have a milky or foggy finish may have been cleaned with an unsuitable substance. Do not delay in contacting a professional tile and grout cleaning if you find yourself in a similar predicament. You can trust that a professional tile cleaner will use only safe, effective materials on your tiles, and that they will advise you on the best products to use in the future.
Mould
The most prevalent problem with tiles is mould, which thrives in moist environments like the shower or bathroom. The reason for this is because mould thrives in humid and moist conditions, making these places especially susceptible to infestation. In addition, there is an issue with mould growth owing to soap residue and body oils.
Once mould establishes itself in porous grout joints, it cannot be adequately scrubbed out. Using chemicals to get rid of mould is futile because it will eat away at the grout, causing even more problems.
Shower and bathroom mould is typically caused by a leak. Water can accumulate and mould can form even in the tiniest of crevices, such as those found in the grout between tiles or in the crevices of the shower's walls. You should hire a leak detection or bathroom cleaning expert before commencing the mould removal process so that they can identify and eliminate the water source that is sustaining the mould growth.
Dirty, Stained Tiles And Grout
Grout often seems stained or unclean after cleaning because of the cleaning method itself. Because grout joints are lower than tiles, dirt and other impurities are driven into them when washing or mopping tiles. Because of this, the grout becomes tainted. Use regular professional cleaning services and have a clean mop on hand to maintain their like-new appearance in between deep cleanings.
Grout is porous; thus it absorbs stains quickly and usually permanently. To the same extent, tiles are also criticised. Surface dirt particles tend to stick to textured tiles, making it more difficult to clean them. Professional tile and grout cleaners can help resolve these kinds of problems by using the right cleaning materials and processes.
More Problems With Tile Grout
Even if a homeowner with some knowledge in the field should be able to handle the tiling project independently, a few issues may arise due to seemingly minor elements. Grout is a good post-installation indicator of issues with the underlayment, subfloor, or installer's technique. Problems could stem from a number of sources, including improper installation, sloppy underlayment, and a wobbly subfloor. Do-it-yourself tilers would do well to familiarise themselves with some of the most common grouting mistakes before commencing their project.
Cracking
Grout damage can be caused by a number of different things. The worst-case situation is for the substrate (the substance beneath the tiles) to become loose. Your weight could force the substrate beneath the tile to shift, cracking the grout or the tile itself. Lack of correct packing of the grout into the gap between the tiles is another major source of this issue. When grout is left with an air gap underneath it, the grout crumbles and slides into the void, creating a fissure. Last but not least, grout breaks when it is either over-watered during mixing or let to sit for too long before being used.
Uneven Colouring
When possible, it's best if the grout colour is consistent across the entire room. Colour shifts are a common side effect of putting this theory into practise. This difficulty can arise for many different reasons. In most cases, the issue is due to poor grout mixing. The colour pigment may not be dispersed uniformly from one batch to the next if just half the bag is utilised for mixing.
Because only a portion of the bag was really used. Also, rehydrating a batch of grout with more water will make the colour appear lighter while you're working on the job. This occurs because colour is diluted in water. When cleaning the tiles and grout afterwards, many people make the common error of utilising dirty water or a dirty sponge. That's another typical explanation.
Stains
Grout has a tendency to absorb moisture, which can produce discoloration of the surface, because it is constructed of a very porous material. Unless the grout is properly sealed after it has dried, this problem is almost certain. A lot of time and effort is saved by the simplicity of the procedure.
You can apply grout sealer to the lines in your grout with a sponge or an applicator brush after the grout has dried and the grout haze on the tiles has been removed. The sealant should be left on for the time specified on the bottle before being wiped away with a clean rag and thrown away. You should do this once a year to keep the grout clean and free of discoloration.
Cleaning
The grout in your tiles will quickly become an eyesore as dirt and debris settle into the recessed space there. It is notoriously difficult to clean due to its porous and rough surface. Although you can't just run a mop over the tile and consider the job done, cleaning the grout in your tile doesn't have to be a nightmare.
Make a remedy by mixing 1.5 cups of baking soda with 1/2 cup of water and 14 cups of vinegar. You can use a spray bottle to apply the mixture to the grout lines, and then scrub it in with a toothbrush or sponge to ensure thorough coverage. Wipe the tile down with a dry cloth to finish the job. Use a mixture of one part bleach to five parts water and scrub the area until the spots disappear. Use this technique to get rid of those impossible stains.
How To Quickly Grout Tile
Grout not only makes your tile floors and walls seem better, it also reinforces the tiles and makes them stronger. If you have the right equipment and attitude, you can lay grout on your own, even if you have never done it before. It's possible to do the work of grouting tile by yourself despite the fact that it may seem like a huge challenge at first. There's no need to hire a pro to help you grout, and the job can be done in a fraction of the time you'd expect.
- Grout lines can be cleaned by scrubbing away any glue that may have built up and any dirt or debris that has settled there. You can get this job done quickly and easily with the help of a utility knife or razor knife. It is not necessary to clean every speck of dirt from the joint, but you should get rid of any sticky residue or debris that sticks out from the surface.
- The grout should be wetted down. As soon as you're done placing the cement, you may apply the grout with greater ease. Instead of entirely wetting the joints in water, only give them a mild moistening before you start working on them.
- After filling a bucket two or three inches deep with water, add enough powder grout to thoroughly cover the water. Stir the water and grout together until you get a smooth paste. Continue adding water or more grout until the mixture reaches the required consistency.
- Scoop some grout and place it on top of a groat float. A grout float is a flat, specialised trowel used to apply grout. Obtainable at any local hardware or home improvement store. Working the grout into the crevices between the tiles requires keeping the float at a 45-degree angle to the tile surface and pressing down hard. The grout can be applied rapidly by gliding the float smoothly and swiftly along the grout lines. There is no need to worry about smudging the real tiles with grout.
- Once the float is clean, run it in a diagonal motion along the tiles to get rid of the grout that has built up between the tiles. Remove any lingering grout from the float with a damp sponge. Keep the float in a nearly horizontal position throughout the process. You'll save time and effort in the cleaning process as a result of this.
- The tile can be cleaned of any excess grout by wiping it down with a sponge dampened in water. If you have previously done the necessary procedures to remove the rest of the grout from the tile, you should be able to finish this operation pretty fast. This is because you have already completed the essential steps. After you've completed grouting all of the tiles, you should leave the area for at least two hours before treading lightly on the grout. It is recommended to wait at least a week before exposing the grout to moisture.
Guide On How To Replace Grout
If your grout is cracking and crumbling as it falls from your tiles, it was likely not mixed or installed correctly. There are two possible outcomes when this happens: either water will seep between the tiles, damaging the wall behind them, or the tiles will become loose and fall off the wall.
Taking off the old grout is a necessary step before putting in the new stuff. Remember to use the right grout for the job, whether it's unsanded grout with a latex component for the bathroom tile or sanded grout for the floor tile with joints larger than 1/8 inch.
- Grout saws, oscillating tools with carbide grout blades, and rotary tools with carbide grout removal bits can all be used to clean up the spaces between tiles and make way for new grout. A grout saw requires laborious back-and-forth motion to remove grout, but a rotary or oscillating tool can do the job with far less effort.
- You can clean the gap between the tiles with some water and an old toothbrush. Once you've cleaned the area thoroughly with fresh, sterile water, you should let the tile surface dry for an entire day.
- Prepare a container for the grout powder. After adding a small amount of water to the grout, mix the ingredients using a margin trowel.
- Grout should have a viscosity like peanut butter, so continue adding water gradually.
- For around ten minutes, the grout should sit undisturbed. The grout must be blended using the margin trowel. Water should not be added to the mixture at this time.
- To scoop up some of the grout from the bucket, use a rubber grout float. To get the grout between the tiles, hold the float at a 45-degree angle and drag it across the tile in a diagonal motion.
- Remove the surplus grout from the tiles with a clean grout float. Do not let the float float away from a 90-degree angle to the tile. To remove extra grout from the tiles, use the grout float to create a diagonal motion across the surface.
- The drying time for grout is around five minutes. Wait five minutes and test the grout again with your fingernail to see whether it creates an impression. If the impression is still visible after drying, the grout is good to go. If your thumbnail leaves an impression on the tile, wait until then to start cleaning.
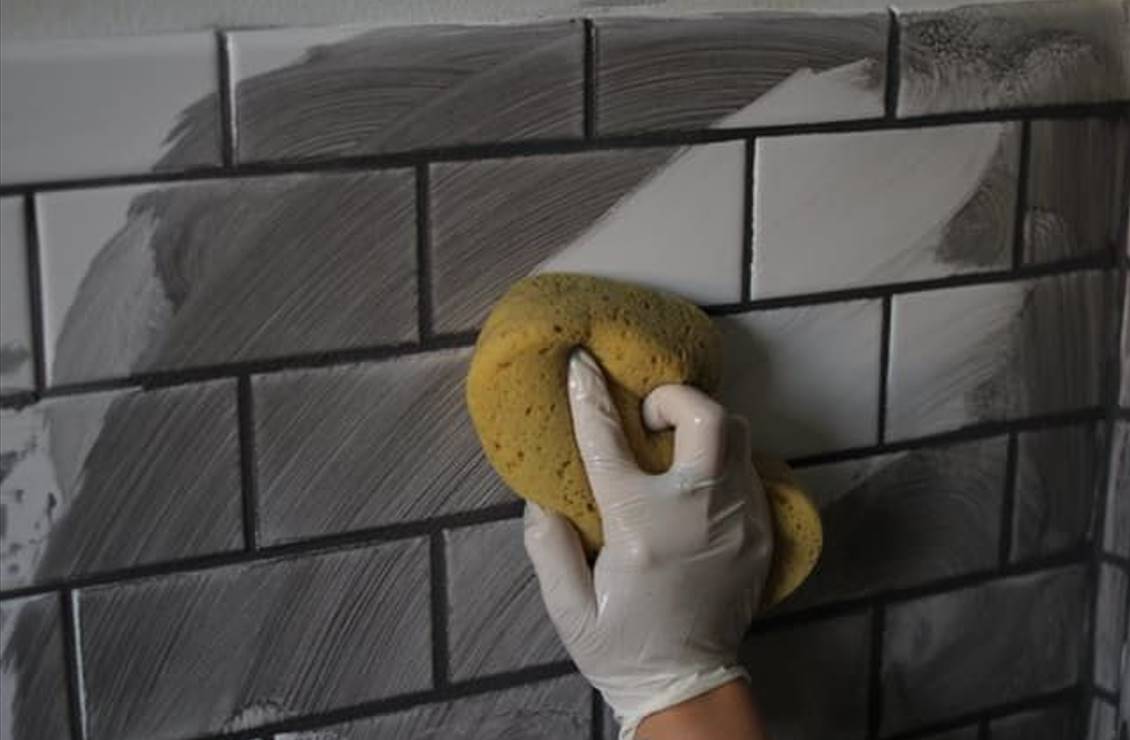
- Moisten a grout sponge with water and use it to wipe off the tile floor. Use gentle, circular motions and rinse the sponge repeatedly with clean water to get rid of any residual grout.
- You may get rid of the grout haze that has built up on the tiles by wiping them down with a damp, soft cloth. After the tiles have been cleaned of the haze, they should be buffed with a light, dry cloth to restore their shine.
- Filtered water, placed in a spray bottle with several applications. For the next three days, spray the freshly poured grout with water twice or three times every day.
- When applying grout sealer, use a paintbrush made specifically for painting. If there is sealant on the tile's surface, wipe it off immediately. Please give the grout at least 24 hours to dry.
Are you looking for the best company to maintain your home's paint in good condition? There's no need to look any further! When you hire Hitch Property Constructions, you have nothing to worry about.
Conclusion
Cracked grout can be repaired with the right tools and knowledge. Too-thin or fast-drying grout is a common issue. Grout seals tiles and keeps water out. The grout's high porosity causes crystal clusters on joints. To locate efflorescence, visit a tile and grout professional.
Tiles may become loose or hollow if the tile glue breaks. Grout may reveal post-installation underlayment, subfloor, or installer issues. Do-it-yourself Tilers should learn about common grouting blunders to prevent making them. Grout absorbs water and discolours. After the grout dries, seal it with grout sealant.
Scrub the area with a bleach-water solution. Scrubbing grout lines removes adhesive. "Grout floats" are used to apply grout. The grout must be firmly pushed between tiles. Walk lightly on grouted tiles after two hours.
Use the right grout. Grout saws or oscillating tools with carbide grout removal bits clear tile grout. Check for grout marks with your fingernail. Before sealing the grout, let it dry for 24 hours. Then, spray the grout for three days.
Content Summary
- Grout is a common tile-related material, and its major purpose is to keep the joints between tiles looking smooth.
- If your grout has become ruined, you can try a few simple solutions on your own.
- With the right equipment and a little practice, you can rapidly fix damaged grout and restore the beautiful appearance of your floors, backsplash, and accent walls.
- Grout is crucial to every tile installation as it protects the tiles' edges and stops water from seeping through to the substrate.
- Unfortunately, numerous issues might arise throughout the grout installation procedure.
- Incorrect grout consistency that dries too rapidly is two common grout faults that must be addressed immediately to ensure a long-lasting installation.
- Too much water is used in the grout mixture, which delays the curing process.
- If your grout is too moist, try mixing in a little drier grout.
- However, crystal clusters on the grout joints are not unusual because of the grout's high porosity.
- A tile and grout specialist can diagnose what's causing the efflorescence and offer a solution.
- Use the right materials when treating tiles and grout to avoid worsening the situation.
- Injecting adhesive under the tiles by a tile repair expert is the best solution.
- Do not delay contacting a professional tile and grout cleaning if you are in a similar predicament.
- You can trust that a professional tile cleaner will use only safe, effective materials on your tiles and that they will advise you on the best products to use in the future.
- The most prevalent problem with tiles is mould, which thrives in moist environments like the shower or bathroom.
- A leak typically causes shower and bathroom mould.
- You should hire a leak detection or bathroom cleaning expert before commencing the mould removal process so that they can identify and eliminate the water source that is sustaining the mould growth.
- Grout often seems stained or unclean after cleaning because of the cleaning method itself.
- Professional tile and grout cleaners can help resolve these kinds of problems by using the right cleaning materials and processes.
- Grout is a good post-installation indicator of issues with the underlayment, subfloor, or installer's technique.
- Do-it-yourself tilers would do well to familiarise themselves with some of the most common grouting mistakes before commencing their project.
- Your weight could force the substrate beneath the tile to shift, cracking the grout or the tile itself.
- The lack of correct packing of the grout into the gap between the tiles is another major source of this issue.
- When possible, it's best if the grout colour is consistent across the entire room.
- Because only a portion of the bag was used.
- Also, rehydrating a batch of grout with more water will make the colour appear lighter while you work.
- When cleaning the tiles and grout afterwards, many people commonly use dirty water or a dirty sponge.
- You can apply grout sealer to the lines in your grout with a sponge or an applicator brush after the grout has dried and the grout haze on the tiles has been removed.
- It would be best if you did this once a year to keep the grout clean and free of discolouration.
- Although you can't just run a mop over the tile and consider the job done, cleaning the grout in your tile doesn't have to be a nightmare.
- Make a remedy by mixing 1.5 cups baking soda with 1/2 cup of water and 14 cups vinegar.
- Wipe the tile down with a dry cloth to finish the job.
- Use a mixture of one part bleach to five parts water and scrub the area until the spots disappear.
- Grout not only makes your tile floors and walls seem better but also reinforces the tiles and strengthens them.
- It's possible to do the work of grouting tile yourself, even though it may initially seem like a huge challenge.
- There's no need to hire a pro to help with your grout, and the job can be done in a fraction of the time you'd expect.
- Stir the water and grout together until you get a smooth paste.
- Scoop some grout and place it on top of a grout float.
- Working the grout into the crevices between the tiles requires keeping the float at a 45-degree angle to the tile surface and pressing down hard.
- The grout can be applied rapidly by gliding the float smoothly and swiftly along the grout lines.
- There is no need to worry about smudging the real tiles with grout.
- Once the float is clean, run it diagonally along the tiles to eliminate the grout that has built up between the tiles.
- Remove any lingering grout from the float with a damp sponge.
- If you have previously done the necessary procedures to remove the rest of the grout from the tile, you should be able to finish this operation pretty fast.
- After you've grouted all the tiles, you should leave the area for at least two hours before treading lightly on the grout.
- It is recommended to wait at least a week before exposing the grout to moisture.
- Removing the old grout is necessary before putting in the new stuff.
- You can clean the gap between the tiles with some water and an old toothbrush.
- Once you've cleaned the area thoroughly with fresh, sterile water, you should let the tile surface dry for an entire day.
- After adding a small amount of water to the grout, mix the ingredients using a margin trowel.
- Using a rubber grout float, scoop up some of the grout from the bucket.
- To remove extra grout from the tiles, use the grout float to create a diagonal motion across the surface.
- Moisten a grout sponge with water and use it to wipe off the tile floor.
- You may get rid of the grout haze that has built up on the tiles by wiping them down with a damp, soft cloth.
- For the next three days, spray the freshly poured grout with water twice or three times every day.
- When applying grout sealer, use a paintbrush made specifically for painting.
- If there is sealant on the tile's surface, wipe it off immediately.
- Please give the grout at least 24 hours to dry.