
Caulk products' basic function is to seal gaps and openings, but they have many other possible applications as well. Whether you're filling the cracks in your walls for cosmetic reasons or to keep out air or water, the application process is essentially the same.
However, you should pay close attention to the features of the product you purchase before applying it, as not all caulks are the same. Silicone, siliconized acrylics, acrylic, latex, and co-polymers are just some of the materials that can be used to create caulking products today.
Getting a clean, professional caulk line is as simple as making a fast trip to the hardware store, picking up the least expensive acrylic caulk, and laying down a bead. These inexpensive caulks are easy to shape and remove from surfaces. Your time spent filling the crown moulding joint will be minimal, allowing you to quickly move on to photographing your handiwork. Within a year, the caulk bead is likely to dry out, shrink, and develop unattractive cracks, but at least you'll have the photo to look back on. Well, at least you have that photo to look back on. Check out Hitch Property Constructions for a huge range of Melbourne caulking services
The problem is caused by the inflexibility of the cheap caulk and the surrounding materials a proclivity to grow and contract with variations in moisture levels and temperature. The crown moulding expands and contracts at different rates than the caulk, thus the bead breaks and needs to be recaulked in a year.
Choose a superior caulk to avoid this from occurring. Instead of having to memorise a long list of chemical names, just follow the directions on the label. In other words, you'll be able to save some time. Listening for terms such as "elastomeric" and "flexible,"suggest the bead can stretch and bend rather than break in reaction to motion in the substrates around it.
Home Repair FAQs
Not removing the old sealant before applying a new one
Over time, sealant tends to harden and detach from the surface on which it was applied. If you don't remove the old sealant properly, water and moisture can seep in. Use a putty knife or sharp tool to remove it, then clean the surface with 99% rubbing alcohol.
Essentially, the difference between them is that a renovation refers to restoring something to a previous state, while a remodel refers to creating something new.
Caulking can and will shrink as it dries. Sometimes a second layer of caulk is required and will produce a neater surface instead of overfilling a crack with caulk. If caulking is to be applied over existing and previous sealed joints, removing old caulk is essential and need to be done carefully.
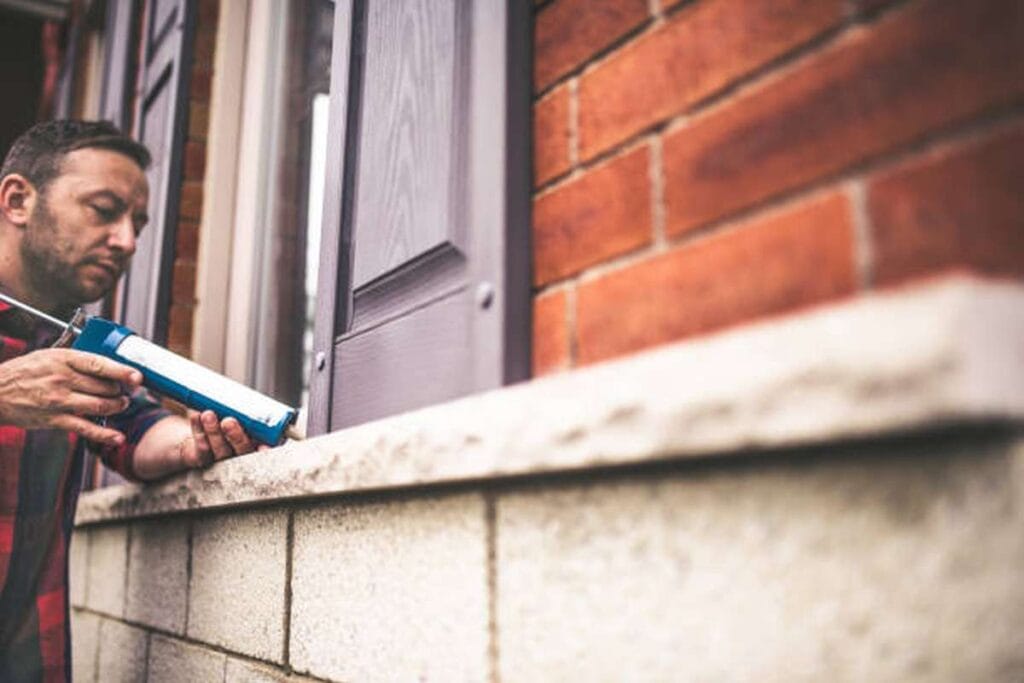
Silicone caulks are among the best caulks for sealing windows. Silicone helps provide a long-lasting seal that can be applied against interior or exterior windows and its flexible material will not crumble in hot or col
What are common uses for silicone caulk? Silicone sealants can be used to bond many common materials, including plastic, metal, glass, and ceramic.
Steps For A Project To Apply Caulk Successfully
If you need to do some caulking around the house but aren't very familiar with a caulking gun, it's a good idea to read through these simple procedures that are essential to finishing a caulking job properly.
If you are a skilled caulking professional, we have everything you need in stock at Maxwell Supply in Tulsa.
Select The Appropriate Caulk.
Where you plan to apply the caulk and what you intend to accomplish with the job are the only two factors that will define the sort of caulk you will need to use. One of caulk's most popular uses is to seal up cracks and crevices from air and water, and there are several varieties available for this purpose. Caulk made of 100% silicone is your best chance for creating a long-lasting seal because it is impervious to water and cracking as well as shrinkage and brittleness. Some other types of caulks, such as acrylic, can be dangerous since they shrink or break after a certain amount of time, causing your seal to fail. Purchase a caulk that is designed for painting after it has been sealed. Look for varieties such as caulk for windows and doors, as well as caulk for the kitchen and bathroom, if you only intend to use it in a particular room of the house.
Clean Up First
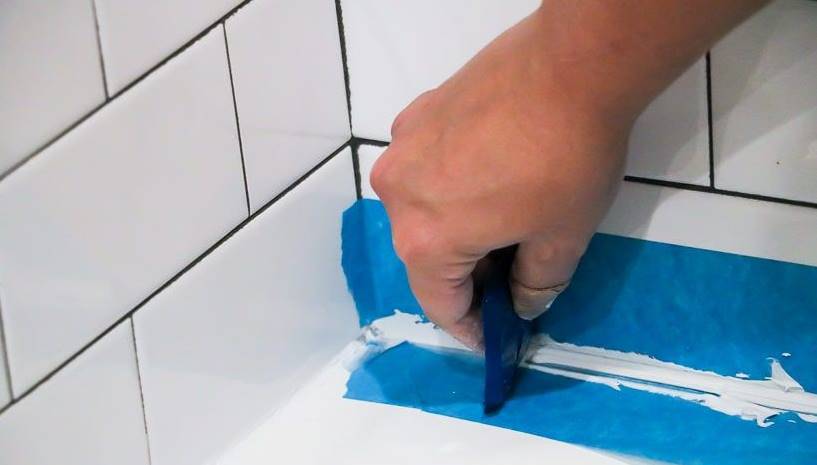
In order to get the surface ready for new caulk, a thorough cleaning is required. This necessitates not only cleaning the area to get rid of dust and debris, but also stripping away any old caulk that could be there. To remedy this, you'll need a caulk remover or wire brush. The next step is to place masking tape along the edges of the surface to create a straight line, but you must remove the tape before the caulk can dry. Check out our Melbourne caulking services here.
Begin Sealing
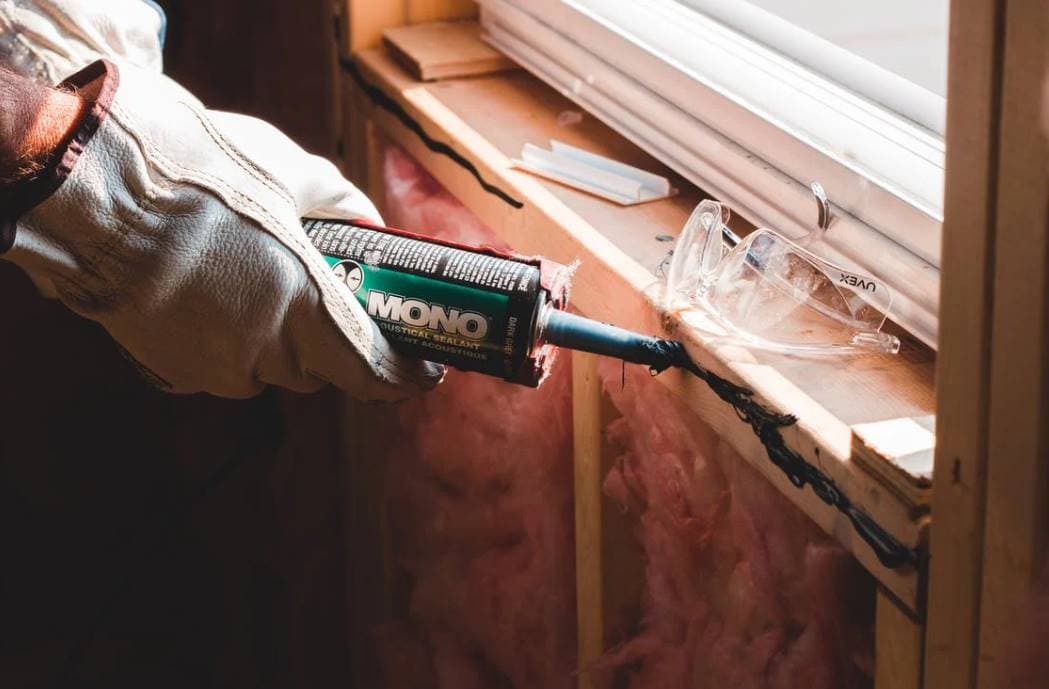
You may start marketing your surface immediately, but first you need to open the caulk tube. Carefully snipping the nozzle off the caulk tube will determine the width of the resulting bead. The next step is to puncture the tube's inner seal using whatever tool is available. For this, a stiff wire is the best option. Putting the cartridge into the caulking gun is the first step in sealing. Caulk should be squeezed out of the tube at a constant rate, thus be sure your trigger pressure is steady.
Smooth It Out
Let's be honest: if this is your first time using a caulking gun, you probably won't do a great job of applying the caulk evenly and uniformly. That's okay, though. A smoothing instrument or your finger is necessary for even the most experienced pros to get a perfectly even bead of caulk. Between two and five minutes after applying caulk, you should smooth it out to fix any mistakes you made. It must start to set, but once it's totally set, smoothing it out will be impossible.
Clean Up And Get Ready For The Next Time
You can't just put the tube aside if there's still caulk in it after you're done using it, thinking it will still be good to go when you need it again. As soon as the last bit of caulk has been squeezed from the tube, either reinstall the cap or jam a nail into the nozzle to keep the opening clear. Mineral spirits work great for cleaning off silicone caulk that has piled up around surfaces.
Successful Caulking Method
Watch The Weather
Keep an eye on the weather, as it can have an impact on:
- how wide the junction was when the caulking was applied (Tthe joint swells in cold temperatures and contracts in warm temperatures)
- debris that has settled on the cartilage (like pollen, dust, old caulk, etc.)
- the strength of adhesion depends on the caulk's ability to "wet" the joint's surfaces.
- the length of time it takes for the caulk to cure and develop its appropriate physical qualities.
Perfect Weather Condition
Schedule your caulking for when the weather is ideal. In what position do we currently find ourselves? Lows of 90 °F and highs of 40 °F are expected. It is critical that you consider the surface temperature of the area you intend to caulk. More importantly, it needs to be a reasonable temperature. There are caulks that can be applied in temperatures ranging from 0 to 120 degrees Fahrenheit, such as Sashco's Lexel and Through the ROOF.
Snowy Or Wet Conditions
Make sure the surface is entirely dry before applying water-based caulk to a joint. Caulk may not cure effectively if applied on a damp surface, and adhesion will be poor at best. Similarly, if there is a potential for precipitation within the next 24 hours, you shouldn't use water-based caulks even if the weather is excellent. If you need to caulk, you should do it right away. Caulk can easily be washed away if exposed to water, so it's important to protect your work area by covering it with a plastic tarp. In doing so, you'll keep the caulk from deteriorating.
Using Sashco's Lexel and Blowing the ROOF OFF! A successful application can be made to actively wet surfaces. These are the items you should grab in the midst of a torrential storm. If frost has accumulated on the surface, denatured alcohol should be used to remove it before wiping the surface clean.
Weather Extremes
When applying the caulk, it is best to avoid extreme temperatures. As a result, the junction won't be as large as it should be, the caulk won't dry properly (leading to performance issues), and the caulk may develop blisters. Both hot and cold weather won't prevent these problems from occurring. Weather-related caulk problems can be readily addressed, but it's best to prevent them in the first place by maintaining a weather check on the area.
Prepare The Surfaces And The Joint For Sealing
Get rid of any old caulking and clean the area to get it ready. The key to a successful and long-term caulking work, whether you are repairing old caulk or sealing a new junction for the first time, is thorough surface and joint preparation. This holds true whether you're sealing an existing joint or starting from scratch. The steps for cleaning are as follows:
- An old caulk can be easily removed from the joint with the help of a putty knife, a painter's 5-in-1 tool, or something else of a similar design. It is possible to soften old caulk and loose paint with a heat gun, making their removal much simpler; alternatively, caulk remover can be used for this purpose.
- Make sure there is no dust, dirt, pollen, grease, oil, wax, rust, mildew, soap scum, mould, old caulk, peeling paint, deteriorating wood fibres, or anything else on the surface. When cleaning dirty, unstable concrete, a wire wheel attached to a drill is often the most efficient alternative. Use a cleaner made specifically for removing grease, and then rinse the area well to get rid of oil or grease. It's important to remember that even the best caulk on the market won't work if it's applied to a surface that is unclean or in disrepair.
- The final stage in chemical removal is a thorough rinsing of the affected region. Adhesion problems can also be caused by chemical substances.
Apply Pre-Caulking Filler Rope
Use a backing rod instead of additional caulking. It is recommended to instal Filler Rope TM or an equivalent foam backer rod in a joint or crack that will be 1/4 inch wide or more and 1/2 inch deep or deeper before applying caulk. The caulk's effectiveness depends on its ability to cling to the surface, and this will guarantee that. In what way is filler rope necessary?
- It's cheaply efficient. When compared to caulk, the cost of employing Filler Rope or another type of backer rod to fill the joints is far lower.
- The best elasticity and straightforward repairs are achieved through a joint design that features two places of adhesion with less product put in the centre of the joint in the event of significant movement and the joint widening beyond the caulk's capacity to accommodate it. Seek the truth by looking in the
- For more guidance on how to construct joints properly, take a look at the product literature offered by Sashco.
- All of the equipment has been modernised. Caulk can be compressed further when Filler Rope is positioned behind it. This added force ensures that the caulk makes full contact with both surfaces of the joint, enhancing its ability to stick.
How To Install Filler Rope
Simply press the substance into the joint using your hands or a blunt object of the right size. When the caulk is put over it, it should be pushed in until it is between a half and a quarter of an inch deep. Avoid puncturing or nicking closed-cell backer rods, since this might result in "out-gassing" from the backer rod and lead to caulk blisters. You shouldn't use a blistered caulk if you accidentally nick or poke holes in the backer rod. The caulk line can be kept neat and free of smears by first taping off both sides of the junction using masking tape or painter's tape. In preparation for caulking, this is done.
Applying Primers
Priming a joint or crack before caulking is essential if the area will be subjected to extreme conditions, such as constant water submersion at the bottom of a swimming pool or a residence in high winds. Caulk's binding to the joint or fracture will be improved by using a primer. Priming a house with regular latex paint should be fine. If you find yourself in an odd setting, such a swimming pool, please don't hesitate to contact us. The caulk will stick to the primer better, leading to better long-term performance and less frequent maintenance needs.
Why Caulking Fails
Consider all the outside caulking projects you've witnessed throughout the years. After 5, 3, or even 2 years, how many of them are still effectively blocking water infiltration? Less than half of them may serve their purpose as designed over the long haul. Because water is getting in where it shouldn't be, building envelopes are failing too soon. Exterior caulking failure, regardless of the product used, can typically be traced back to the same source: a failure to properly regulate expansion and contraction.
The caulking industry as a whole has been largely mute on this topic at the retail level, which raises the question of why this is the case given that poor education plays a role in the failure of many caulking jobs. Maybe they think the average person can't or won't sit still for long enough to completely grasp the complexities required. It's likely that the caulking quality doesn't have a major role in the success of the business. The result is the same regardless of the underlying reason. If you want professional-quality outcomes, you need to go above and beyond common knowledge in your research and training.
It would be considerably easier than it seems to install successful external caulking if every joint that might be caulked was entirely stable at all times. To the contrary, the reality is quite different. Particularly where two dissimilar materials flank a caulkable connection, expansion and contraction due to changes in temperature (or sometimes humidity) are always noticeable. Whenever the seam between the two materials contains the joint, this is especially the case. If you don't plan for the movement that will occur no matter what, not even the most flexible caulking solutions on the market today will accomplish the job properly.
While wide joints are ideal because they don't put too much stress on the elasticity of caulking, deep joints often require more caulking than is practical to use in a short amount of time. That's why there's a special rod called a backer rod to support the structure. These flexible foam lengths, often with a cylindrical cross section, are meant to be put into any gaps before caulking is applied. Diameters of 1/4 inch to 7/8 inch are the most common, but backer rods can be found with diameters as big as 4 inches.
When installing a backer rod, make sure the uncompressed rod is at least 25% greater in diameter than the hole it is filling (or use the next larger size), and push it in so deep that the hole's depth is at least as much as its width. Ideally, the space between them would be between a quarter and a half of an inch deep. What is the rationale for the depth limit? Using a backer rod to restrict the depth of the caulking has further flexibility implications beyond saving material. Beads of caulking that are wider than they are deep have a harder time stretching to their maximum capacity without separating from the joint edges. Caulking beads are usually deeper than they are wide, and this is why. It's not a good idea to dive too deeply.
This is well and dandy up to a point, but realistically, how often do you get to pick the breadth of the junction that needs caulking? Sadly, not nearly enough. As a result, some folks in white lab coats came up with a product called bond breaker tape. A self-adhesive tape, commonly made of polythene, is put there to cover or cross over under-width joints. To prevent caulking from adhering in certain places, bond breakers are utilised. For the most part, they serve this purpose. Because the stress associated with the joint's movement is spread across a broader area of caulking, the joint in the example shown in the figure is less likely to break as a result. Bond breaker tape is not required because electrical tape can be used instead.At Hitch Property Constructions, we provide a wide range of home maintenance services.
Conclusion
Caulk products fix gaps and holes, but they have many other uses. Common caulking materials include siliconized acrylics, acrylic, latex, and co-polymers. Caulk prevents air and water leaks in cracks. 100% silicone caulk is optimal for lasting sealing. Acrylic caulks are hazardous.
Apply water-based caulk to dry joints. Some caulks can be used at -40°F and +50°F. Caulk can wash away, so protect your work area from the water. Long-lasting caulking requires thorough surface and joint preparation. Dirty or damaged surfaces will not work with the greatest caulk.
Preventing weather-related caulk issues is best. The most flexible and healing connection has two adhesions. Primer improves caulk adhesion to joints and cracks. If severe weather is expected, don't caulk without priming. Uncontrolled expansion and contraction cause exterior caulking issues.
Caulking producers and suppliers have mostly kept quiet about this issue. Professional results require further training. Caulking less deeply with a backer rod saves more than material. Wide caulk beads extend less. Polythene bond breaker tape covers under-width joints.
Content Summary
- However, you should pay close attention to the product's features before applying it, as not all caulks are the same.
- Getting a clean, professional caulk line is as simple as making a fast trip to the hardware store, picking up the least expensive acrylic caulk, and laying down a bead.
- Your time spent filling the crown moulding joint will be minimal, allowing you to quickly move on to photographing your handiwork.
- Within a year, the caulk bead will likely dry out, shrink, and develop unattractive cracks, but at least you'll have the photo to look back on.
- The crown moulding expands and contracts at different rates than the caulk; thus, the bead breaks and needs to be recaulked in a year.
- If you need to do some caulking around the house but aren't very familiar with a caulking gun, it's a good idea to read through these simple procedures essential to properly finishing a caulking job.
- Where you plan to apply the caulk and what you intend to accomplish with the job are the only factors defining the sort of caulk you will need to use.
- Purchase a caulk that is designed for painting after it has been sealed.
- A thorough cleaning is required to prepare the surface for new caulk.
- You may start marketing your surface immediately, but first, you need to open the caulk tube.
- Putting the cartridge into the caulking gun is the first step in sealing.
- Between two and five minutes after applying caulk, you should smooth it out to fix any mistakes you made.
- You can't just put the tube aside if there's still caulk in it after you're done using it, thinking it will still be good to go when you need it again.
- Once the caulk has been squeezed from the tube, either reinstall the cap or jam a nail into the nozzle to keep the opening clear.
- The adhesion strength depends on the caulk's ability to "wet" the joint's surfaces.
- the length of time it takes for the caulk to cure and develop its appropriate physical qualities. Schedule your caulking for when the weather is ideal.
- Make sure the surface is dry before applying water-based caulk to a joint.
- Similarly, if there is potential precipitation within the next 24 hours, you shouldn't use water-based caulks even if the weather is excellent.
- If you need to caulk, you should do it right away.
- If frost has accumulated on the surface, denatured alcohol should be used to remove it before wiping the surface clean.
- When applying the caulk, it is best to avoid extreme temperatures.
- Both hot and cold weather won't prevent these problems from occurring.
- Weather-related caulk problems can be readily addressed, but it's best to prevent them in the first place by maintaining a weather check on the area.
- Please get rid of any old caulking and clean the area to get it ready.
- The key to successful and long-term caulking work, whether repairing old caulk or sealing a new junction for the first time, is thorough surface and joint preparation.
- Make sure there is no dust, dirt, pollen, grease, oil, wax, rust, mildew, soap scum, mould, old caulk, peeling paint, deteriorating wood fibres, or anything else on the surface.
- The final stage in chemical removal is a thorough rinsing of the affected region.
- Chemical substances can also cause adhesion problems.
- Installing Filler Rope TM or an equivalent foam backer rod in a joint or crack that will be 1/4 inch wide or more and 1/2 inch deep or deeper before applying caulk.
- Compared to caulk, the cost of employing a Filler Rope or another type of backer rod to fill the joints is far lower.
- The best elasticity and straightforward repairs are achieved through a collaborative design that features two places of adhesion with less product put in the centre of the joint in the event of significant movement and the joint widening beyond the caulk's capacity to accommodate it.
- Caulk can be compressed further when Filler Rope is positioned behind it.
- Using a primer, Caulk's binding to the joint or fracture will be improved.
- Regardless of the product used, exterior caulking failure can typically be traced back to the same source: a failure to regulate expansion and contraction properly.
- The caulking industry as a whole has been largely mute on this topic at the retail level, which raises the question of why this is the case, given that poor education plays a role in the failure of many caulking jobs.
- Likely, the caulking quality doesn't have a major role in the business's success.
- To achieve professional-quality outcomes, you must go above and beyond common knowledge in your research and training.
- That's why there's a special backer rod to support the structure.
- Using a backer rod to restrict the depth of the caulking has further flexibility implications beyond saving material.
- Beads of wider-than-deep caulking have a harder time stretching to their maximum capacity without separating from the joint edges.
- Caulking beads are usually deeper than they are wide, which is why.
- It's not a good idea to dive too deeply.
- As a result, some folks in white lab coats came up with a product called bond breaker tape.
- To prevent caulking from adhering in certain places, bond breakers are utilised.
- Because the stress associated with the joint's movement is spread across a broader caulking area, the joint in the example shown in the figure is less likely to break.
- Bond breaker tape is not required because electrical tape can be used instead.