
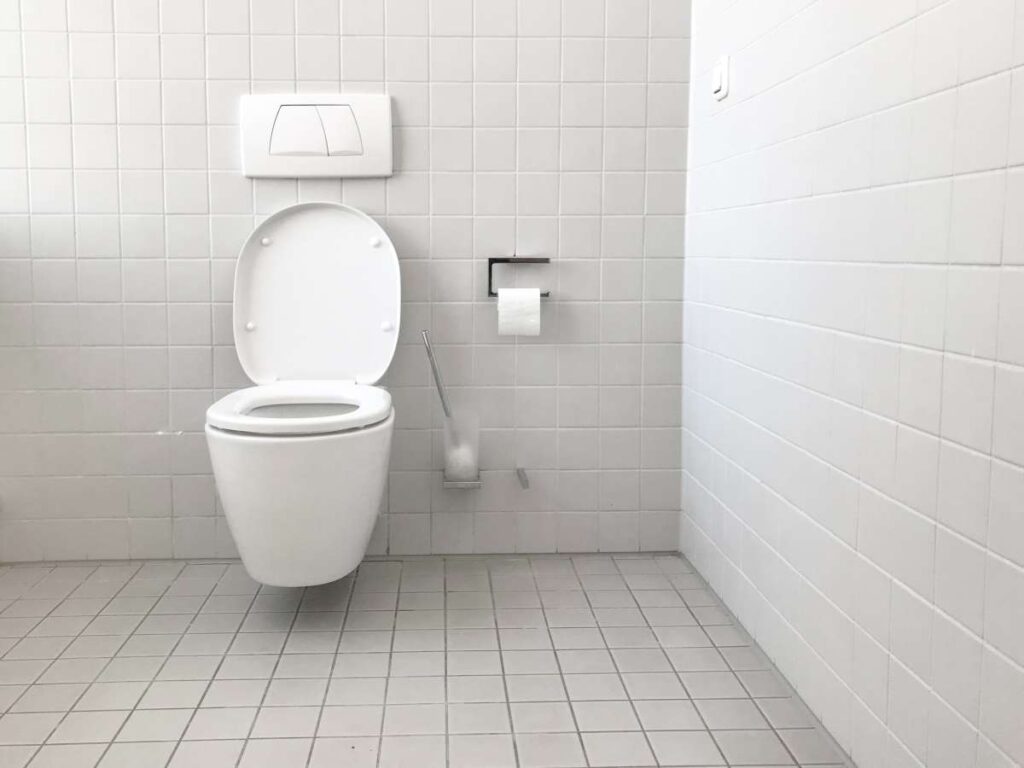
The majority of the time, tile can be considered waterproof. No, natural stones will not absorb water, but porcelain tiles will not absorb water for the most part. The majority of water will be shed from walls that have ceramic tiles installed on them. On the other hand, grout is a terrible material. Literally. With a few notable exceptions, such as epoxy grout and grout that does not contain sand, grout is composed of sand that has been bound together with Portland cement. Because of this, it behaves similarly to sand in that it can absorb water as it moves across the surface of the grout. This indicates that, prior to constructing your shower, you will need to give some thought to what the water will do when it travels through the grout and lands on the wall behind it.
The average shower receives the same amount of precipitation as a standard shower head in a single year, which is the equivalent of 2,500 inches. This indicates that waterproofing a shower in the correct manner is not just a recommendation; rather, it is necessary in order to protect a residential or commercial structure from the effects that water can have. The migration of an excessive amount of water into wall cavities can result in expensive structural damage and can encourage the growth of mould, which can cause illness and create a hazardous environment.
It is imperative that the substrate be properly prepared before even beginning the process of waterproofing the structure. First, you should check to see that the foundation is stable. Building codes require that the floor and frame be constructed properly. The placement of drains should then be carefully planned to ensure adequate water removal. In addition, make sure to check the level and the pitch to ensure adequate drainage.
Ceramic tile and grout, on their own, are not waterproof despite the widespread belief that this is the case. It is possible for water to break through grout made of cement and make its way through the substrate. Installing a water-resistant membrane just below the tile bonding mortar and as close to the tile itself as you can gets you one step closer to solving the problem of water damage. There are two different kinds of waterproof membranes, including sheet and liquid membranes that are applied.
Looking for the best tiling renovations? Look no further! Hitch Property Constructions has you covered.
Sheet Membranes
Sheet membranes are made out of elastomeric or plastic sheets that need to be bonded to the substrate before tile can be installed on top of them. Some of the sheets come with their own adhesive backing, whereas others call for additional adhesives or cement mortar. Primers are almost always required to be applied to the substrate before pressure-sensitive adhesive-backed membranes can be installed. The drying time for the primer might be at least an hour. Other membranes have to be bonded using a cement-based thin-set mortar, which also needs time to cure completely before it can be used.
When installing a sheet membrane, it is essential to remember to treat and seal the seams where the sheets come together so that the membrane can continue to function as intended and keep water out. If you want to create a waterproof membrane that is continuous, you need to pay careful attention to all of the transitions and changes in the plane. In most cases, installing prefabricated sheet membranes is not nearly as quick and simple as the manufacturer advertises it to be. Before beginning installation, all of the components, including the membrane, preformed corners, bonding mortar, primer, and sealant, have to be gathered together, and the sheets have to be cut. Sheet membranes are not only more expensive but also require more time and labour to instal.
Liquid Membranes
The installation of prefabricated sheet membranes is made significantly simpler with the use of liquid membranes. Primers are not required, there is no need to treat seams, and there is no need to worry about transitions going up walls or through corners. The RedGard Waterproofing and Crack Prevention Membrane is an elastomeric membrane that is ready to use and is applied in the form of a liquid. It forms a continuous barrier that is waterproof and has excellent adhesion. Additionally, it can be utilised to effectively vapour-proof steam rooms as well as gang showers. Brushing, trowelling, rolling, or spraying are all valid methods. Applying a second coat on top of the first will ensure that the floor will have a continuous film that is free of voids. For optimal performance, the membrane should have a thin fibreglass mesh embedded within it to accommodate changes in plane and gaps measuring at least 1/8 inch.
No Waterproofing: Will this cause shower leaks?
Shower leaks.
The last thing anyone wants when they build a new shower. And yet I hear the following questions quite often:
- Is cement board resistant to water?
- The majority of the water will be prevented from entering the space by the tile and grout.
- Our shower does not have any waterproofing because the contractor who worked on it did not do it. Will there be leaks in the shower as a result?
- We were unaware that the shower was supposed to have a moisture barrier installed in it. Should we make a fresh start?
The fact that a member of the John Bridge forum had recently posed the question "Is a moisture barrier required?" served as the impetus for writing this post. It was a contractor that he hired to instal his shower, and the contractor advised him that there was no need for it. However, as more details were disclosed and photos were shared, it became abundantly clear that there would be some water damage caused by the showers. It is strongly recommended that you click on the link and read through the post.
How do moisture barriers work?
In other words, a moisture barrier is a barrier that prevents water from getting through. Its job is to prevent water from penetrating the wall behind the backer board. The following are examples of shower curtains that will keep water out:
- The tile backer board is protected from moisture by a four-mil plastic sheet, liquid waterproofing applied to its surface, and a waterproof membrane sheet set atop the tile backer board.
Shower Waterproofing Crash Course
My personal opinion is that a plastic sheet that is only four mils thick and is glued to backer board is not a waterproof membrane. Why? First, you staple this membrane to the studs, and then you nail (or screw) backer board in front of it, piercing the membrane several times. In spite of this, it is not only a sufficient means of preventing moisture from penetrating a wall cavity, but also an acceptable one.
To clarify, a moisture barrier is not the same thing as a waterproofing membrane.
- Waterproofing vertical walls requires the installation of a moisture barrier.
- All horizontal surfaces, including slopes, need to be waterproofed with a membrane.
Moisture Barrier vs Waterproofing
You won't find me alone in thinking it's important to treat horizontal and vertical surfaces differently when waterproofing. Custom Building Products requires two coats of their Redgard liquid waterproofing on all waterproofing-targeted surfaces. However, they also provide a technical bulletin that says only one coat of paint should be used on the backer board's vertical surfaces.
Just like how all bourbons are whiskeys but not all whiskeys are bourbons. In spite of the fact that a moisture barrier can also serve as a waterproofing barrier, this does not imply that the reverse is always true.
Water can be kept out of the water cavity with just a moisture barrier. A shower can be made watertight by thoroughly waterproofing the horizontal surfaces.
Where you are likely to have shower leaks
Some common types of horizontal surfaces in a shower include the floor, half walls, benches, curbs, and recessed niches. Leaks can be avoided only with special care given to these. This kind of surface can be waterproofed in a number of ways, including with two coats of liquid waterproofing, a waterproof sheet membrane, or any of the numerous foam waterproof products available today. They manufacture foam recessed niches, corner benches, floating benches, curbs, and shower pans, among other products.
Do you need to waterproof shower walls before tiling?
Before the year 1960, the typical family home did not have any "shower stalls," but rather bathtubs with walls surrounding them. In the same manner as the rest of the house, these walls were constructed using concrete plaster. On top of that plaster, a second layer of concrete plaster measuring half an inch thick was applied and given the name "mud bed." This was the layer in which the tiles were set, and the edges were finished off with a piece of tile referred to as a "mud cap" (hence the name).
The disadvantage of using concrete plaster was that it absorbed moisture through the grout lines, which was a common problem. Once inside the wall, the wooden frames soaked up the moisture from the wet concrete, and because there was a lack of fresh air, the studs began to deteriorate, a process that is known as "stud rot.
After some time, when drywall or gypsum boards were generally recognised, the plaster was eventually replaced with the so-called "green board," which offered the promise of being resistant to mould and water.
Mold loves cellulose, so it's a good thing they didn't know (or didn't care) that the green, water-resistant paper layer is a product made of cellulose and that mould can grow on cellulose. As soon as the water broke through the coating that prevented water from getting in, the mould was able to start feeding on the gypsum and the paper without any restrictions.
Check out our range of tiling renovations Melbourne at Hitch Property Constructions.
The purpose of waterproofing a shower before tiling
In our opinion, and in the minds of the vast majority of people, the most crucial aspect of any bathroom's construction is that it serves its intended purpose and prevents water from leaking into or otherwise damaging areas where it doesn't belong. Simply put, this is the single most crucial feature of any lavatory. How a shower is built, the materials it's made from, and the methods it's sealed off with all have an effect on this. Wet panels or the backer boards to which tiles are adhered must be installed above the bath or tray's edge in a shower. This holds true whether tiles or wet panels will be used on the walls. In rare cases, like wet rooms, the panels can slide all the way down to the floor alongside the tray. I'll go into more depth about how wet rooms have the space between the wall and the floor sealed off with specialised sealant tape, but for now, know that it exists. Putting off the cost of waterproofing a bathroom may seem like a good idea at first, but in the long run, it will cost you much more.
Tile Backer Boards
The proper tile adhesive and backer board must be present if tiles are to be used. Although there are tile backer boards available, plasterboard is still the most commonly used material. Because of how much the individual materials cost. There is a common expectation among customers that they will not exceed a certain budget. A plasterboard panel that is 1200 millimetres by 2400 millimetres in size. The price of a plasterboard sheet measuring 1200 by 2400 millimetres is half of what a tile backer board measuring 600 by 1200 millimetres would be. As a result, the price of tile backer board is roughly four times that of regular wallboard. Prospective customers often do not account for this expense when budgeting for a bathroom remodel. Unless it has been treated with a waterproofing agent, plasterboard, whether standard or moisture-resistant, is not a material that should be used in a wet setting. This holds true regardless of whether the plasterboard in question is standard or moisture-proof.
Although many tile adhesives and grouts claim to be watertight, this is not always the case. Waterproofing is not a property of the tile itself. Because of the absorption of water, plasterboard will deteriorate over time. Plasterboard can only support 32 kilogrammes per square meter, so installing heavy tiles while keeping that in mind creates a situation that is begging for an accident to occur. Visualize yourself in the shower when suddenly a tile 300 mm x 600 mm x 10 mm thick falls from the wall and lands on you. To prepare plasterboard for tiling, a watertight membrane must be applied. The green paper-faced moisture resistant plasterboard is frequently used by those who instal bathrooms. This method is widely utilized. It can withstand some rain and snow, but that's about it.
There's no denying that the best tile backer boards are the ones made for use in damp settings. You can find tile backer board made of a variety of materials, but cement board and insulated foam board are the most common. Depending on the type of material being supported, both types of tile backer board have a weight bearing capacity anywhere from 50 to 200 kilograms.
How to build a shower correctly.
After covering the different types of tile boards, I'll move on to the wrong way to build a shower, which includes tiled and wet-paneled showers but excludes wetrooms. That's the best way to build, by far. The tile backer board, also known as plasterboard, cement board, or a similar product, is installed on the walls. Another option is to put up the wet wall panels. The tub or shower tray is then lowered into place, or pushed alongside the boards, so that they meet at the floor. Don't bother putting in a wooden frame for the bath if you're trying to save money elsewhere. Tile without first applying waterproofing compound if possible; just seal the gap between the tray and the panels with silicone sealant.
Continue with grouting and siliconizing to finish up the project. This plan will inevitably fail. If the wall is constructed of wood, not only will it rot, but it will also leak water as it bends and shifts. If this does happen over time, you will almost certainly experience wet rot and maybe even dry rot. This is an all too common occurrence when we inspect potential repair jobs, and unfortunately, the only solutions involve either routinely redoing the silicone or tearing out the shower entirely and starting over.
The best way to do something. Even if a steel tub is used for the installation, the combined weight of a person in the tub and the water causes it to bend slightly. An acrylic tub offers much more adaptability. Therefore, the timber frame must be built in such a way that there is no room for flex. The reasons for this are as follows. The base for the inclosure, be it a shower tray or bathtub, goes in first during a proper installation. As a next step, the tile backer boards or wet panels are fastened to the wall so that their lowest edge is flush with the top of the shower pan or bathtub. Two or three millimetres of clearance is needed between the floor of the tub or shower and the bottom of the board. When installing wet panels, the gap at the base is sealed with silicone. Waterproofing the boards is a prerequisite to tiling them.
Any bending of the tray or bath will cause the silicone seal or waterproofing to break at the joint. This means that the timber frame for both fixtures must be built in such a way that it does not bend. Shower bases must be set into cement mortar, or even better, tile adhesive, for maximum stability. A new bathroom built in this way should last for many years without showing any signs of wear and tear.
We have a wide range of Melbourne tiling renovations to help you choose in creating a new design for your house.
How to waterproof a shower using tanking kits
I'll start by describing how tanking kits vary from waterproofing kits. Waterproofing a tank is the purpose of a tanking kit. In my experience, tanking kits are the prefered method of waterproofing plasterboard prior to tiling a shower because they are more professional products, are slightly more difficult to work with but dry faster, and produce better results. Waterproofing is the term used to describe products aimed squarely at the Do It Yourself crowd. Tanking is a term used to describe goods that are primarily marketed to businesses.
All required wall preparation must be done before either choice can be implemented. Dust should be swept up or vacuumed up first. Joint sealing tape from a random manufacturer will be provided to you. Put this anywhere there is a gap in the wall, but especially in the joints between the boards and in the corners.
Move around the entire circumference of the bath in this manner. Apply the tape so that one edge rests on the bath no further than the pencil line, and the other is fastened to the wall. First, adhere the side that will face the bath; then, using a scraper or another tool with a flat side, press the tape into the corner between the bath and the panel to create a good 90-degree angle; and finally, adjust the wall. There should be no incline in the tape at the transition from board to bath.
scrim tape for tanks
Due to the potential for mess, I advise you to take the following additional steps. The next step is to use inexpensive masking tape to seal the gap between the jointing tape and the top of the bath or shower tray. Instead of sitting atop it, it needs to be placed next to it, with just 1 mm of space between them. Wrap the tub or tray in plastic and secure it with masking tape to prevent leaks.
If a primer was included in your kit, apply it to the wall now and let it dry before moving on. The compound can then be applied. Put on some disposable clothing, gloves, and goggles to protect yourself.
Waterproofing the floor of a wooden bathroom is a prerequisite to tiling the floor. The wooden subfloor will be preserved from the inevitable rot this causes. Any tanking compound prepared for the floor material can be applied to the walls surrounding the shower area. This is true whether the floor material is timber or cement board laid on top of the timber floor. Spending less money to achieve the same results makes sense. Another option is to use a decoupling membrane, which I covered on the page about tile installation preparation. Most of them are waterproof, which is convenient if that quality is necessary for the task for which they were created.
But if decoupling isn't necessary, using them isn't the best way to finish the task because they are so expensive compared to liquid tanking. You should know that luxury vinyl producers frequently claim that their products are watertight. Water can seep in between the joints even if you seal them, so they are not waterproof. But unless you immediately flood the floor after getting out of the shower, no amount of water will get through these joints.
Waterproofing a bathroom may be the single most important factor that can lead to drastically different quotes for a new bathroom, and just because a big, well-known company is doing the job doesn't mean they'll do it right. Many businesses boast that they can completely renovate a bathroom in as little as five days, with some even going so far as to provide a detailed description of the work and a time frame for it. Waterproofing will not be mentioned at all in the quote because doing so would add unnecessary costs and time. Although the finished bathroom will likely have a pleasant appearance upon first glance, it may only last for the next five years. A proper installation should have a 25-year lifespan.
Conclusion
The amount of water collected by a typical shower head in a year is equivalent to the annual rainfall experienced by the average shower. Cement grout can be penetrated by water, allowing water to reach the substrate below. Extensive monetary harm can be caused by water seeping into wall cavities in large enough quantities. Sheet membranes can be constructed from a variety of materials, including elastomeric or plastic sheets. Installation of pressure-sensitive adhesive-backed membranes typically requires priming the substrate first.
Thin-set mortar made from cement is required for bonding other membranes. If you want to keep water out of the wall space behind your backer board, you'll need a moisture barrier. In most cases, the tile and grout will be able to keep water out. A waterproof membrane must be applied to all horizontal surfaces, including slopes. For a shower to be completely leak-proof, the horizontal surfaces must be sealed with waterproofing sealant.
Everything from the ground up, including the half walls, benches, curbs, and alcoves. For optimal results, all surfaces in need of waterproofing are required to have two coats of Redgard liquid waterproofing applied by Custom Building Products. It is important to waterproof a shower so that it can be used as intended. Showers require the installation of wet panels or backer boards, upon which tiles are placed, above the bath's edge. Sealant tape is used to close off the gap between the wall and the floor in bathrooms and other wet areas.
Tile backer boards designed for use in damp environments are the best option. With a maximum load bearing capacity of 32 kg/m2, plasterboard struggles to support heavy tiles. The weight bearing capacity of tile backer board is reflected in its high cost, which is four times that of standard wallboard. The walls are prepared for the tile backer board, which can be made of plasterboard, cement board, or another similar material. When the boards are at the correct height, the tub or shower tray can be lowered into position or pushed alongside them.
The boards must be waterproofed before tiling can be done on them. If the tray or bath is bent in any way, the silicone seal or waterproofing will break at the joint. Waterproofing plasterboard before tiling a shower is best accomplished with a tanking kit. They're a little trickier to work with, but the results are better and they dry quicker. The degree to which a bathroom is waterproofed can have a significant impact on the final cost.
It is claimed by many companies that a bathroom can be renovated from top to bottom in as little as five days. Because it increases both the price and the time required, waterproofing will not be mentioned in the quote.
Content Summary
- Installing a water-resistant membrane just below the tile bonding mortar and as close to the tile itself as you can gets you one step closer to solving the problem of water damage.
- The installation of prefabricated sheet membranes is made significantly simpler with the use of liquid membranes.
- We were unaware that the shower was supposed to have a moisture barrier installed in it.
- The fact that a member of the John Bridge forum had recently posed the question "Is a moisture barrier required?"
- To clarify, a moisture barrier is not the same thing as a waterproofing membrane.
- Waterproofing vertical walls requires the installation of a moisture barrier.
- A shower can be made watertight by thoroughly waterproofing the horizontal surfaces.
- Mold loves cellulose, so it's a good thing they didn't know (or didn't care) that the green, water-resistant paper layer is a product made of cellulose and that mould can grow on cellulose.
- The purpose of waterproofing a shower before tilingIn our opinion, and in the minds of the vast majority of people, the most crucial aspect of any bathroom's construction is that it serves its intended purpose and prevents water from leaking into or otherwise damaging areas where it doesn't belong.
- Wet panels or the backer boards to which tiles are adhered must be installed above the bath or tray's edge in a shower.
- This holds true whether tiles or wet panels will be used on the walls.
- Putting off the cost of waterproofing a bathroom may seem like a good idea at first, but in the long run, it will cost you much more.
- The proper tile adhesive and backer board must be present if tiles are to be used.
- To prepare plasterboard for tiling, a watertight membrane must be applied.
- Another option is to put up the wet wall panels.
- As a next step, the tile backer boards or wet panels are fastened to the wall so that their lowest edge is flush with the top of the shower pan or bathtub.
- Any bending of the tray or bath will cause the silicone seal or waterproofing to break at the joint.
- Waterproofing a tank is the purpose of a tanking kit.
- The next step is to use inexpensive masking tape to seal the gap between the jointing tape and the top of the bath or shower tray.
- Waterproofing the floor of a wooden bathroom is a prerequisite to tiling the floor.
- Any tanking compound prepared for the floor material can be applied to the walls surrounding the shower area.
Tiles Floor FAQs
Stone and porcelain tiles are the best for the shower floor. Avoid glazed ceramic tiles in this spot, as they tend to be slippery. Also, remember that non-vitreous tiles are not suitable for the shower floor. Only impervious or vitreous tiles should be used in the shower area, as they are relatively more waterproof.
When water penetrates from tile joints, it leads to debonding of tiles and you certainly don't want that to happen. When you consider a grout there are different types of grouts which you must choose from. For instance, for areas where water is a concern, you must pick water-resistant tile grouts.
For flooring, Vitrified tiles are the best bet since they are durable and can withstand heavy traffic. For walls, you can choose either ceramic or porcelain tiles as they are non-porous or do not absorb stains.
Instead of choosing different tile colors, go for different shapes instead. Select two tile designs in the same color and use the grout lines to create patterns. To add more detail to the tiles, choose a grout color that contrasts with the tile. For instance, choose white subway tiles and black grout.
A small bathroom can actually benefit from a large tile. With fewer grout lines the walls and floor are less cluttered and the room visually expands.