
Plastering is essential to building and remodelling, whether you're a do-it-yourselfer or a professional. The success and efficiency of your plastering job will be directly proportional to the tools you use.
This blog post will cover the basic plastering equipment necessary for both amateurs and professionals to achieve quality results.
What Is Plastering?
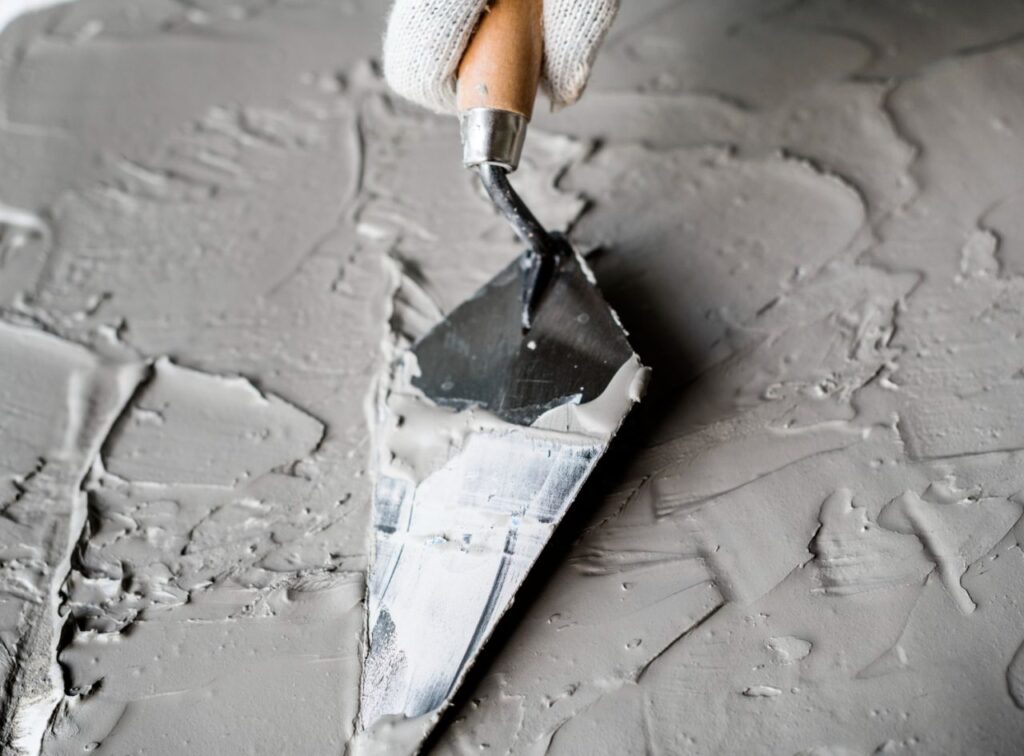
Let's get a quick overview of what plastering entails before we get into the necessary equipment. Plastering is a method for finishing walls, ceilings, and other surfaces to a uniform smoothness. Plastering is applying a mixture of plaster, sand, and water to create a smooth surface that can be painted or wallpapered.
Plastering has many applications. It serves as a foundation for subsequent treatments by masking any unevenness in the underlying surface. Second, it makes the surface tougher and less prone to wear and tear. Plastering, by providing a uniform and aesthetically pleasing surface, also enhances the aesthetic quality of a room.
Both do-it-yourselfers and skilled tradespeople can successfully plaster a wall. Homeowners can learn and practise basic plastering techniques, but hiring a professional may be best for more complex or extensive projects.
Important Plastering Tools For Do-It-Yourselfers And Professionals
Having the proper equipment is essential if you want to plaster like a pro. These instruments make it easier to apply plaster, but they also guarantee accuracy, uniformity, and longevity in the finished product. So let's check out the essential equipment experts and amateurs use.
Plastering Trowel
Plastering a wall or ceiling requires special tools, the most important of which is a trowel. Unfortunately, thousands of trowels are available, making it difficult to find the right one for you. However, the trowels included in our apprentice kits are all high-quality options from reputable manufacturers.
Plastering is best learned with a 14-inch trowel, which strikes a good balance between size and control and is the tool we recommend for beginners. When applying plaster to a wall, a trowel that is too small will make it difficult to maintain a steady hand, while a trowel that is too large will make it difficult to perfect your technique.
It will take some practice to become proficient with a plastering trowel, but you can move on to better equipment once you do.
Please don't skimp on the plastering trowel; it's responsible for the project's final look and should, therefore, be of high quality.
Hawk
Plastering with a hawk is like painting on a tray or a pallet. The hawk is a square tray with a handle that goes under the tray and is used for carrying food and drinks. Plaster that is still wet is transported using the hawk. The expert plasterer can reach down with the trowel, scoop some wet plaster, and apply it to the wall.
The most important aspect of choosing a hawk is finding a comfortable handle for your hand, as hawks come in a wide range of sizes. If you don't have a good hawk, transporting wet plaster can become a burden.
Mixing Bucket
You can only make plaster if you have a mixing bucket. Check out Wickes' 75-litre bendable builder's bucket as an example of a suitable bucket size. Make sure the bucket is spotless before mixing the plaster, as doing so may result in hard lumps that will mar the final appearance.
Sandpaper And A Sponge
As the plaster dries, sandpaper is ideal for removing any rough spots. If you want better results, try using finer grit sandpaper. Just as the plaster begins to set, you can wet a sponge and use it to smooth it out into a professional finish.
Utility Knife
The plastering trade is one of many where a utility knife is indispensable. The utility knife will be handy for scoring walls and opening plastering supplies.
The blades on utility knives can be swapped out and are of higher quality overall. So a plaster expert will always keep a high-quality utility knife in their tool belt.
It's crucial to find an easily transportable and sturdy device, as this one will be used frequently.

Handsaw
When you're a plaster expert, you know that you may need to cut and fix wood before you can apply plaster. Drywall sheets can be cut using a handsaw to make smaller pieces.
Pick an implement that has a fine edge and is a breeze to handle. For example, you won't need a huge saw; a smaller one will be easier to handle and more practical.
Handsaws need to have comfortable handles in order to make them easier to use.
Plasterers Stilts
You can get more done in less time with the help of plasterers' stilts because you won't have to waste time climbing ladders.
A ladder can accomplish the same task, so they are more of a luxury than a necessity. However, getting some practice before attempting to walk on a plasterer's stilts is important, or you could end up in A&E with a serious injury.
Hammer
Plaster experts can only do their jobs with a high-quality hammer. Plaster can be broken into manageable chunks and pried out of unwanted places with a hammer. One of the best hammers is a claw hammer; another good option is a drywall hammer.
Hammers can be compact and lightweight while still up to the task when plastering.
Paint Brush
The finishing touches on a plaster wall require a high-quality paintbrush. However, you can get a more professional-looking complete finish by using a wet paintbrush to clean up the wall at the end.
Paintbrushes with wider, more rounded bristles hold more water and are easier to use quickly. One of the best options available is a paintbrush of about 4 inches in size.
Mortar Pan
A mortar pan is a portable mixing station for small batches of plaster that can be used anywhere.
Polyethylene is the material of choice for a mortar pan. The polyethene construction of the mortar pan makes cleanup a breeze after use. Additional boards for use with the mortar pan are available.
Plasterers often prefer mortar pans because their angled design facilitates tidiness and cleanliness.
Finishing Trowel
A finishing trowel is a tool to achieve a uniform and polished wall surface. There are typically several stages when smoothing plaster, with the finishing trowel used in the final stage.
Professional plasterers tend to be picky about the final trowel they use. However, plastering is an art form, so having the right equipment is crucial to achieving the desired results.
Corner Trowel
There are both outdoor and indoor variations of corner trowels. V-shaped trowels are useful for finishing off corners and creating clean lines around things like window sills and door jambs.
When compared to a standard flat blade, they make quick work of corners and leave a polished appearance.
Water Brush
All apprentices must have access to a water brush, as this tool is used at the end of the plastering process to achieve a smooth, professional finish on the final coat.
Water brushes also save plastered walls from being ruined when you've fallen behind schedule and only have time for a quick wipe with the tool.
Water brushes are commonplace, but using a low-quality imitation can save your plaster and time. So instead, buy a quality brand-name tool from this vendor.
Safety Glasses
Many plaster professionals are accustomed to working without extensive protective gear. Unfortunately, this is a terrible plan.
Plaster dust and shards can fly up and poke you in the eye when you're working with it quickly. This is crucial for any tasks that require you to reach up high.
A variety of safety glasses and goggles are available that will not only shield your eyes from harm but also keep you comfortable. To ensure that your protective eyewear is worn consistently, it should be comfortable.
Mixing Paddle
Plaster is mixed with a mixing paddle. You will have more success smoothing out the plaster with a mixing paddle.
Plastering experts must check the consistency of the mixture several times before applying it to the wall. Plaster, paint adhesion, and the overall appearance of the finished product are all susceptible to long-term damage if the consistency is off.
You can find mixing paddles in various sizes and shapes, so you can pick one that's ideal for your specific task.
Angle Float
Plastering experts can only do their jobs with an angling float. However, the vast surface area may be easily smoothed and applied with an angle float's handle.
The ergonomic design of most angle floats makes it simple to maintain precise control of the tool throughout the workday. Consider getting a variety of float sizes to use on various projects. The angle float is not limited to use on flat surfaces, however.
Jointing Knife
A jointing knife can repair the Plasterboard with holes or gaps between the sheets. Because of the blade's width and flexibility, you can cut wider sections than a standard knife without sacrificing precision.
If you want a seamless ceiling made of plasterboard, you'll need a jointing knife to cover the seams.
Power Drill
The mixer also requires the use of a power drill. Plaster in a bucket can be stirred with the help of a power drill and a mixer.
A bucket of plaster can be stirred and mixed much more quickly and efficiently with the help of a power drill. However, as previously discussed, plaster must be thoroughly and professionally mixed for the best results.
A wide selection of power drills is available, but for larger jobs, you should get one with a lot of torque.
The Benefits Of Using The Proper Plastering Tools
There are many advantages to using the proper plastering tools for amateurs and experts. Let's check out some of the main benefits.
Efficiency And Time Savings
Plastering is a labour-intensive process, but if you have the right tools, you can perform more effectively and finish the tasks at hand in a shorter amount of time. With the correct equipment, you may get professional results while expending less effort since the application can be made more smoothly, coverage can be achieved more quickly, and surface levelling can be accomplished more easily.
Increased Durability
Using the right equipment guarantees the longevity of plastered surfaces. You can reduce the likelihood of cracks, sagging, and peeling in finished plaster by using tools specifically for plastering. Plastering that stands the test of time protects the structure for as long as possible.
Increased Security
Safety features are standard on all plastering tools worth their salt. They help you hold on tighter, have ergonomic grips, and reduce stress on your hands and wrists. To lessen the chances of experiencing accidents or injuries caused by repetitive strain, if the tools you use emphasise safety, this will enable you to work comfortably and confidently.
Increased Precision And Consistency
Selecting the right plastering tools is essential for getting a smooth, even coat. Better control is attained with instruments like trowels and floats, allowing for uniform layering and polished finishes. This means a higher quality, more polished final product that looks great.
Material Waste Has Been Reduced
Plastering waste can be kept to a minimum with the help of the right equipment.
Plaster can be applied and distributed more efficiently with the help of tools like hawks and trowels, resulting in less waste.
In addition to being financially beneficial, this also helps the environment.
Professional-Quality Results
Investing in high-quality plastering tools is essential for achieving a professional finish. If you want your plastering job to turn out as expected, whether you're a do-it-yourselfer or a professional trying to impress clients, you need the right equipment. Your projects' value and reputation will rise due to your hard work producing professional results.
Conclusion
Plastering is essential in construction and renovation, and the quality and speed of the finished product depend heavily on the instruments employed.
Plastering entails putting a flat surface of plaster, sand, and water in order to paint or wallpaper it. It's the first step in a series of treatments that will ultimately make the surface harder and more wear-resistant.
Homeowners can undertake simple plastering themselves by learning the basics and then contacting a professional for more complicated work.
A plastering trowel, hawk, mixing bucket, sandpaper, utility knife, handsaw, plasterers' stilts, hammer, paintbrush, and mortar pan are some of the most crucial tools for both amateur and professional plasterers. Plastering novices should start with a 14-inch trowel, while professionals can use anything from a 16- to 18-inch tool.
When creating plaster, a mixing bucket is an indispensable instrument. A 75-litre flexible builder's bucket is the right size, and finer grit sandpaper works best for smoothing out imperfections.
For scoring walls and opening plastering materials, a utility knife is indispensable, as is a handsaw with a sharp blade and sturdy grips. If you're a plasterer, you might be interested in trying out some stilts to help you get more done in less time.
To break plaster into manageable chunks and pry it out of unwelcome places, a good hammer is required. Paintbrushes with wider, more rounded bristles retain more water and are easier to use rapidly; in contrast, a claw hammer or drywall hammer can be small and lightweight.
Mortar pans are indispensable for both amateur and professional plasterers because they provide a portable mixing station for small batches of plaster.
Polythene is the material of choice for mortar pans because of how simple they are to clean and maintain. Plasterers use angled mortar pans because they are easier to keep clean and tidy while working.
The use of finishing trowels is crucial for creating a smooth and even finish on walls. A V-shaped trowel is helpful for smoothing out edges and making sharp corners along door and window sills.
For a flawless final coat, water brushes are a must-have. Protecting one's eyes and keeping one's comfort level high during the plastering process requires the use of safety glasses or goggles.
Plaster can be mixed and smoothed with mixing paddles and applied using angle floats. If your plasterboard has holes or spaces between the sheets, you can fix it with a jointing knife.
Using a power drill to thoroughly combine the plaster in a bucket allows for a more even and rapid application. There is a vast variety of power drills to choose from, but for heavier work, one with a high torque rating is ideal.
Using the right equipment can make your plastering job faster, easier, stronger, safer, more precise, and more uniform. They also help cut down on wasteful material usage, which is great for the end result.
Investing in high-quality plastering tools is crucial for producing professional results, which in turn increases the value and reputation of a project.
FAQs About Plastering Tools
If you notice cracks in the plaster after it has dried, it may indicate issues with the application or underlying surface. Small cracks can be repaired using a filler or joint compound, then sanding and plaster reapplication. However, it is best to consult a professional plasterer to identify and address the underlying causes of larger or recurring cracks.
Plastering can be done as a DIY project, especially for small areas or simple repairs. However, for larger or more complex projects, hiring a professional plasterer with the necessary skills and experience is advisable to ensure a high-quality finish.
Some common issues during plastering include uneven surfaces, air bubbles, cracking, or improper adhesion. These issues can be minimised by using the right tools, following proper techniques, and ensuring the correct consistency of the plaster mixture.
The drying time of plaster can vary depending on several factors, such as the type of plaster used, the thickness of the application, and the ambient conditions. Generally, the plaster takes around 24 to 48 hours to dry completely. Therefore, it is important to allow sufficient drying time before applying any additional treatments or finishes.
To maintain plastered surfaces, avoiding excessive moisture or water exposure is important, as this can lead to damage or deterioration. Regular cleaning with a soft brush or cloth is recommended to remove dust or debris. In case of minor damages, such as scratches or small cracks, timely repairs should be carried out to prevent further deterioration.