
Plaster wall renovation is a chore that many homeowners find difficult. Plaster walls lose their charm as they develop flaws like cracks, holes, and uneven surfaces over time. In addition, removing wallpaper or paint from plaster walls can be an added challenge.
Plaster walls can lose their aesthetic value and structural integrity due to these problems, leaving homeowners asking what they can do about it.
You may easily update your plaster walls with the help of modern technologies. Before attempting to repair cracks and holes, cleaning the area and removing debris is important.
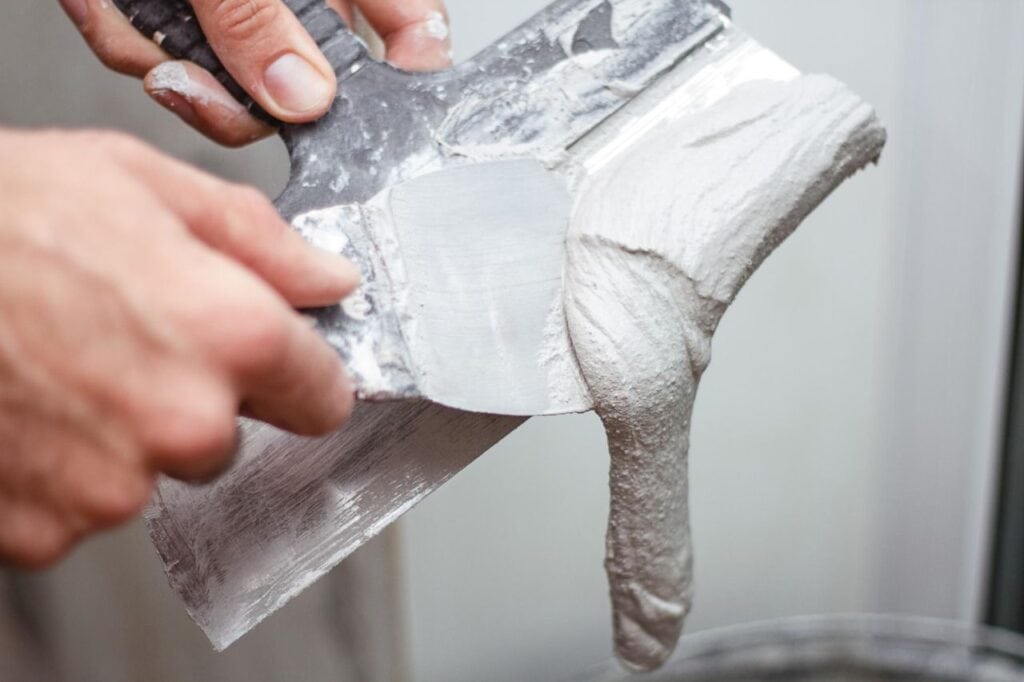
Then, using a putty knife, evenly cover the damaged area with a high-quality patching solution for plaster repair. If you want a smooth result after sanding, wait until the compound is dry. To make the patch seem like the rest of the wall, prime it first and then paint it.
It is important to be careful and delicate while removing old wallpaper or paint off plaster walls. First, use a scoring instrument or sandpaper to make tiny perforations in the wallpaper or paint.
Since the adhesive is exposed, it can be easily loosened by any moisture or chemical stripper. When the adhesive has softened, use a putty knife or a wallpaper scraper to remove the old wallpaper or paint carefully.
To avoid damaging the underlying plaster, remember to work in small areas. After thorough washing, you can apply your finish of choice.
If you need help with a plaster wall renovation, this article is your complete guide to getting the job done right.
Listed are some of the most frequent issues homeowners have, along with detailed explanations of how to fix them.
Restoring the look and strength of your plaster walls is easy with our solutions, whether dealing with cracks, holes, or peeling wallpaper or paint.
The History Of Plaster
Around 12,000 B.C. is when limestone was first used. Until the Second World War, it was a prevalent wall-covering method.
The wood went through a three-coat treatment. Lath is soaked in water before being coated so it doesn't wick away too much of the plaster's liquid.
Plaster can now run through the lath from the sides, providing additional support.
After World War II, however, builders switched to a quicker-drying material to coat walls. They came up with a drywall to cover the walls without worrying about them becoming wet.
How Can I Explain Plaster Walls?
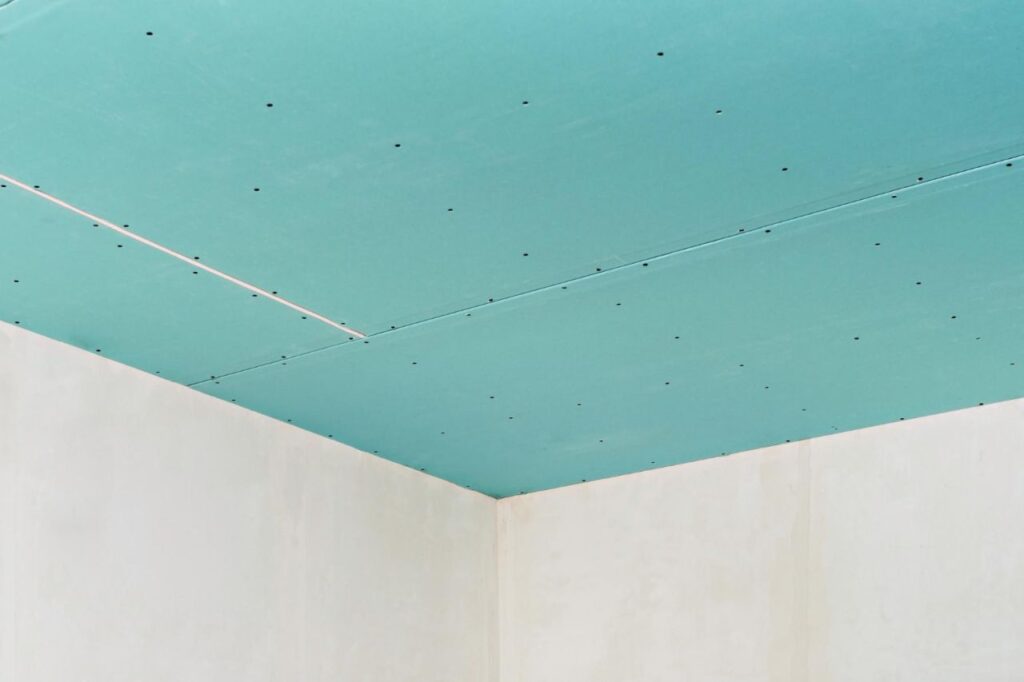
Plaster walls, also known as internal walls, are constructed by laying a coat of plaster over lath or a solid basis, such as masonry, brick, or concrete. Plaster is made from gypsum, sand, and water, and it hardens as it dries after being placed on a wall while still wet.
The result is a robust, smooth surface ready for further decoration.
Before the invention of drywall, plaster walls were a standard means of building interior walls. Older houses and buildings typically have them. Plaster is a great insulator against noise and temperature fluctuations and is also fire resistant.
Thin strips of wood, known as a lath, are commonly fastened to the wall studs in a plaster wall's construction. Plaster is then troweled onto the lath in many thin layers until the desired thickness is reached. It is standard practice to wait for each layer to dry before applying the next. The finished product is a smooth, even wall.
Plaster walls require skill and care to install so the procedure can take longer than drywall. However, they have a few benefits, like enhanced longevity and better soundproofing.
Additionally, holes or cracks can be patched or filled with new plaster with little effort.
Drywall's ease of use and low price have made it a staple of modern buildings. Plaster walls are more commonly associated with older homes and historic buildings, although they can also be seen in modern residences as ornamental accents.
Filling in Tiny Cracks
First, use a utility knife to scrape away any loose plaster from the area to be plastered. After removing the flaking plaster, you can clean up the mess with a damp sponge or a vacuum.
Plaster cement should then be mixed per the manufacturer's directions or used in its pre-made form. To have the right consistency, the mixture must be properly prepared.
After the surface has been cleaned, use a filling blade to apply the initial coat of plaster. Follow the manufacturer's instructions for drying time and duration. The drying time could be different for different products.
It is suggested that a second coat of plaster be applied after the first has dried.
After the second coat has dry, you can sand the repaired area using extremely fine grit paper. You can blend the filled area seamlessly with the rest of the wall by sanding afterwards.
Make a series of holes in the plaster at varying distances. By measuring the penetration depth, you can tell if the plaster has come loose from the lath. If it's loose, we'll need to use screws to assemble it. When this fails, additional holes are drilled, and the adhesive joint material is injected. The clamping washer is then used to apply pressure on the plaster surface. After that, you just let the mixture dry.
Fixing Big Cracks
As a first step in replacing a damaged section of plasterboard, you will need to cut out a new section with the same thickness as the old one. You should also ensure it's big enough to cover the damaged area. A screwdriver hole can be punched in each corner of the wall where the new item will be mounted after its outline has been drawn.
Use a keyhole saw to follow the contour, carefully avoiding pipes or wires. Using a stud finder can help you avoid hitting any frames while you work. Finally, carefully disassemble the severed parts and remove them from the premises.
To prepare the wall for the new plasterboard, take a plank of wood and screw it to the rear of the studs. To prevent unsightly holes in the wall, countersink the screws.
Place the new piece of plasterboard in the opening and secure it with countersunk screws after applying glue to the timber backing. This keeps the plasterboard steady on its wooden backing. Joint tape should be applied along the seam without overlapping.
Cover the tape and screw holes with a thin layer of filling compound and smooth it with a wide knife to finish the repair. After it dries, you can sand it down to the same level as the rest of the wall. To make the repair less obvious, apply a second coat of filler with a wider spread and sand it using fine-grit paper in a circular motion. This will aid in producing a more refined result.
Analysing the Source of the Problem
There are numerous potential causes for the plaster to deteriorate. Finding the source of the damage is crucial before attempting to restore the old plaster.
Water damage, house settlement, weather-related movement, and even vibrations from a door can all cause problems for older plasterboard. Damage can take many forms, including paint flaking off walls, plaster crumbling, and lath separation.
In addition, the uneven settlement of the house may have contributed to the severity of the fissures. If that's the case, you should get in touch with a structural engineer right away.
Repairing The Peeling Paint
The paint often chips off of the older plaster houses.
The buildup of paint coats over time is frequently to blame when plaster begins to peel. The first step in fixing the problem is to remove the old paint.
The paint can be scraped off using a plaster knife and a wallpaper steamer. After scraping off the old paint, quickly wipe down the plaster with a damp towel. Be careful not to soak the wall. Only bother painting again for another day once the wall has fully dried.
Unlocking The Secrets To Flawless Restoration
Do you have to renovate plaster walls, which sounds like a huge project? You may stop searching now that we've revealed the definitive approach to restoring your plaster walls to their former beauty. We can help you regardless of whether you're a do-it-yourself expert or a novice homeowner looking for advice.
We at Plasterer Melbourne know how difficult it may be to work on plaster walls.
It's easy to feel overwhelmed by the world when your environment is marred by cracks, crumbling surfaces, and other irregularities.
With the correct tools, supplies, and creative flair, however, you can turn your walls into works of art that dazzle and captivate.
Our staff has spent years perfecting the art of plaster wall restoration, allowing us to guarantee the highest quality results for every project. This post equips you with the knowledge, skills, and confidence you need to tackle any home improvement project. Resolving the Problem Areas:
Tackling Damaged Surfaces
Cracks, chips, and other deterioration are common problems for plaster walls over time. We share your frustration and longing to see these walls restored to their former glory. Our manual will provide you with tried-and-true methods for dealing with these problems, allowing you to repair damaged plaster surfaces successfully.
Navigating Crumbling Plaster
Plaster that is crumbling can be distressing, leaving homeowners unsure of what to do. Don't worry; we'll help you stabilise and fix the cracking plaster so you can feel safe and secure in your remodelling.
Achieving a Smooth Finish
Uneven surfaces and ugly defects can diminish the overall aesthetic appeal of your plaster walls. In this piece, we'll show you how to paint your walls to look as good as new with a smooth, faultless finish. Smooth off the rough edges and welcome the smooth, sophisticated look.
How Can We Help?
When it comes to plaster wall restoration, no one does it better than Plasterer Melbourne. Thanks to our depth of expertise and in-depth understanding of the requirements, we are the go-to experts in this industry. Our assistance will look like this:
Instructional Manuals That Cover Every Detail
You can confidently tackle the renovation procedure with the help of the extensive, user-friendly guidelines provided in our article. We will help you through every step of the process, from determining the extent of the damage to putting on the finishing touches.
Expert Techniques and Tips
Please use our expertise as we reveal tried-and-true methods perfected throughout countless projects. Using these guidelines, you can accomplish tasks normally reserved for experts.
Recommended Materials and Tools
When renovating your plaster walls, we know how crucial it is to use the proper equipment. Our manual will suggest the best tools for the job, guaranteeing you have all you need to succeed.
Conclusion
Plaster wall renovation is a difficult task for many homeowners, but modern technologies can help. To repair cracks and holes, cleaning the area and removing debris is important.
To remove old wallpaper or paint, use a scoring instrument or sandpaper to make tiny perforations and use a putty knife or wallpaper scraper to remove it carefully.
After washing, apply your finish of choice. Plaster was first used around 12,000 B.C.
and was a prevalent wall-covering method until the Second World War. Plaster walls are constructed by laying a coat of plaster over lath or a solid basis, such as masonry, brick, or concrete. Plaster is made from gypsum, sand, and water and hardens as it dries.
Older houses and buildings typically have them, and they are a great insulator against noise and temperature fluctuations and fire resistant. Plaster walls require skill and care to install, but they have benefits such as enhanced longevity and better soundproofing.
Filling in tiny cracks involves scraping away any loose plaster from the area to be plastered, mixing plaster cement, applying the initial coat of plaster, and following manufacturer's instructions for drying time and duration.
The most important details are that a second coat of plaster should be applied after the first has dried, sand the repaired area with fine grit paper, make holes in the plaster at varying distances, inject adhesive joint material, and let the mixture dry.
To fix big cracks, a new section should be cut out with the same thickness as the old one and secured with countersunk screws. Joint tape should be applied along the seam without overlapping. Cover the tape and screw holes with filling compound and smooth it with a knife.
Analyse the source of the problem and remove the old paint using a plaster knife and a wallpaper steamer. Unlock the secrets to restoring plaster walls to their former beauty by scraping off the old paint and wiping down the plaster with a damp towel.
Plasterer Melbourne has spent years perfecting the art of plaster wall restoration, allowing them to guarantee the highest quality results for every project.
This post equips you with the knowledge, skills, and confidence you need to tackle any home improvement project. It provides tried-and-true methods for dealing with cracks, chips, and other deterioration, navigation of crumbling plaster, and achieving a smooth finish.
Plasterer Melbourne provides instructional manuals that cover every detail, expert techniques and tips, and recommended materials and tools.
Content Summary
- Plaster wall renovation can be challenging and homeowners often face issues like cracks, holes, and uneven surfaces.
- Cleaning the area and removing debris is important before repairing cracks and holes in plaster walls.
- High-quality patching solution should be used for plaster repair, followed by sanding and priming before painting.
- Removing old wallpaper or paint from plaster walls requires careful and delicate techniques.
- Scoring instruments or sandpaper can be used to loosen the adhesive, and a putty knife or wallpaper scraper can remove the old wallpaper or paint.
- Plaster walls are constructed by laying a coat of plaster over lath or a solid basis like masonry, brick, or concrete.
- Plaster is made from gypsum, sand, and water and hardens as it dries, resulting in a robust and smooth surface.
- Plaster walls provide insulation against noise, temperature fluctuations, and are fire-resistant.
- Plaster walls require skill and care to install but offer enhanced longevity and soundproofing.
- Drywall has become more popular in modern buildings, while plaster walls are associated with older homes and historic buildings.
- Steps for filling in tiny cracks include scraping away loose plaster, cleaning the area, applying plaster cement, and sanding for a smooth finish.
- For fixing big cracks, a damaged section of plasterboard is cut out and replaced with a new one using screws and glue, followed by applying joint tape and filling compound.
- Identifying the source of damage is crucial before attempting to restore old plaster, as it can be caused by water damage, settlement, weather-related movement, or vibrations.
- Peeling paint on plaster walls can be caused by the buildup of paint coats over time and can be fixed by scraping off the old paint and applying a new coat.
- Plasterer Melbourne provides a complete guide to renovating plaster walls, suitable for both experienced individuals and novice homeowners.
- The guide covers various problems encountered in plaster wall restoration, including cracks, crumbling plaster, and achieving a smooth finish.
- Plasterer Melbourne offers instructional manuals with detailed guidelines for every step of the renovation process.
- The guide provides expert techniques and tips based on years of experience in plaster wall restoration.
- Recommended materials and tools are suggested to ensure successful plaster wall renovation.
- The history of plaster dates back to around 12,000 B.C. and it was a prevalent wall-covering method until the Second World War.
- Plaster walls consist of multiple layers applied over a lath, providing additional support.
- Plaster walls require more time to install compared to drywall but offer benefits such as longevity and soundproofing.
- Small holes can be made in plaster to determine if it has come loose from the lath, and if needed, screws and adhesive joint material can be used for reinforcement.
- Damaged plasterboard can be replaced by cutting out a new section and securing it with screws and glue, followed by applying joint tape and filler for a seamless repair.
- Various factors can cause plaster deterioration, including water damage, settlement, weather-related movement, and vibrations, requiring identification before restoration.
- Peeling paint on plaster walls can be resolved by removing the old paint and applying a new coat once the wall has dried.
- Plasterer Melbourne offers expertise in plaster wall restoration and provides detailed guidance for each step of the process.
- The guide shares techniques and tips honed through extensive experience in plaster wall renovation.
- The importance of using the right materials and tools for plaster wall renovation is emphasized in the guide.
- Plasterer Melbourne is a trusted resource for plaster wall restoration, offering comprehensive support and assistance.
FAQs About Plaster Walls
Yes, you can apply a skim coat to a plaster wall to create a smooth and even surface. Start by cleaning the wall and applying a bonding agent. Mix the skim coat compound according to the manufacturer's instructions and apply it in thin, even layers, using a trowel. Sand the surface lightly between coats, and once dry, prime and paint the wall.
If the plaster on your walls is crumbling, it's important to stabilize the surface before proceeding with any renovations. Remove loose and deteriorated plaster, then apply a plaster bonding agent or primer to help the new plaster adhere. Follow up by applying new layers of plaster, allowing each layer to dry and cure before proceeding.
To remove wallpaper from plaster walls, start by scoring the wallpaper with a scoring tool or sandpaper to allow the removal solution to penetrate. Apply a wallpaper removal solution or a mixture of warm water and vinegar, and let it soak for a few minutes. Then, use a scraper or putty knife to gently peel off the wallpaper, working from the edges. Clean the walls thoroughly and allow them to dry before proceeding with any further renovation.
Yes, you can paint directly over plaster walls. However, it is important to prime the surface first to ensure proper adhesion and an even finish. Use a high-quality primer suitable for plaster surfaces, and follow it up with your desired paint color for a fresh and durable result.
Start by removing any loose or damaged plaster using a putty knife or scraper. Fill any cracks or holes with a suitable patching compound, and sand the surface to create a smooth and even finish. Finally, clean the walls thoroughly to remove dust and debris before proceeding with painting or applying new finishes.