You have entered the exciting world of plastering! Before beginning any home renovation project or repairing damaged walls, knowledge of the equipment required for installing plaster is essential.
Achieving a beautiful finish that completely changes the look of your room is possible with the appropriate tools and methods.
This tutorial will walk you through installing plaster from start to finish, covering everything you need to know to become an expert.
Get out your measuring tape because I'm about to spill the beans on making your walls look like a million bucks with plaster.
Materials and Equipment for Plastering
Hammer
A reliable hammer is an essential tool for any aspiring plasterer.
Claw hammers and drywall hammers are the two most practical varieties. You can use either one to chip out plaster sections and reattach or eliminate loose lath.
Drywall hammers are excellent plastering tools because of their curved heads and hatchet-style ends.
Handsaw
Plasterers have been using wood lath for decades. In the traditional method, a sharp handsaw is needed to cut the tiny strips of wood used as a base for plaster.
It could also be useful for removing chunks of dated wallboard in preparation for new door or window installations or other refurbishment tasks.
Spackle Knife
If you're doing a lot of plastering, you might think spackle knives aren't necessary, but you'd be wrong. Before attempting to repair, run a robust spackle knife across any cracks or uneven areas.
Doing this before applying new mud flattens out any bumps or chips in the old plaster. The end effect will be a lot more uniform and polished appearance.
Bucket
Although it may seem simple, a good five-gallon bucket is required for plastering tasks. The plaster will be mixed in the same bucket multiple times. Low-quality, fragile buckets will break after repeated washings, knocks, and bangs on the job site.
Wet, muddy plaster is even heavier than dry plaster. A weak bucket won't cut it here.

Utility Knife
It's hard to exaggerate the value of a good utility knife. You'll need it to open bags of plaster mix, score the wall, and cut drywall patches for a plastering project.
A decent utility knife is essential; keep the blade sharp. It's safer to use a blade that's been sharpened than one that's dull or damaged.
Paddle Mixer
Paddle mixers are the unsung heroes of every mud project. Paddle mixers are attachments for drills that make mixing plaster in multiple buckets quicker and easier on the back.
Their construction makes mixing swiftly in wet and dry components like plaster easy. Plasterers and do-it-yourselfers benefit from paddle mixers since they easily break up clumps and allow a wide range of consistency adjustments.
Bucket Trowel
Removing wet, soupy plaster from a 5-gallon bucket can be difficult and messy. To facilitate this, bucket trowels feature slanted handles and expansive working surfaces. They can be run around the inside of the bucket's rim to break up the dry ingredients before mixing.
Hawk
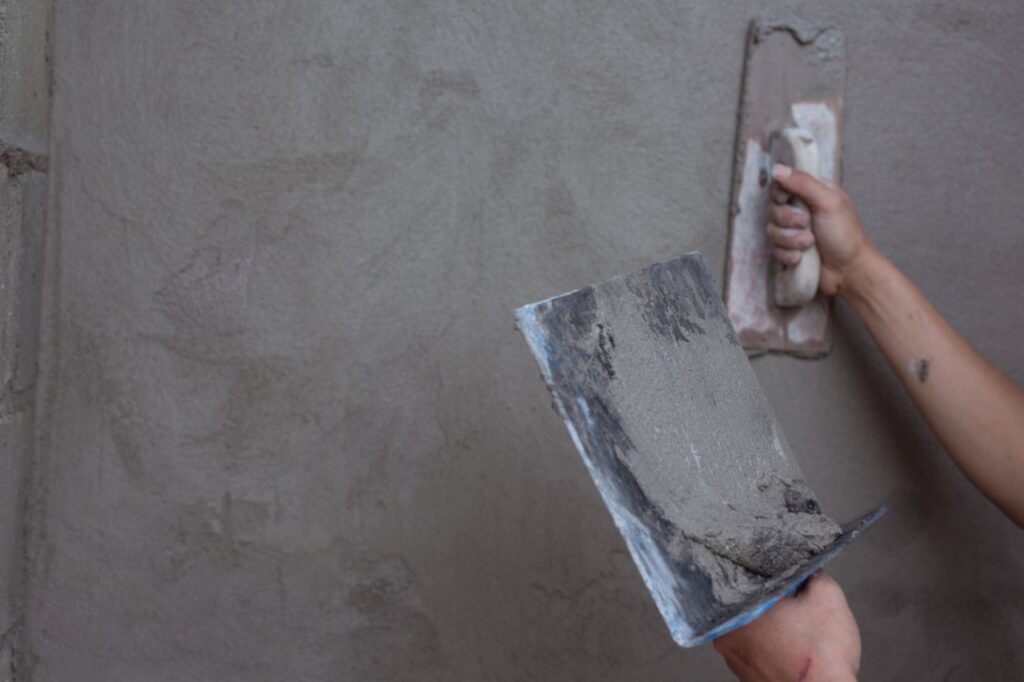
Plaster hawks are flat, rectangular tools having a central handle, and they are used to transport wet plaster. With its aid, the plasterer can load the mud more neatly and uniformly onto the trowel.
While a seasoned plasterer may make it look easy to butter and clean their trowel, newcomers may have trouble getting into the swing of things at first.
Trowel
Plastering is a job that calls for a sturdy trowel. Professional plasterers will have various trowels tailored to different tasks, while amateurs can get by with just one solid rectangular trowel. A 12-inch version should do the trick.
Sand the trowel's edges down so they aren't so sharp when you first use it. The wall will show fewer lines and trowel marks in between coats.
Paint Brush
Plastering's last smoothing phase calls for a broad, heavy-bristled 4-inch paintbrush. If you wet the wall first, you may use a clean trowel to easily smooth any rough spots. Cleaning the crevices of a mixing paddle or trowel is another possible application.
Plumb Bob
The vertical levels of a wall can be checked with an instrument called a plum bob. This plastering tool takes the form of a bob, or solid cone, with a threaded point at one end.
The Floating Rule
Between each new screen, the plastered surface is checked for level with a floating rule.
Sponge
The plastered surface is smoothed with a sponge. A damp square sponge is used to balance out the plastered surface.
Tube height
The upper portion of the plastered surface is brought to a uniform and tidy finish using a tube level. A tube level is a clear plastic tube or thin water-filled pipe. Because water always finds a level, this device is effective.
If the surfaces are parallel, the water level in the tube will remain in the same vertical plane when held at either end.
Thread
The plaster level is checked with a roll of thread to ensure uniformity between buildings.
As shown in the figure below, the thread is held on the perimeters of both buildings when the procedure is carried out.
Spirit Level
The spirit level is indispensable and useful equipment for any plasterer since it facilitates the production of a level surface.
A water tube is used to measure the height above ground. You can also improve the quality of your work and achieve balance.
Step-by-Step Instructions for Plastering a Wall Like a Pro
Preparation
If you want to keep your floors clean and safe from plaster dust and debris, lay down a dustsheet before you start working on the wall (or walls). If you intend to plaster an older, more worn-out wall, ensuring the wall is dust-free and that any debris is removed is especially crucial.
Apply screen tape to any wall cracks or holes you detect. Using screen tape to cover the seams when plastering over freshly installed plasterboards.
Paint the wall(s) with PVA
Since PVA is also made of a latex-based product, like the glue used to seal the pores of the drywall, it can be applied to the walls before plastering to ensure that each layer dries at the same rate.
One component PVA to four parts water is the recommended dilution ratio.
The PVA mixture can be rolled onto a brush, applied to the wall and checked for even coverage. The initial coat of plaster can be put in after the wall has been covered with PVA glue.
Plaster should be mixed
Read the manufacturer's instructions for the plaster you plan to use for the project, and then mix the plaster accordingly.
Put on a mask before opening the bags of the stuff. Please put it in a large container of ice water and whisk it until it's the consistency of smooth, thick custard.
Plaster and water should be continuously mixed, but never the other way around.
Coat the walls with plaster
Once the wall or walls have been cleaned and the plaster mixture is ready, the first layer of plaster can be applied with the hawk board, trowels, and floating tool. Master the application by first practising on a spare piece of plasterboard.
Trowel the plaster onto the hawk board, and then use the float to smooth it onto the walls.
After each sweep, flatten the float and spread the plaster evenly upward.
Plaster should be applied organised, starting in the lower left corner and working up, filling an entire portion from bottom to top before going on to the next.
Always use minimal plaster and apply heavy pressure with the float to achieve a smooth finish and prevent flaking. Continue in this manner until the area is completely plastered.
Smooth and Skim
Please wait 20 minutes after applying the first coat of plaster for it to dry.
Then, use a trowel to even out the wall and remove any humps or bumps. Use the corner trowel to smooth the wall's edges and the floor and ceiling.
These are the most difficult spots to plaster evenly, so be sure you have the right equipment.
Scrape

While it's not strictly necessary to scrape the wall before applying a second coat of plaster, most experts recommend doing so for the best results. Using a devilling float, a tool for this purpose, is the quickest and easiest way to scrape the wall.
If you don't have access to one, an ordinary kitchen fork will scrap the walls. If this is not used, the first coat must be completely dry before the second can be applied.
Second Coat
Plaster the wall(s) for the second and last time. Add extra water to the plaster mixture to make it thinner so it may be poured. Apply a 2 mm coat of plaster on the wall and let it cure slightly.
Final touches
Polish the plaster once it has dried slightly. Use a spray gun to apply water on the walls. Spray the edges of the plaster and then smooth it out with the trowel, working from the inside out. To complete, smooth out the wall by running a clean float along its length. You can sand the plaster down to eliminate the excess when it is dry.
Decorating With Paint And Paper
Your wall(s) are now prepared for a new coat of paint or, if you choose, wallpaper. Before you paint, apply an undercoat to seal the surface. Similarly, if you're ready to hang wallpaper, use an adhesive instead. Make sure to prepare and seal the surface with two applications of glue.
FAQs About Plaster Installation
A plasterer's brush is used to wet the surface before applying plaster. It helps improve the plaster's adhesion to the wall or ceiling, ensuring a strong bond.
A measuring tape and plastering rule are essential for accurately measuring the dimensions of the area to be plastered. They help determine the amount of plaster required and achieve precise results.
A spirit level ensures that the plastered surface is perfectly horizontal or vertical. It helps in achieving a level finish and prevents any sloping or unevenness.
Depending on the wall or ceiling height, scaffolding or ladders are necessary for reaching higher areas during plaster installation. They provide a safe and stable platform to work from.
Additional tools such as a corner trowel, feather edge, notched trowel, or plasterer's stilts might be required depending on the specific plastering task. These tools help in achieving specialised finishes or accessing hard-to-reach areas.

