
Plastering over a damaged wall is easier than it looks; once you know what you're doing, the process becomes second nature.
Before you start, though, you'll want to figure out what's causing the peeling or bubbling in the first place; if it has anything to do with water, you'll want to call in the pros to take care of that first. Due to its invisibility, water is the bane of any remodelling or building project.
In this blog, we will explain how to repair a peeling ceiling and how to do it properly so that the repair lasts.
Is It Possible To Paint A Peeling Ceiling?
The ceiling can be painted over if it is peeling. However, before you paint over the peeling paint on the ceiling, you should investigate the problem.
You can't expect it to look good after a quick coat of paint. Rather than simply covering up problems, addressing and fixing the causes at their roots is often necessary.
If you don't fix the underlying problem, you'll have to keep fixing it in the future.
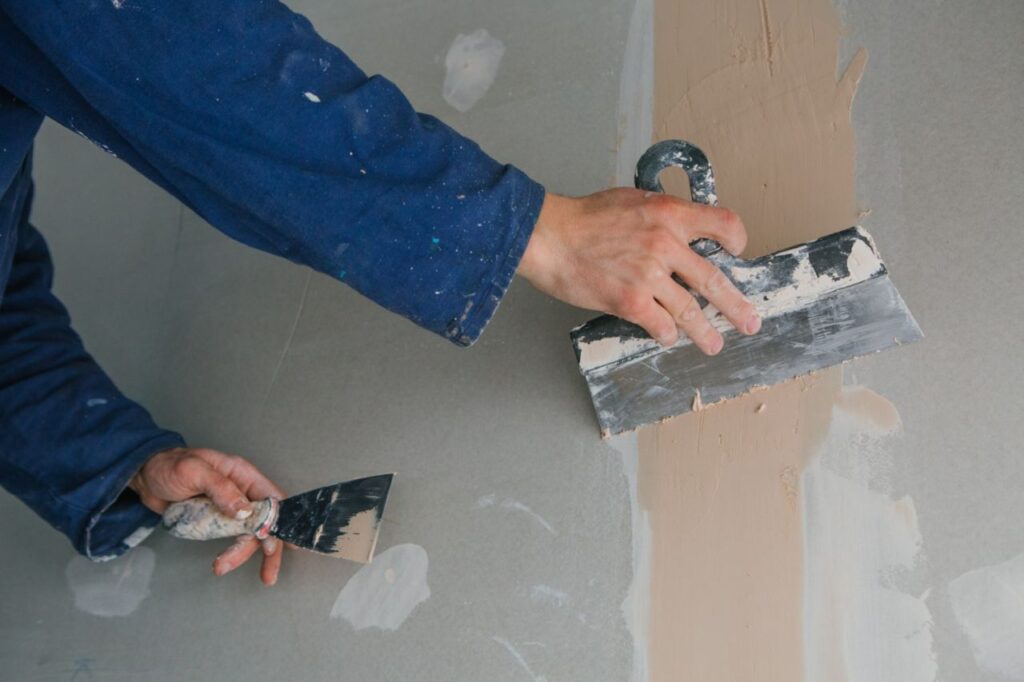
Fortunately, fixing ceiling paint that has begun to peel is essentially the same regardless of the root cause. You'll have to scrape off any loose paint and then fill and plaster the area.
The damaged areas will need sanding, priming, and sealing. Then, paint it again. When it comes to painting,
What Causes Plaster Ceilings To Peel?
The most frequently heard complaint is some variation of "My ceiling is peeling" or "Please tell us what we should do since our plaster ceiling paint is peeling off." Keep cool even though the world's final days are now at your house.
It is our expertise to repair ceilings with flaking plaster. Let's first examine the root causes of the problem before diving into solutions. A flaking ceiling plaster could be the result of several different factors. A water leak, fire, mould, or the house's age can all contribute to this problem.
Fixing the problem and avoiding further damage requires understanding these root causes. Common causes of peeling plaster ceilings include the following:
Water And Moisture Damage
Plaster peeling is often caused by water getting behind the walls. Water seeping into the plaster from leaky roofs, broken plumbing, or high humidity levels will eventually cause it to lose its grip and peel.
Insufficient Preparing Or Application
Peeling plaster ceilings can also be caused by improper installation or inadequate preparation. Plaster may peel over time if it isn't applied properly or if the surface isn't properly prepared (cleaned and primed).
Structural Movement
The settlement, temperature changes, and vibrations all contribute to the constant motion of buildings. Plaster can shift due to these movements, resulting in cracks and peeling.
Extreme Weight Or Pressure
Ceilings made of plaster can peel if subjected to too much pressure. For instance, plaster can crack and peel if there isn't enough support for heavy objects mounted or hung from the ceiling.
Age And Deterioration
Ceilings made of plaster are particularly vulnerable to the effects of time and weather, particularly in older homes. Plaster is more likely to crack, flake, and peel away from its supporting surface as it ages.
Poor Ventilation
When too much moisture accumulates in a room, it can weaken the plaster and compromise the structural integrity of the building. In addition, lack of ventilation allows moisture to build up, which encourages mould growth and reduces the plaster's ability to adhere to the wall.
Repairing Peeling Plaster Ceiling Paint
Peeling paint on a plaster ceiling is an annoyance that can be fixed efficiently if approached correctly. Here's what you should do if the paint on your ceiling is peeling:
1. Assess The Damage
Before beginning restoration work on a peeling plaster ceiling, always stock your ceiling's damage. Peeling can be repaired efficiently by pinpointing the root cause and assessing the underlying structure. Follow these directions to conduct a damage assessment:
Detecting The Source Of Peeling Plaster
First things first, if your plaster ceiling is peeling, figure out why. Some potential causes for this problem include water intrusion, faulty installation, or structural shifts. Next, look for damp spots, cracks, or flaking plaster and thoroughly inspect the area.
Examining The Amount Of Damage
Examining the extent of the damage is the next stage. For example, is the ceiling peeling in a localised area, or does it extend over a larger surface area? Is there a deeper problem, like cracks or sagging, that has yet to be discovered? The extent of the repairs and materials required can be estimated once the damage has been evaluated.
Considering The Underlying Structure
If you want to make sure your ceiling is stable, you need to check its foundation.
Check for cracks in the support beams or spaces between the plaster and lath to see if the structure has shifted.
You should seek the advice of a professional contractor or structural engineer if you have any concerns about the building's stability. Repairs will last longer, and future damage will be less likely if the underlying causes are addressed.
2. Prepare The Area
Getting the area ready before you start repairing your ceiling's peeling plaster is important. The repair process will go more smoothly if you take the time to prepare the area properly, protect the environment, and guarantee your safety. To get things ready, do as follows:
Getting the Tools and Materials You Need
Get together everything you'll need to fix your ceiling's peeling plaster. Common construction tools include scrapers, putty knives, sandpaper, sanding blocks, plaster adhesives, patching compounds, trowels, safety glasses, and dust masks. Painter's tape, plastic sheets, and drop cloths may also be needed to safeguard surfaces from drips and spills.
Cleaning And Protecting Furniture
As much of the room as possible should be emptied before you start working on the ceiling. Clear the area of any furniture or decorations that could get in the way of the repairs or be damaged in the process. Drop cloths or plastic sheets should be used to cover furniture that cannot be moved to prevent damage from dust, debris, or accidental splatters.
Taking Precautions For Safety
Plaster ceiling repairs can be dangerous because they require working at heights and with potentially toxic materials. It would be best to take whatever measures you think are necessary to protect yourself. Protect your eyes and lungs from dust by donning a mask and safety goggles. If you need chemical adhesives or compounds, read the label carefully and work in a well-ventilated area. When working at great heights, taking precautions and using safety equipment like ladders and scaffolding is important.
3. Remove Any Loose Paint
Removing the loose or damaged plaster is an important first step in repairing a ceiling that has begun to peel. This will lay a solid groundwork for the repair and guarantee a flawless final product. To successfully remove flaking plaster, try the following:
Scraping Or Putty Knifing Loose Plaster
After you've secured the area, you can remove the loose or peeling plaster from the ceiling with a scraper or putty knife. To repair a damaged area, begin at its edges and move inward. Use light pressure and an angled scraper to protect the surface beneath. It's important to completely remove any loose or flaking plaster, as even a little bit left behind can weaken the repair.
Securing The Surrounding Area
Take care to safeguard the area before you start removing loose plaster. Cover the floor, the furniture, and anything else in the area with drop cloths or plastic sheets. This will help collect any dust or debris that may be kicked up during removal, simplifying cleanup afterwards.
Keeping The Surface Smooth And Clean
After the loose plaster has been scraped away, the area can be smoothed with sandpaper or a sanding block. To blend the patch with the surrounding plaster, sand it down. This will allow the new plaster to adhere properly and smooth the transition. You can use a damp cloth or a vacuum with a brush attachment to clean up after sanding.
4. Ceiling Repair
After removing the loose plaster, the peeling plaster ceiling can be repaired. To achieve a long-lasting repair, it is necessary to employ suitable materials and methods. Here's how to patch the ceiling like a pro:
Using A Plaster Adhesive Or Bonding Agent
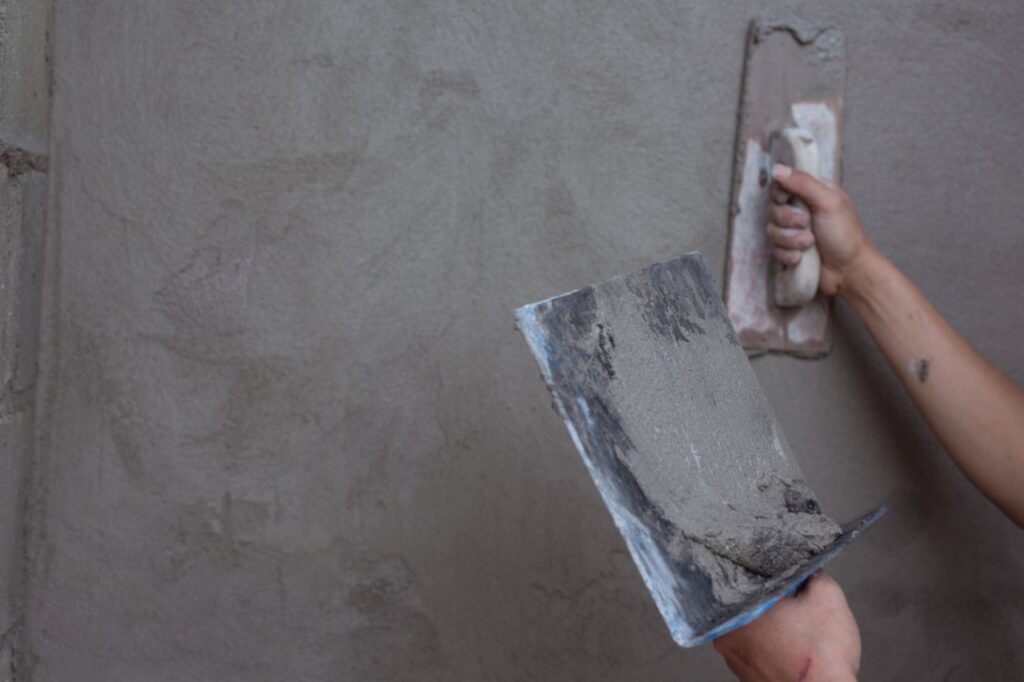
A plaster adhesive or bonding agent should be applied to the bare ceiling sections as the first step in the repair process. Using this adhesive, you can ensure that the new layers of plaster will adhere securely to the old. Use the adhesive in accordance with the directions provided by the manufacturer. Spread the adhesive evenly and consistently over the damaged area using a trowel. Wait for the adhesive to dry for the specified time before moving on.
Patching Small Cracks And Holes
A patching compound is the best option for repairing minor damage to the ceiling, such as small cracks and holes. To fix plaster, you should use a high-quality patching compound. Putty or a trowel can level out the compound once it has been filled into the holes and cracks. Check that the compound meets the surrounding plaster at a constant level. Drying times and further procedures, such as sanding or priming, should be followed as the manufacturer specifies.
Plaster Patching Larger Damage
Plaster patches may be required to repair larger areas of the damaged ceiling, such as peeling or missing plaster. A plaster patch is a ready-made square of plaster that can be glued over an imperfection. Determine the exact dimensions of the damaged area and cut the patch to fit. Put some plaster adhesive on the patch's back and stick it where it needs to go. Use a trowel to round off the corners and make it blend in with the rest of the plaster. The patch needs to dry as directed by the manufacturer.
5. Sanding And Smoothing
The ceiling's peeling plaster must be repaired before the next step of sanding and smoothing can begin. This step is essential for achieving a flawless appearance and preparing the surface for further treatments like painting. How to sand and smooth over patchwork, done right:
Repairing And Sanding
Repairs should be sanded after the adhesives and fillers have cured. Gentle sanding with fine-grit sandpaper or a sanding block can do the trick. Apply minimal force initially and build up if necessary. Next, blend the patched areas with the surrounding plaster by sanding in a circular or back-and-forth motion. The intended result is a uniform and unbroken layer. Refrain from sanding too roughly, or you'll ruin the patched areas and the plaster underneath.
Getting A Smooth Finish
Sanding should be done carefully so that a smooth surface results. Inspecting the patched areas frequently ensures they are flush with the rest of the ceiling. Next, blend the margins of the patchwork with the surrounding plaster using a feathering technique. This careful method ensures that the patched areas properly merge with the rest of the ceiling, making it virtually invisible.
Getting The Surface Ready For Painting Or Finishing
After sanding, you should examine the area thoroughly to ensure it is flawless and devoid of rough spots. Then, use a damp cloth or a vacuum with a brush attachment to remove the dust and dirt. After sanding, the surface is prepared for further finishing steps, such as painting. Priming the ceiling before painting will improve adhesion and create a more consistent appearance.
6. Painting And Priming
Priming and painting a ceiling damaged by peeling plaster is the next step after the surface has been repaired and sanded. When the ceiling is painted after being primed, it restores its original appearance. Here's how to prime and paint the patched areas so they look great:
Choosing The Right Primer
Choosing the right primer is essential for a strong paint job that lasts.
Try to find a primer that is made for plaster. Use a high-quality latex or oil-based primer, as desired, before applying your chosen paint. If you need help deciding which primer is best for your project, talk to an expert at your nearby paint store.
Primer Is Applied To The Repaired Areas.
Priming the ceiling repairs can be done with a paintbrush or roller. With even and smooth strokes, start outside the patched areas and work your way in.
First, make sure the patched areas, along with the surrounding plaster, are completely covered. Then, follow the primer's instructions for drying time and time again. The primer you use will determine how long it takes to dry.
Paint The Ceiling To Match The Surfaces Around It
Ceiling painting can begin once the primer has dried.
Pick a shade of paint that harmonises with or enhances the room's decor. Choose a high-quality ceiling paint, either latex or oil-based.
Make sure the paint is an even consistency by stirring it well. As the manufacturer directs, use a brush or roller to apply the paint to the cleaned and primed surfaces. Try using broad, overlapping strokes to achieve a uniform and polished look.
Preventing Future Peeling
Once you've successfully repaired the ceiling's peeling plaster, you should take precautions to ensure it doesn't happen again.
Your plaster ceiling will last longer and hold up better if you take care of any problems that arise and practise good maintenance practices. To avoid further peeling, consider the following:
Address Moisture Problems
One of the main causes of peeling plaster is moisture. You should conduct routine roofing, plumbing, and ventilation checks to detect and repair any water damage. Excessive humidity can weaken the plaster, so make sure the room has good ventilation.
Select High-Quality Materials
Spend money on paint and other finishes that are made to be used on plaster walls. Superior durability, adhesion, and moisture resistance are hallmarks of high-quality products, drastically reducing the possibility of future peeling.
Regular Maintenance
You should check for cracks, peeling, and other damage to your ceiling plaster regularly. Don't let problems fester; deal with them as soon as possible. The ceiling's durability and aesthetic appeal can be preserved with routine cleaning, dusting, and painting.
Inspection By A Professional
A professional should evaluate the condition of your plaster ceiling if you notice repeated problems or are unsure of their origins. They can offer professional guidance and suggest necessary maintenance or safety precautions.
Correct Surface Preparation
It is important to properly prepare the ceiling's surface before painting or applying any other finishes. First, remove any debris, dust, or dirt from the area. Then, use a primer if you want the paint to stick well to the plaster.
Prevent Using Heavy Pressure Or Weight
Plaster ceilings can easily crack if too much weight is applied to them. Ensure there's enough help and evenly distributed weight so the plaster doesn't crack. The weight could be supported in other ways; for example, by employing wall brackets or support beams.
Temperature And Humidity Control
Changes in humidity and temperature can damage plaster. Keep the house at a constant temperature and humidity by using climate control. When possible, use humidifiers to keep the temperature from fluctuating too much.
Conclusion
The first step in fixing a ceiling that is peeling is to figure out why the plaster is flaking. In the event that water is the cause, expert medical attention is required immediately. While it is feasible to paint over a peeling ceiling, it is much more effective to fix the underlying problem.
To repair paint damage, first scrape off any flaking paint, then fill and plaster the area, sand, prime and seal the repaired parts, and finally repaint. "My ceiling is peeling" or "Please advise us what to do because our plaster ceiling paint is peeling off" is the most frequently heard concern.
There are several potential causes of a peeling plaster ceiling, including water damage, fire, mould growth, and simply the passage of time.
Fixing this problem requires identifying and fixing its underlying causes. Damage from water or moisture, incorrect installation or application, structural movement, excessive weight or pressure, age or degradation, lack of air, and so on are all common reasons.
Content Summary
- Repairing a peeling plaster ceiling is a manageable task with the right approach.
- Identifying the cause of the peeling is crucial before starting the repair process.
- Water damage is a common culprit behind peeling plaster ceilings.
- Addressing the underlying problem is essential to prevent future repairs.
- Peeling ceilings can be painted over, but addressing the cause is necessary for a lasting solution.
- Properly preparing and applying paint is vital for a good finish.
- Various factors can cause plaster ceilings to peel, including water damage, age, and poor ventilation.
- Repairing peeling plaster requires understanding the root causes.
- Water and moisture damage can cause plaster to lose its grip and peel.
- Insufficient preparation or application can lead to peeling plaster.
- Structural movement from settlement, temperature changes, and vibrations can cause plaster to crack and peel.
- Excessive weight or pressure on plaster ceilings can lead to peeling.
- Plaster ceilings in older homes are more prone to cracking, flaking, and peeling.
- Poor ventilation can weaken plaster and promote mould growth, leading to peeling.
- Assessing the damage and identifying the root cause is crucial before starting repairs.
- Detecting the source of peeling plaster helps determine the appropriate repair approach.
- Evaluating the extent of the damage helps estimate the required materials and repairs.
- Checking the underlying structure ensures the stability of the ceiling.
- Proper preparation, including gathering the necessary tools and materials, is essential.
- Clearing the area and protecting furniture is important before starting repairs.
- Taking safety precautions, such as using protective gear and equipment, is necessary.
- Removing any loose paint is a crucial first step in repairing a peeling plaster ceiling.
- Scraping or using a putty knife can effectively remove loose or peeling plaster.
- Securing the surrounding area with drop cloths or plastic sheets simplifies cleanup.
- Smoothing the area with sandpaper or a sanding block helps prepare it for repairs.
- Applying a plaster adhesive or bonding agent ensures the new plaster adheres properly.
- Patching small cracks and holes with a high-quality compound is recommended.
- Plaster patches may be necessary for larger damaged areas.
- Sanding the repaired areas ensures a smooth and even surface.
- Blending the patchwork with the surrounding plaster helps achieve a seamless finish.
- Thoroughly inspecting the patched areas guarantees a flawless appearance.
- Cleaning the area after sanding prepares it for painting or finishing.
- Priming the repaired areas improves adhesion and creates a consistent look.
- Choosing the right primer for plaster is crucial for a long-lasting paint job.
- Applying primer with even strokes ensures proper coverage.
- Painting the ceiling with high-quality paint enhances the room's decor.
- Selecting the appropriate paint consistency and using broad strokes achieves a polished look.
- Preventing future peeling requires addressing moisture problems.
- Using high-quality materials reduces the likelihood of future peeling.
- Regular maintenance, including cleaning and painting, preserves the ceiling's durability.
- Seeking professional inspection and guidance is advisable for recurring problems.
- Proper surface preparation is important before painting or applying finishes.
- Avoiding excessive pressure or weight on plaster ceilings helps prevent cracking.
- Controlling temperature and humidity protects plaster from damage.
- Repairing peeling plaster can be done efficiently with the right approach.
- Understanding the causes of peeling is essential for effective repairs.
- Preparation and protection of the working area ensure a smooth repair process.
FAQs About Plaster Ceilings
The time it takes to fix a peeling plaster ceiling can vary depending on the damage's extent, the affected area's size, and the chosen repair method. In general, repairing a small section of peeling plaster can be completed within a few hours or a day. However, if the damage is extensive or requires more intricate repairs, it may take several days or weeks to fix the peeling plaster ceiling fully. Therefore, it's important to properly assess the damage and allocate sufficient time for the repair process to ensure a thorough and durable restoration.
Yes, it is possible to repair a peeling plaster ceiling yourself. However, the complexity of the repair and your level of experience with such projects should be considered. Simple repairs, such as fixing small areas of peeling paint or applying a new coat of paint, can often be tackled by homeowners with basic DIY skills. However, for more extensive damage or if you're unsure about the underlying causes of the peeling, consult a professional or contractor with experience in plaster ceiling repairs. They can provide guidance, ensure proper techniques are used, and help address any structural issues contributing to the peeling.
It is generally only recommended to paint over a peeling plaster ceiling to fix the underlying issues. Painting over peeling plaster without addressing the root causes can lead to further damage and a compromised aesthetic result. The peeling paint is often a symptom of an underlying problem, such as moisture infiltration or plaster deterioration, which needs to be resolved to prevent future issues.
Ignoring these issues and painting over the peeling areas can also result in the new paint layer peeling off, leading to a cycle of ongoing problems. It is best to fix the peeling plaster properly, address any underlying issues, and ensure a stable surface before applying a fresh coat of paint for a long lasting and visually pleasing result.
Hiring a professional for plaster ceiling repairs is not always necessary, but it can be beneficial in certain situations. Homeowners with basic DIY skills and the right tools can often handle simple repairs, such as minor cracks or small peeling areas. However, if the damage is extensive, the underlying causes are unknown, or structural issues are involved, it is recommended to consult a professional. A professional has the expertise, experience, and knowledge to assess the damage accurately, provide effective solutions, and ensure a high-quality repair that meets safety standards.
They can also address hidden issues that may not be apparent to an untrained eye. Hiring a professional for plaster ceiling repairs can save you time, effort, and potentially costly mistakes, especially if you need more confidence in your abilities or if the repair requires specialised techniques.
It's important to choose a paint that is suitable for plaster surfaces. Look for paints specifically for plaster or masonry, as they offer better adhesion and durability. Avoid using paints not designed for plaster, as they may not adhere properly and could lead to peeling or other issues.