

During the winter, indoor relative humidity often drops significantly because of the low temperatures outdoors.
Using a furnace or central heating system might actually dry out the air in your home. Mold grows on wood and floorboards shrink when relative humidity drops.
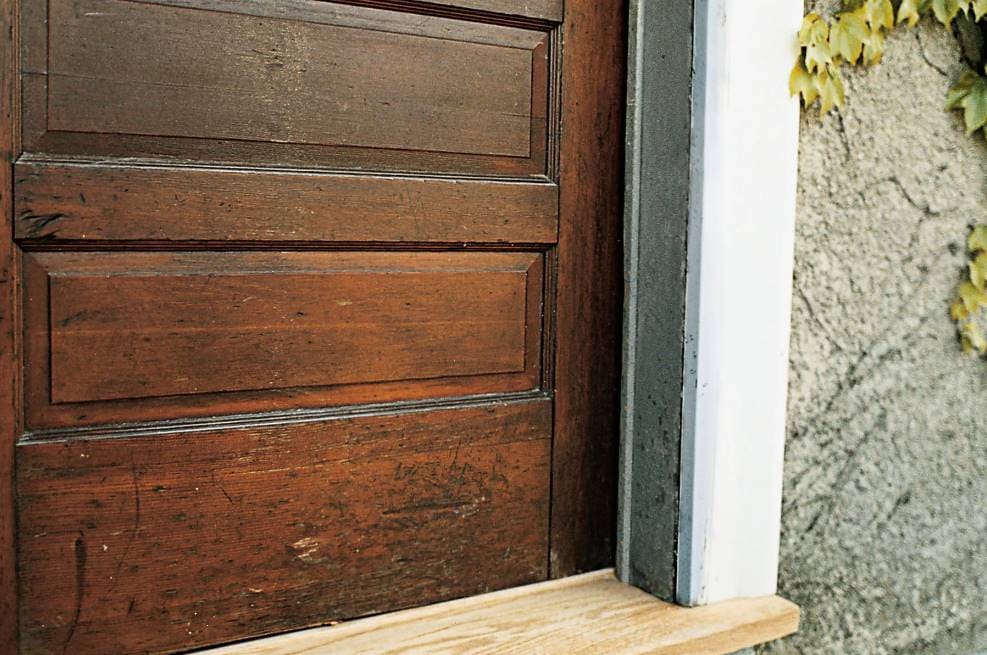
Damage in the form of visible fissures results. If you have just placed woodwork in your home and you happen to reside in a location with a high seasonal temperature swing, you may run into this issue.
The wood in your home will expand if you paint it when the temperature is high. The extreme heat and humidity are to blame for this.
When moisture and warmth are reduced, as they are during winter, wood contracts.
The result is a disjointed look as the trim pieces shift apart from one another and the paint, moulding, and caulking start to fracture.
The freezing temperatures of winter can cause the moulding and caulking in your home to become brittle and crack, necessitating the services of a painter to perform repairs at your expense. The fissures are also unsightly, so there's that.
You're in luck: there are some measures you may take to lessen the impact of these issues. Hitch Property Constructions offers a wide range of caulking services in the Melbourne area.
Invest in a humidifier. It is almost impossible to prevent cracks in wood-framed buildings from forming during the winter. If you don't humidify your home, the wooden parts that expand when the weather is warm will contract when the weather becomes cold.
This is the root cause of the crumbling caulking and moulding. One of the simplest ways to keep your home's moulding and caulking from cracking is to set up a central humidifier. It is ready for use in your heating system right immediately.
This method uses the preexisting ductwork to treat the incoming air and assist keep the relative humidity in your home at a consistent, healthy level.
All About Caulk and Caulking
What Is Caulk Used For?
Caulk is versatile and can be used as a substitute for glue, a sealant, or a filler.
Bathrooms, kitchens, concrete, gutters, mouldings, roofing, windows, plumbing, and many more interior and exterior uses call for specific types of caulk.
- Because of their resistance to water, their flexibility, and their ability to create a watertight barrier, silicone and polyurethane caulks are widely utilised. Sealing windows, tubs, and toilets, as well as sinks and sink cabinets, are common uses for silicone caulk.
- Cracks in the moulding surrounding rooms, doors, and windows are often caulked with an acrylic substance. It can be painted over without worrying about cracking the previous coat because it dries stiff and nonpliable.
- When joints have to endure prolonged submersion in liquid, polysulfide caulks are used. Common places to find these are in swimming pools, fountains, cooling towers, fuel and chemical storage tanks, sewage treatment plants, and petrochemical facilities.
How Was Caulk Used and Made in the Past?
Caulking (also spelt calking) is a watertight sealant that has been used since ancient times to keep water out of wooden ships. The Vikings used a process called clinker, which is also known as lapstrake.
Boards were clasped together over one another and then fastened using either brass or iron.
When it comes to caulking, the method of carvel construction, which is used on ships, is the most relevant.
The seam between the planks of a Carvel had to be cleaned using a scraper and hook before the caulking could be applied, and then the caulking had to be pounded and compressed into the seam using a caulking mallet and caulking irons.
"Oakum," which was essentially tarred hemp cordage, was the caulking of choice.
The joints would be caulked and then hot pitch would be placed on top. The caulked joints below the waterline would be filled up with paint.
Up above the water line, white lead was commonly used. In maritime parlance, this method of payment was known as "paying the hull."
Since caulking did not endure indefinitely, hulls required periodic maintenance, such as caulking repairs or replacement. It is also possible to completely remove and replace the caulking.
In the end, none of these approaches of waterproofing wooden ships were foolproof. Vessels soaked up water regularly, especially when being twisted or "worked" by rough seas.
The Vikings utilised pumps, called bailers, to get rid of excess water in the ship's hull.
How Is Caulk Made?
Caulks can be made using one of four different base compounds: acrylic latex, silicone, polyurethane, or rubber.
The base compound is what determines the product's unique qualities, such as the substrates it can attach to, the simplicity with which joints may be smoothed, its longevity, and its paintability.
Water-based synthetic polymers resemble the qualities of natural latex in latex and acrylic caulk, however neither caulk includes any latex.
They are a generalisation, and there are many different kinds of water-based synthetic paints within the greater category.
Silicone rubber, also known as silicone elastomer or silicone rubber, is an elastomer or rubber-like material made from silicone, a polymer made up of silicon, carbon, hydrogen, and oxygen.
It's no surprise that silicone is the main ingredient in silicone rubber. Numerous silicone rubber formulas meet a variety of needs in business.
Polyurethanes are created by reacting a polyol (defined as an alcohol containing more than two reactive hydroxyl groups per molecule) with a diisocyanate or a polymeric isocyanate in the presence of catalysts and additives.
As a class of chemical compounds, polysulfides are distinguished by the existence of long sulphur atom chains.
Many types of commercially available elastomers use polysulfides as crosslinking agents. Polysulfide shouldn't be used on plastics since it hastens the breakdown of the plastic to which it is bonded.
Can You Make Your Own Caulk?
Baking soda and wood glue can be used as a makeshift replacement for expensive materials. Make a paste-like material by mixing two tablespoons of baking soda with enough glue. Don't be stingy with the mixing.
You won't be able to use a tube dispenser to spread your homemade caulk in a neat, uniform manner. Using various implements including severed straws, popsicle sticks, and a tiny spoon has yielded varying degrees of success.
This caulk will serve your needs when you need to seal a gap when painting mouldings or making other minor repairs.
If it shifts or cracks over time, you will need to remove it, so it is not a long-term solution. Caulks are now easily available, cheap, and ubiquitous. There is little need to develop your own. No, not at all.
What Is the Best Way to Caulk?
Regardless of the task at hand or the specific caulk being used, the process of applying the caulk is generally the same.
- Before you start caulking, make sure the area is clean and free of oils and dust. After cleaning, it must be dried thoroughly before further use. If you try to caulk over a damp spot, you'll end up having to scrape off the caulk and start again. Put in some effort to ensure that your space is properly prepared.
- The caulk tube can be loaded into the cannon once the tab is detached and the hook is brought forwards. It's important that the tube fits snugly.
- Bring the hook all the way down until it touches the floor. Stay loose for now.
- The best way to remove the stub is to use a utility knife to shave it open without cutting the threads. Those threads are essential for fitting the nozzle.
- Discover the end of your tube's nozzle and secure it. The tip must be cut off once again, this time using your utility knife. Making the hole as tiny as feasible will help your application perform better and save you money.
- Put the barrel of your rifle aiming at the corner of the room you want to occupy. Gently and steadily pull the trigger of the caulking gun to eject a fine bead of caulk.
- Don't abuse it, though. When applied properly, even a negligible sum can have a disproportionately large impact. Maintain a gentle finger on the trigger of your weapon and slowly make your way along the length of your joint until you reach the end of your void.
- When you're through applying your bead, clean up the joint by running your caulking tool over it. After checking for gaps, caulk the joint once again to make sure there are no voids.
Don't forget to use a scrap of paper or rag to rest your caulking gun on. Caulk might harden and clog your nozzle if you don't remove the cap after each use.
How to Remove Caulk
Caulk removal can be a stressful process, but it doesn't have to be. Slow and steady wins the race; just make sure you have the necessary equipment and keep your focus on the task at hand, and you'll succeed.
You can get help from Hitch Property Constructions in a wide range of service areas with their specialised selection of home renovations.
- Caulk should be removed with a suitable caulk remover before any mechanical removal is attempted. Submit an application but don't rush into anything just yet. Caulk of a much older vintage may require waiting much longer than the recommended two to three hours. Do what you can to spend the night there.
- If you're looking to make a financial investment, we recommend choose one of these options. Use the tool to make incisions around the outer edge of the caulk, both vertically and horizontally.
- Use the hook to get a hold of the caulk strip where it meets the wall, and then pull it out. If you're lucky, the whole mystery will be solved in one neat comic strip. When old caulk is removed, it often breaks off into flakes. First, scrape off what you can, and then use a clean scraper tool to carefully remove the rest of the caulk.
- Old caulk on the tile should be cleaned off with mineral spirits before you re-caulk. Water is the most effective cleaner for wood. Use a clean, dry cloth to apply some drying pressure.
Tips for Caulking on a Quality Home Painting Project
The effectiveness of caulking depends heavily on the degree of adhesion between the two surfaces. Without proper adhesion, the caulk will peel away from the surface, and in some circumstances it will just fall out.
Dust from uncleaned sheetrock or chalky paint from low-quality paint can also contribute to a lack of adherence. When the surface is clean, the adhesive can stick to it.
Because of their narrow width or close proximity to one another, caulk may not be able to enter some crevices. There will be no penetration of the fracture into the caulk itself.
Because the sealant does not fully fill the crevice, the wood expands and contracts unevenly when exposed to even little variations in humidity and temperature.
For the repair to hold, the crack must be between a sixteenth and a quarter of an inch wide. Wet towels are sometimes used after caulking the interior trims of a structure to remove excess caulk and leave a clean appearance.
If too much is wiped away, the resulting bead will be extremely thin and prone to fracture.
If the crown mouldings, door and window frames, baseboards, etc. are not fastened properly together, the caulk may fail when adhering them to the wall and ceiling surfaces. If you give a piece of trim a little push and it gives, you know it has to be nailed down a little tighter.
Caulk can be affected by both thermal and humidity shifts, as well as by vibrations. In the instance of the stairs in your home, caulk is most likely to split at the stringer-to-wall junction.
The vibrations caused by persons ascending and descending the stairs are to blame. The success of the caulking process depends on the security with which the stringers are nailed down. One of the most important factors in achieving success is this.
To ensure that outdoor caulk can endure the more extreme weather fluctuations, it is recommended that it be put in a thicker coating than interior caulk.
When caulk is placed with a narrow bead, it increases the probability that it will fracture or split in the future.
Problems You Can Solve with Caulk
Seal Drafts with Caulk
The greatest approach to lessen draughts, lower energy bills, improve your home's energy efficiency, and lessen your carbon impact is to seal leaks around doors and windows.
It's possible to get each of these advantages at the same time. Acrylic latex or vinyl latex caulk is ideal for this purpose.
While vinyl latex can be used in both dry and wet conditions, it only lasts about five years while acrylic latex can last for up to fifteen. Longevity is increased in acrylic latex.
Seal Concrete and Mortar with Caulk
Maintenance on the mortar and concrete Caulk works great for filling in holes and voids in masonry materials like concrete, brick, stucco, stone, and metal. It's for sale on Amazon.com.
Similarly, it is great for sealing up crevices in the basement and the foundation that may let in insects, rodents, and other pests.
Caulk can be painted over once it has dried and has a rough appearance. It can be used indoors and outdoors for a variety of purposes, including fixing cracks in concrete and mortar.
Caulk Baseboards
Miniscule gaps between the mouldings and baseboards you instal are inevitable no matter how well you measure and cut them.
When there is a need to seal off a gap, acrylic latex caulk is a great option to use. The substance dries quickly, allowing painting to take place six to eight hours after application.
Acrylic latex can be purchased in a broad variety of colours, allowing the coating to be color-matched precisely to the substrate it will be used on.
Caulk Tiles
Tile has been around for a long time in the bathroom and kitchen because it is durable and never goes out of style. However, grout lines can weaken over time, allowing moisture and mildew a foothold behind the walls.
Many varieties of caulk are suitable for this purpose.
Both the pure silicone and the siliconized acrylic caulk create a waterproof, airtight seal, making them well-suited for usage in wet settings.
Silicone caulk is impermeable and resistant to mould and mildew; it is best used on nonporous surfaces like ceramic, glass, and metal; siliconized acrylic caulk is best used on porous surfaces like bathtubs, tiles, glass, and ceramic tile.
Both forms of caulk can be found at any hardware or home improvement store.
Painter's Caulk
Painter's caulk, an acrylic and latex mixture, is ideal for sealing off even the tiniest of cracks and holes before painting.
Painter's caulk sticks to many different materials, including wood, drywall, and brick. On top of that, it's a great choice for folks who are in a rush to finish their DIY projects because it dries to a paintable texture in approximately an hour.
Are you looking for the best company to maintain your home's paint in good condition? There's no need to look any further! When you hire Hitch Property Constructions, you have nothing to worry about.
Fireproof Caulk
There are several applications for fireproof caulk beyond simple repairs. Because fire can't travel through the building's frail, flammable materials, it does assist make your home safer.
Fireproof caulk can be used to seal any openings in interior frame, such as those for plumbing or electrical pipes and wires. This caulk is multipurpose and can be used to fix cracks in exterior structure.
Adhesive Caulk
Damage such as the loss of a part of moulding, the lifting of a corner of the carpet, or the dislodging of a tile can be repaired using simple, old-fashioned caulk that can be used for a variety of applications.
The missing piece of fabric can be reattached by applying adhesive to its back and pressing it back into place. Wood panelling can be installed without nails by using caulk, which serves as an adhesive and sealant.
Use Caulk for Wallpaper
Wallpaper has the ability to stump even the most seasoned of interior decorators, but some good old-fashioned caulking can save the day in a crisis.
To prevent the wallpaper from peeling as it dries, caulk all of the trimmed paper seams, paying special attention to the corners, and smooth it out with a damp sponge or your finger.
Wallpaper that is starting to come loose from the wall can be easily repaired by lifting up the offending part, applying adhesive caulk under the paper, and then smoothing the paper back against the wall. The issue will now be resolved.
To prevent the seam from breaking apart again, run a fresh bead of caulk alongside it after the adhesive has dried.
Roof Repair with Caulk
When you have the proper caulk, you can even fix a roof. Small holes or breaches in the roof's exterior, including those found between shingles, around skylights, or in the flashing, can be filled with roof repair caulk.
Skylights and flashlights are only two more commonplace examples.
Roof repair caulk is made to last and may be applied to either damp or dry roof surfaces.
Use Caulk on Gutters
As gutters age, fractures and gaps often occur at the joints and downspout junctions, especially in older gutters.
However, butyl rubber caulk is an excellent sealant and can be used to properly waterproof and repair the joints in those broken gutters.
A modest amount applied to the cracks will keep water flowing away from your home and out of your gutters.
Conclusion
Heating your home with a furnace or central heating system may cause the air to become dry. A decrease in relative humidity causes wood to dry up, which in turn encourages the growth of mould. Winter's low temperatures can freeze and fracture the moulding and caulking. Get a humidifier if you want your home's relative humidity to stay at a safe level. Caulking (also spelt calking) is a sealant that has been used to keep water out of wooden ships since ancient times.
The Vikings utilised clinker, often termed lapstrake, to ensure that their ships were watertight. Elastomer or rubber-like material derived from silicone, a polymer comprising silicon, carbon, hydrogen, and oxygen. The properties of natural latex are mimicked by water-based synthetic polymers in latex and acrylic caulk, however neither caulk really contains latex. Even while removing caulk might be a bothersome chore, it need not be. If you don't take the lid off the caulk tube after each use, it can harden and clog the nozzle.
Caulking guns need to be rested on something, so grab a piece of scrap paper or an old cloth. Prior to attempting to remove caulk mechanically, it should be removed with a caulk remover. Waiting far longer than the suggested two to three hours may be necessary if using caulk of a much older vintage. When finishing up caulking the interior trim of a building, it is common practise to wipe away any excess using dry cloths. Modifications in temperature and humidity, as well as movement, can all have an impact on caulk.
The caulking will only hold if the stringers are firmly attached to the floor. It has a wide range of applications, both inside and outside the home, including mending broken masonry and concrete. There is a wide selection of caulk available that will do the job. It's possible to find acrylic latex in a wide range of hues. It's best to use painter's caulk to fill up even the tiniest of gaps and fissures.
Use fireproof caulk to cover any gaps in the interior frame. Caulk is great for securing wallpaper that is peeling or otherwise coming away from the wall. Caulking can also be used to seal off any cracks or openings in the exterior of a roof. If your gutters need fixing or waterproofing, butyl rubber caulk is a great choice for a sealant.
Content Summary
- Using a furnace or central heating system might actually dry out the air in your home.
- Mold grows on wood and floorboards shrink when relative humidity drops.
- Invest in a humidifier.
- One of the simplest ways to keep your home's moulding and caulking from cracking is to set up a central humidifier.
- They are a generalisation, and there are many different kinds of water-based synthetic paints within the greater category.
- It's no surprise that silicone is the main ingredient in silicone rubber.
- Numerous silicone rubber formulas meet a variety of needs in business.
- Discover the end of your tube's nozzle and secure it.
- Gently and steadily pull the trigger of the caulking gun to eject a fine bead of caulk.
- Caulk should be removed with a suitable caulk remover before any mechanical removal is attempted.
- First, scrape off what you can, and then use a clean scraper tool to carefully remove the rest of the caulk.
- are not fastened properly together, the caulk may fail when adhering them to the wall and ceiling surfaces.
- In the instance of the stairs in your home, caulk is most likely to split at the stringer-to-wall junction.
- The success of the caulking process depends on the security with which the stringers are nailed down.
- Maintenance on the mortar and concrete Caulk works great for filling in holes and voids in masonry materials like concrete, brick, stucco, stone, and metal.
- There are several applications for fireproof caulk beyond simple repairs.
- To prevent the wallpaper from peeling as it dries, caulk all of the trimmed paper seams, paying special attention to the corners, and smooth it out with a damp sponge or your finger.
- When you have the proper caulk, you can even fix a roof.
- Roof repair caulk is made to last and may be applied to either damp or dry roof surfaces.
Home Repair FAQs
In most cases, given standard flooring heights, you will install the cabinets before the floor covering. Floor covering, or finish flooring, is the surface that you see and walk on, not the subfloor (under the underlayment) or underlayment (between the subfloor and finished layer).
Baseboards are often installed before flooring, although it depends on the type of flooring being used. It is necessary for carpeting to have the trim in place, allowing the edges to be tucked under and out of sight. However, for hardwood or laminate, it is easier to install the trim after.
Installing flooring before your cabinets is the best choice for most hardwood floors. When professionals install floors then cabinets, it's easier to get everything to standard heights. It's also a safer installation process for your cabinets since you won't risk any damage to them as professionals install the floors.
Repainting the exterior of your residential rental property: By itself, the cost of painting the exterior of a building is generally a currently deductible repair expense because merely painting isn't an improvement under the capitalization rules.
Check walls, ceilings, and floors for damage, leaks, or other deterioration. Be sure to remove hazards and ensure proper operation of doors and locks. Restroom areas should be inspected for problems, and alarms should be tested.