
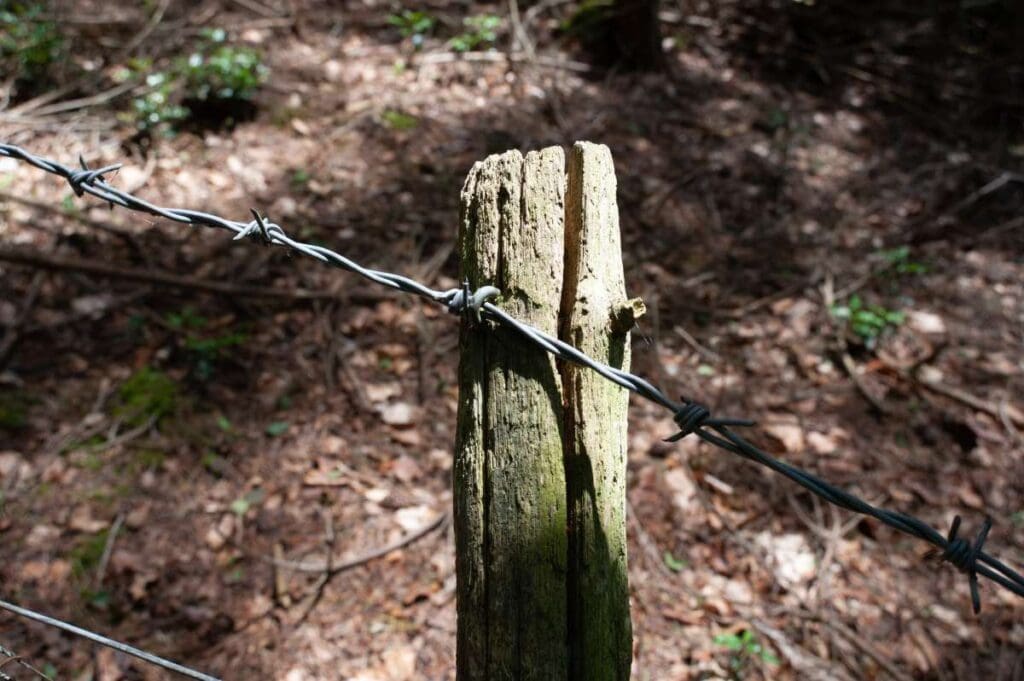
In older buildings, rotting wood is a prevalent issue. Wood can rot both indoors and outdoors, depending on the presence of moisture or the passage of time. Pipes, basements, doors jams, deck, and fences are common places to find rotten wood. We can save money by fixing the rotten wood instead of throwing it away.
Molds and mildews need water to thrive on decaying wood. Negative effects of fungi are not limited to rotting wood. Treating both the rotted & unrotted wood is necessary for a proper repair of rotten wood.
Wood that has been exposed to moisture will decay. Without proper remediation, mould can be both unattractive and damaging to a house. Replacement of rotten wood is simple. When rotten timber is patched with glue, hardwood filler, or another piece of wood, the home can look like it was built yesterday.
At Hitch Property Constructions, we offer timber repairs work from simple timber repair to almost new structures, renovations, and extensions.
Materials Required
Equipment/Tools
- Knife for cutting putty
- Utility knife or rasp
- Chipper for wood
Materials
- Tool for painting and paint of the same hue
- Polyurethane or polyester filler Sanding block or paper, grit 100
- Hardener for Wood
Instructions
Check The Damage And Figure Out What's Wrong.
Inspect the area you suspect has decayed wood, taking careful measurements and making an accurate assessment of how much effort will be needed to fix it. It's likely that you can fix the rot on your own or at least avoid having to hire a professional if the affected area is small and doesn't make up more than half of the product.
Determine what caused the wood to decay so that the problem can be fixed once and for all. Look for places where water can seep in or collect, for cracks where the elements and damp air can enter, and for poor drainage. If the area is outside, you should also examine for areas of poor drainage or clogged gutters.
Get Rid Of The Old, Moldy Wood
Use a rasp or chisel to carefully chip away at the rotten wood. Applying just the appropriate amount of pressure and maintaining a delicate touch can get you there. Don't forget to reinforce the spots that look weak near the rotted wood. As soon as it is taken out of the region, it must be thoroughly cleaned.
Wood Hardeners Should Be Used.
Your local hardware or home repair store should carry a wood hardener. As a resin, the hardener can permeate the wood and help form a seal that keeps moisture out. Use a paintbrush of the proper size to apply the timber hardener to the affected area, and then let it dry thoroughly.
It's Time To Use Some Filler
Wood epoxy or polyurethane is the most efficient agent in filling the wood. With the aid of a putty knife, putty should be spread into the empty spots. As soon as the putty is applied, any lumps or ridges should be promptly smoothed down and the excess scraped off before it hardens. Allow the putty to dry for at least 24 hours, ideally overnight.
Sand It Down
After putty has had ample time to cure, sand it down with just a sanding blocks or some paper to ensure that it has the same amount of smoothness as the adjacent wood. You may get rid of the dust by blowing it away, and the splinters can be wiped away with a dry rag.
Prime
It's possible that priming the area with just a primer may be necessary before painting it after the repairs have been made. Indeed, this is region-specific. Primer is applied with a paintbrush; it should be applied according to the directions on the bottle and let to dry completely.
Paint
Fix the splotchy paint job. One to 3 coats may be needed, depending on the final product. Put it in the dryer, and you're done! Okay!
There are two curing agents in epoxy. You can mould it with your hands, and then it will solidify to keep that form. It's a waterproof sealant that adheres to wood. When the filler is dry, sand it, prime it, and paint it. Pine is the best wood for accepting stain. Before applying stain, use a utility knife to make false grain lines. Patchwork is actually hiding behind the wood effect.
Fixing Wood That Has Gone Bad
Clean Up The Decay.
A screwdriver or thin chisel can be used to pry open damaged portions (rotten spots are noticeably softer). Since rot frequently occurs under paint, it's not safe to presume that it's sound just because the surface looks to be in good shape. For more substantial bits, a chisel can be used to gouge and scrape away at the material.
Let The Wood Soak
Apply a wood preservative to the planks. Keep doing this until the wood can take no more (usually three to four applications). Use a towel to remove any surplus. You can increase the area's permeability by drilling holes in it, so try that. It's considerably easier to fill in gaps with the help of a nozzle squeeze bottle.
Smear On Some Epoxy Filler
Any holes or cracks should be filled with epoxy. Drive screws fully into the wood before adding epoxy to deep holes. To avoid the filler from drying to the putty knife, dip it in epoxy solvent liquid lacquer thinner and use it to smooth out the area before it sets.
Reconstructing Lumber
The wood needs to be dry for at most a week before you can apply the epoxy. Since epoxy bonds best to raw, unfinished wood, roughen the surface with some sanded or a wire brush. Any external repairs should be coated within three days since epoxy is degraded by UV light.
To repair badly damaged wood, soak it in epoxy liquid. Use a paintbrush and squeeze bottle to apply it evenly and deeply into the surface. Repeated coats should be applied while the prior one is still sticky.
Taking Out The Bad Spot
Get A Hammer And A Claw And Remove The Rotten Wood.
Have used a claw hammer to dig out rotting wood. The hammer's claw needs to be positioned near the rot's foundation. Apply force as you pull the clawback towards you. Extract as much you can do that without destroying the sound wood.
- It's not worth damaging the wood to get it out. Throw away only the mushy, rotten wood.
Any Leftover Rotted Timber Can Be Easily Cut Away With A Router And A V-Shaped Bit.
Hold the router such that the bit is a scant 1/8" (3.2 mm) from the rear of the wood you're working on. The decay that the hammer missed can be removed by grinding it up with quick, back-and-forth strokes. Pulverize the wood until you have a powder that is both healthy and solid. Harder wood will be more of a challenge for the router to slice through.
- The wood may decay again if the rot is not completely removed.
Scrub Peeling Paint And Rusty Nails Away With Sandpaper.
Many patching solutions won't stick to the current paint, therefore it must be removed before they can be used. Use a paint scraper with sander with a coarse grain of around 60 to remove any residue from the wood's surface. Apply the same amount of pressure as you move around in a circle.
- The wood's surface also has to be cleaned of any dirt, rust, or priming before proceeding.
Check out our range of timber repairs Melbourne at Hitch Property Constructions.
The Damaged Wood Should Be Coated With Wood Restorer For Four To Six Applications.
Apply the restorer using the supplied brush to the entire damaged area. Allow two minutes for drying time between coats of restoration to allow the product to fully enter the wood. The restorer needs to dry for 2 hours before further work may be done on it.
- If you don't want the restorer to react with your skin, use rubber gloves.
Fixing A Hole In The Wood
Create a clean, straight cut in the wood using a Japanese hand saw.
Align the saw's teeth along the line you wish to cut that that they are nearest the handle. You'll need to press down on the saw and drag it down at a 45o angle to make the cut. It's important to keep cutting until you can easily pull the board out by hand.
- Draw a pencil line along the desired cut line to ensure a straight cut.
Cut A Piece If Cedar To Fit The Opening You Need To Fill.
Cut the patch down to size with a saw. Be sure the wood fits tightly in the hole left by the rot. It won't sit flush with the surrounding wood if the fit is too slack.
- For its durability and resistance to decay, cedar is frequently utilised in repairs.
Use A Damp Towel To Moisten The Bare Wood.
When wet, the glue you'll been using will set. Wet both the bare wood where you're applying the patch and the patch itself with a rag before proceeding. The surface ought to be somewhat damp to the touch.
Polyurethane Glue Should Be Used To Adhere The Patch To The Wood.
Apply the glue on the wood by squeezing it straight from the bottle. To use, simply disperse it so that the entire vulnerable surface is coated. To speed up the curing time of the glue, press the patch firmly on the wood.
- Polyurethane glue swells and foams before hardening, allowing it to fill up even the smallest of cracks.
- Don't put anything metal or unwashed hands on the glue until it has set. It will be quite challenging to get rid of.
To Secure The Patch, Drill Adjusting Screw Into Both Sides.
Make sure your screws are long enough to cover the baseboards. Hold the patch in place whilst glue dries by placing one on either side.
After 6 Hours, Sand Off The Patch To Remove Any Extra Adhesive.
In order for the urethane glue to fully dry and set, you need to allow about 6 hours. In order to make the dried glue flush with the wood, you should sand it down with progressively finer grits of paper.
Fixing Holes With Wood Filler
Pour A Ring Of Wood Filler That Is 3 Inches (7.6 Centimetres) In Diameter Onto A Smooth, Nonporous Surface.
Wood filler won't adhere to or get tangled up in plastic or glass if you place it on those surfaces beforehand. In order to have enough to work with initially, the circle should be around a half-inch (13 mm) in thickness.
With The Top Still On, Squeeze The Hardener Tube.
Since the hardening agent tends to split in the tube, it is important to give it a good push with your fingers before opening it.
Mix The Filler And Hardener By Placing A 3-Inch (7.6-Centimeter) Strip Of A Hardener On Top Of The Filler.
Take a putty knife and mix the filler and hardener together for around 2 minutes. When everything is combined properly, it should be a pale shade of red.
- For best results, apply only a tiny amount of wood filler at a time, as its working duration is about 10 minutes.
- Spread the mixture out as much as possible to increase its working duration.
Fill The Wood With The A Putty Knife And Apply Heavy Pressure.
Apply the filler two inches beyond the damaged wood (5.1 cm). Use even pressure with the putty knife to establish a good bond between the wood filler and the surface. Allow the wooden filler to dry after spreading it to the desired thickness.
Allow 30 Minutes For The Filler To Dry.
If the ambient temperature is less than 75 degrees Fahrenheit (24 degrees Celsius), the wood filler should harden completely in 30 minutes. Set time might be as minimal as 10 minutes in warmer conditions.
The Procedures Of Sanding And Painting Repaired Wood
Sandpaper The Repair Until It's Smooth.
If you want your patch to blend in with the rest of the wood, make sure its edges are smooth. To achieve a fully smooth surface, you should begin with coarse sandpaper, at around 60 grit, then work your way down to a finer grit, such as 200 grit.
If Indeed The Original Wood Was Stained, Choose A Stain That Is Similar.
Apply the stain with a paintbrush and wait for it to dry. It's important to avoid applying new layers of stain on top of the old ones, as this can create an uneven coloration.
- Wood filler spots may take on a slightly different hue than the surrounding wood. Determine how well the filler will take the stain by testing a tiny area with the stain.
In The Event That Wood Is To Be Painted, At Least Two Coats Of Primer Should Be Applied.
Apply a grey or white foundation in thin applications to ensure an even finish. Ten minutes should be enough time to dry between coats.
- It's best to use a sprayed primer to get a smooth, even application without brush marks.
Once The Primer Has Set, You Can Paint The Surface.
Use a stir stick to combine the paint so it doesn't separate before application. Use a paintbrush to apply multiple thin coats for uniform coverage. For a uniformly smooth surface, use broad strokes that run the length of the wood.
- Unless the air is extremely humid, paint should dry in under 10 minutes.
Replace Rotten Wood Only If It Can't Be Fixed.
Any structure's wood is susceptible to wet or dry decay. A decaying wooden door, floorboard, baseboard, window ledge, or columns may signify major concerns. If you don't address rot like a fungal infection, it will swiftly spread. The bad news is that replacing destroyed wood is just a chore and can be expensive. Quasi wood usually needs replacing. Use easy-to-use items to strengthen the weaker area.
Root Out The Problem And Fix It.
Rot is caused by factors such as missing or broken roof shingles, drainage leaks, ill-fitting doors and windows, improper stone pointing, and dampness. Wood that has been affected by rust (which, despite the name, requires 20% wetness) will change colour, crack, shatter, or flake and will emit an odour reminiscent of mushrooms. Wherever there is more than 50 percent moisture, black fungal infection and a spongy, wet texture should be expected due to wet rot. Ventilate the area thoroughly with fans and dehumidifiers if the issue is inside.
Get Rid Of The Rot.
If you discover rot in the home, you'll need to replace any boards that are harmed. To get rid of rotten wood, use a 5-in-1 craftsman's tool or a putty knife. Clean up the dust and sawdust.
Get a polyester or epoxy board hardener & filler with little to no volatile organic compound (VOC) odour (VOCs). Please use gloves when dealing with these materials.
Using a medium and small brush, evenly coat the wood and fill up any crevices with the hardener. Its framework will be strengthened by this.
Make Some Wood Filler Next.
The texture of peanut butter is ready. Spread it on thick (the excess may be sanded off) and mould it using a putty knife. The filler for big repairs should be shaped using a form. Use wood filler like a pro by learning from the San Diego handymen who do it every day. You can add a second and even a third coat of filler as it dries. Get rid of the dust and sand it down.
We have a wide range of Melbourne timber repairs for your home renovations. Check out Hitch Property Constructions.
First, Prime The Damaged Area, And Thereafter Paint It So That It Blends In With The Remainder Of The Piece.
Use anti-fungal paint for the maximum performance in preventing future problems with dry or wet rot.
It's important to exercise cautious here. It's crucial to remember that decaying wood could still retain lead paint before doing any kind of treatment on it. It is important to take the proper health and safety measures at work to avoid breathing in paint dust or picking up pieces of paint from other surfaces.
Conclusion
Any exposed wood, whether indoors or out, will eventually rot if exposed to enough moisture or time. Rotted wood can be found almost anywhere, but the most common places are in pipes, basements, door jams, decks, and fences. An effective repair requires treatment of both the rotted and unrotted wood. When filling wood, epoxy or polyurethane is the most effective agent. Make fake grain lines with a utility knife before staining.
It's not safe to assume it's sound just because it appears to be so, as rot often occurs under paint. Epoxy liquid, applied evenly and deeply into the surface, can fix severely damaged wood. Use a router with a V-shaped bit to quickly remove rotten wood. After the first application of Wood Restorer, damaged wood can be treated with it for another four to six applications. It's also necessary to remove any grit, rust, or primer from the wood's surface before moving forwards.
The Patch should be glued to the wood with polyurethane glue. As it cures, polyurethane glue expands to fill even the tiniest of gaps. Wait about 6 hours for the urethane glue to dry and set completely. Wood filler can be used without worrying about it sticking to or breaking glass or plastic. In some cases, wood filler may change the colour of the affected area slightly.
If you want a flawless, streak-free primer application, spraying it on is your best bet. Wet or dry, wood decay can occur in any structure, necessitating its removal if repair is not an option. Roofing shingles that are missing or broken, improper drainage, poorly fitting doors and windows, improper stone pointing, and excessive moisture are all potential causes of rot. Get rid of rotten wood with the help of a 5-in-1 craftsman's tool or a putty knife.
Content Summary
- In older buildings, rotting wood is a prevalent issue.
- Treating both the rotted & unrotted wood is necessary for a proper repair of rotten wood.
- Replacement of rotten wood is simple.
- Determine what caused the wood to decay so that the problem can be fixed once and for all.
- Use a rasp or chisel to carefully chip away at the rotten wood.
- Your local hardware or home repair store should carry a wood hardener.
- Use a paintbrush of the proper size to apply the timber hardener to the affected area, and then let it dry thoroughly.
- Allow the putty to dry for at least 24 hours, ideally overnight.
- Fix the splotchy paint job.
- When the filler is dry, sand it, prime it, and paint it.
- Apply a wood preservative to the planks.
- Drive screws fully into the wood before adding epoxy to deep holes.
- To repair badly damaged wood, soak it in epoxy liquid.
- Have used a claw hammer to dig out rotting wood.
- Throw away only the mushy, rotten wood.
- Use a paint scraper with sander with a coarse grain of around 60 to remove any residue from the wood's surface.
- Apply the restorer using the supplied brush to the entire damaged area.
- Create a clean, straight cut in the wood using a Japanese hand saw.
- Cut the patch down to size with a saw.
- Wet both the bare wood where you're applying the patch and the patch itself with a rag before proceeding.
- In order for the urethane glue to fully dry and set, you need to allow about 6 hours.
- Mix The Filler And Hardener By Placing A 3-Inch (7.6-Centimeter) Strip Of A Hardener On Top Of The Filler.
- Take a putty knife and mix the filler and hardener together for around 2 minutes.
- Apply the filler two inches beyond the damaged wood (5.1 cm).
- If you want your patch to blend in with the rest of the wood, make sure its edges are smooth.
- Apply the stain with a paintbrush and wait for it to dry.
- Determine how well the filler will take the stain by testing a tiny area with the stain.
- Apply a grey or white foundation in thin applications to ensure an even finish.
- Ventilate the area thoroughly with fans and dehumidifiers if the issue is inside.
- Get Rid Of The Rot.
- If you discover rot in the home, you'll need to replace any boards that are harmed.
- To get rid of rotten wood, use a 5-in-1 craftsman's tool or a putty knife.
- Clean up the dust and sawdust.
- Get a polyester or epoxy board hardener & filler with little to no volatile organic compound (VOC) odour (VOCs).
- Use wood filler like a pro by learning from the San Diego handymen who do it every day.
- Use anti-fungal paint for the maximum performance in preventing future problems with dry or wet rot.
FAQs About Wood Rot
Rotten wood is highly porous and must be sealed before painting. Before rotten wood can be painted, it must be treated with a wood hardener. The hardener absorbs into the rotted wood to provide a firm base for the paint.
Dry rot is a type of dampness primarily found in aged homes and buildings. If left untreated, it can cause wooden structures to weaken and the building's foundation will get disturbed.
To help the wood hardener penetrate deeper, drill small holes into the rotten area. It's worth drilling holes in the area that's slightly beyond the rotten wood to ensure the rot doesn't spread. Once you've removed the crumbling wood, use a wet rot wood hardener and apply it to the wood with a paintbrush.
While dry rot can technically happen to any wooden structure, it's most commonly associated with homes and buildings. Left unchecked, a dry rot issue can be catastrophic, leading to structural failures and collapses.
Dry rot can spread up to 80 mm per day, if it has optimal conditions for growth. In order to achieve this intense growth, dry rot needs temperatures between 66- and 70-degrees Fahrenheit. Further, unlike many other fungi, dry rot does not need a lot of moisture to grow quickly.