
The paint work will appear better and the last longer if the trim and siding are caulked first. The peeling paint is caused by water collecting in cracks and gaps.
Caulk is used to fill and seal cracks. When working outside, you should be using caulk that can last for 30-50 years regardless of the weather. Always refer to the product's manual before deciding how to seal any gaps between components. To prepare the area for painting, use caulk that can be painted. If you have any doubts about the efficacy of a caulk, you should ask the company that made it.
The caulking process should begin with scraping, sanding, and priming. Surfaces that have been prepared prior to applying caulk have a better chance of adhering to it, thereby highlighting any cracks or holes.
Get rid of flaking paint around caulked areas. Caulk any cracks that aren't moving if it reveals wood. Don't rush into power cleaning the outside; give it some time to dry. Want to find someone to fix your weatherboards? Done! You may be assured knowing that Hitch Property Constructions has your back.
Joints in horizontal siding that overlap should not be caulked. Moisture can escape through the cracks between the siding courses and the wall. One frequent method for addressing moisture issues is to insert wedges between siding courses. This creates a bigger gap through which moisture may evaporate. Do not paint in the intermezzo either.
Siding gaps can be patched with external patching compound, which comes in both pre-mixed and dry-powder varieties. Check the product's packaging to make sure it can be used in the open air.
Filling Exterior Wooden Holes With Caulk
Caulk is used to fill up and seal gaps and crevices. Caulk can be used to patch up the exterior wood of your new house after it has been damaged by nails or ice. Select a siliconized acrylic caulk that can withstand the elements and has a strong bond to wood. Pick out a caulk that blends in with the wood's natural tone, or paint over the area once it's set.
We figured out the best approach to repaint the outside of our house and repair the peeling, cracking, and hole-filled walls. Sharing was caring, and we both agreed that this was a great experience to have together. The concept came from my in-laws' father, who has completed a number of construction projects. Concerned, we say.
We assumed Zissner Bin Peel Stop will suffice as a protective coating after sanding and priming the surface. Our dissatisfaction was due to the unevenness of the surfaces. Its painted surface still was harsh and the peeling paint was visible after sanding and applying a triple-thick guide.
No amount of sanding or directing improved the situation. The filler/spackling paste idea came from my husband's dad. Superior Exterior Filler - Dap Platinum Patch.
Remains of paint, rotten wood, and wire-brush detritus in a hole. It's important to clean the hole before applying caulk so that it can adhere properly. Put some water in the hole and wet the wood around it, then leave it alone to dry.
With such a knife or razor, snip off the end of the caulk tube. The optimal TV opening size for a small hole is 60–70% of the hole's width.
Sealant cartridge for a caulking gun. Put caulk in the crack by squeezing the nozzle. You need to patch that up.
Remove any extra caulk from the wood around it with a damp paper towel. Before applying a primer or paint over the caulk, make sure you wait the amount of time recommended on the tube.
Painting after caulking and repairing
The following procedures will help you locate damaged siding:
It's important to prep the space for filling.
Use 80-grit sandpaper to improve adhesion in the region.
Put a bandage on it.
Fill the void or relieve the stress by first applying the compound in one direction and then smoothing it out in the other.
Smooth out the cured compound using sandpaper.
As the first coat wears off, you may need to apply a second. Sanding dust must be cleaned up before the second coat can be applied.
In order to fix the major cracks and the damaged trim, you will need to remove the rotten wood. Fix it using auto-body filler-like two-part polyester compound. Two-component fillers consist of a paste and a separate hardener. Be sure to follow the instructions when combining the hardener and paste. Only mix what you will use in the next few minutes, and clean your instruments as soon as possible afterwards, as the fill sets in just 3 to 5 minutes.
Use a putty knife to spread and smooth the compound. Unlike pre-mixed external fillers, this one doesn't contract while you work with it. If the hole is large, you may need to apply more than one layer. Once the filler has hardened, you can use common tools on it like a shoe sander or a drill.
Use two-part polyester-resin or auto-body fillers to repair holes in aluminium siding. Drill holes that are 1/8 inches in diameter into the surface before you fill the area. The use of the chemical results in a more secure attachment. If the siding is damaged, that can be fixed as well. Assemble the spot by cutting the leading flange to fit beneath the courses above it and caulking the top and sides.
Filling In Cracks, Holes, And Gaps When Painting Your Home
It's a good sign if the painted object has a smooth, faultless surface. We've already covered the various Surface Grades and the Defined Levels on Surface Prep required to get there in a prior article. However, what filling products should be used to fill cracks, nails holes, or other openings to get the desired results?
This article will focus on those products and the situations in which they are useful. Observing these steps will help you produce a result that will be the admiration of many expert painters.
Making Up The Missing Pieces.
Before painting, it's possible that you'll need to fill in some holes.
You might discover them in a freshly painted interior between the junctions of walls and ceilings, between wood trim and walls, and between various types of wood trim (such as door and window casings, baseboards, and so on).
The interior corners, butt joints on longer lines of siding, etc.
More of these spaces are needed, whether indoors or out. There will be a high need for caulk, particularly painter's caulk. They go through it so quickly that painting crews always have at least a handful of cases on hand.
Sure, caulk is cheap. 25-year paintable latex caulk can be purchased for slightly more than a dollar. You're good to just go if a few months' wait is OK. It may stay in place for a long period in a laboratory with constant temperature and humidity, but in the actual life, it usually retreats from the joint rather rapidly. At Hitch Property Constructions, we offer Melbourne weatherboard repairs services.
Patching Holes.
When repairing drywall or plaster, joint compound is the most discreet option. One-gallon and five-gallon containers of pre-mixed "mud" are for sale. It can also be purchased as a powder and diluted to the appropriate consistency for filling a certain sized crack.
Depending on how fast you need to operate before the mix sets, you can choose from joint powders that dry in 20, 45, or 90 minutes.
Inside wooden doors, window casings, and trim, wood filler is most effective. The best wood fillers harden when dry and can be worked with further (sanding, drilling, painting, staining). As long as the mitre trim joints are sanded down to a flawless finish, no one will ever know they were filled.
High-quality caulking may move and flex with the weather, making it ideal for many outdoor surfaces. When repairing wood, it's possible that wood replacement will be necessary to ensure a smooth appearance. Repairing stucco requires the proper knowledge, equipment, and expertise.
Backfilling Nail Holes.
Filling nail holes in walls using shrink-free spackling is usually as simple as gently overfilling liquid hole with compound, letting it dry, and then smoothing the surface flat. When repairing gaps in wood moulding, wood filler is your best bet.
Repairing nail holes, cracks, and gaps in external surfaces with elevated caulking is an efficient procedure.
Before painting your next job, make sure all the fractures, nail flaws, and gaps are filled. The paint's adhesion will be improved if you do this. True, you'll have to spend some extra cash and some extra time in order to purchase some extra products, but the final result of the painting endeavour will undeniably look wonderful.
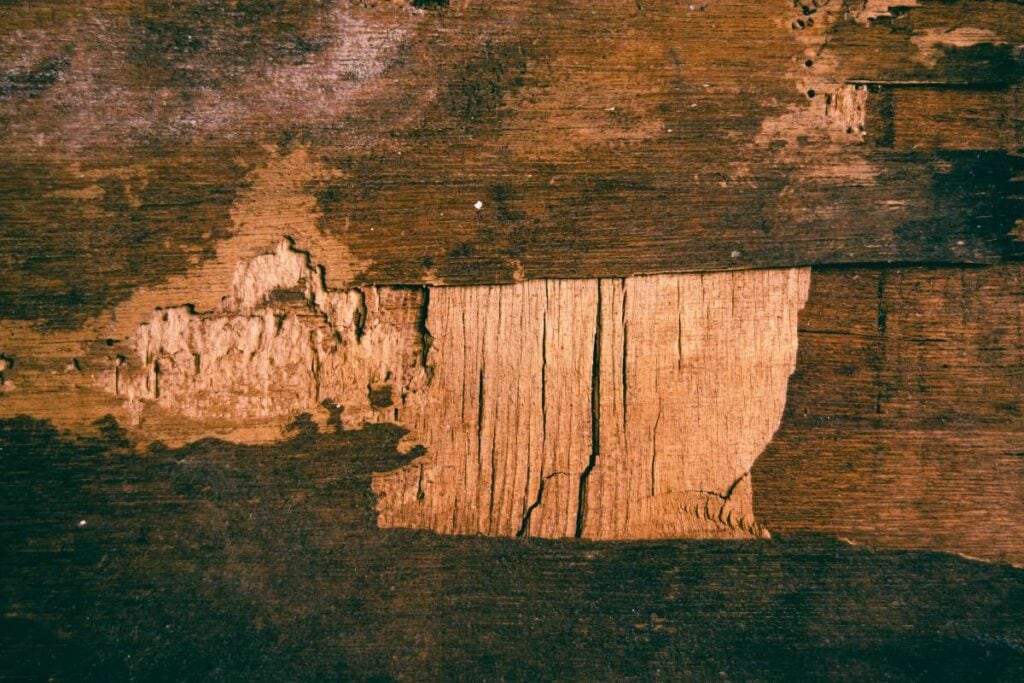
The Reason Timber Cracks.
We all are aware that timber is a naturally occurring substance and that changes in the wood's moisture levels and consequent increases in the wood's various measures can cause splitting.
When a tree is felled for the first time, the lumber that remains is called "green wood." Half of a tree's weight as water is retained in its green state. In basic terms, this water can be divided into two categories: free water as bound water.
The only thing keeping the complementary water in the hardwood is capillary action, so it can easily be lost.
Hydrogen bonds, generated between the fibre and water molecules, trap the water and keep it in the wood.
Drying wood is done such that its moisture content is in equilibrium with its environment, which is usually between 25 or 30 percent.
Despite this, the wood will always want to reach a state of equilibrium with its setting. This implies that it will absorb water during the colder months of winter and spring and then release that water during the warmer months of summer and autumn.
If You Need To Fix A Timber Joint Seal, Why Is It So Difficult To Do So Successfully?
Solid Fillers Are Used To Fix Damaged Seals In Lumber Joints.
Damaged wood is occasionally repaired with a hard compound; several of the cracks in the house I bought had been filled with render. That should not be a surprise that lumber, which responds to daily and seasonal variations in the amount of moisture present in the air, will not be accompanied in its movements by anything hard.
The fix WILL fall apart, separate from the wood, and cease to operate. In the meanwhile, it will almost certainly create a way for moisture too collect and drive the start of the rot you were seeking to prevent. You should make an effort to refrain from doing it.
Repairing Splits And Cracks In Wood Using Moldable Fillers.
Caulks, silicone, or butyl rubber bands should be able to successfully fix wood cracks at first. These fixes rarely last more than a year before letting water back in. It is possible to compress and stretch the filling. That elasticity has its limits; it won't hold forever. As a rule, there are two problems that arise with wood fracture fillers.
Caulk doesn't adhere well to wood, so it peels apart as the crack spreads and closes. It makes sense that this would happen because the inside surface of the fracture was probably exposed to the parts before the repair.
When a flexible fill is pushed far into a crack, the filler may reach a point where any further compression would cause the crack to widen again. Check out Hitch Property Constructions for a huge range of weatherboard repairs Melbourne services.
Conclusion
When water accumulates in these crevices and gaps, the paint begins to peel. Prepare the surface to be painted with paintable caulk. If you find that nails or ice have damaged the exterior wood of your new home, you can easily repair it with caulk. For a small hole, a TV opening size of 60-70 percent of the hole's width is recommended. To ensure proper adhesion, caulk must be applied after the hole has been cleaned.
Use a two-part polyester compound, similar to auto-body filler, to fix the problem. It's possible that you'll need to patch up a few holes before you can begin painting. Repair holes in aluminium siding with two-part polyester-resin or auto-body fillers. You can get latex caulk that lasts for 25 years and can be painted for a little over a dollar. The use of superior caulking to seal up nail holes, cracks, and other imperfections in exterior surfaces is a time-saving method.
Wood filler is the best option for bridging cracks in wooden moulding. The most effective wood fillers dry to a hard, workable state (sanding, drilling, painting). Lumber is sensitive to changes in humidity and is easily damaged by abrasive substances. To begin, you can try mending the cracks in the wood with caulk, silicone, or butyl rubber bands.
Content Summary
- The paint work will appear better and the last longer if the trim and siding are caulked first.
- To prepare the area for painting, use caulk that can be painted.
- Get rid of flaking paint around caulked areas.
- Caulk can be used to patch up the exterior wood of your new house after it has been damaged by nails or ice.
- Select a siliconized acrylic caulk that can withstand the elements and has a strong bond to wood.
- We assumed Zissner Bin Peel Stop will suffice as a protective coating after sanding and priming the surface.
- Remains of paint, rotten wood, and wire-brush detritus in a hole.
- Sealant cartridge for a caulking gun.
- Remove any extra caulk from the wood around it with a damp paper towel.
- Before applying a primer or paint over the caulk, make sure you wait the amount of time recommended on the tube.
- In order to fix the major cracks and the damaged trim, you will need to remove the rotten wood.
- Fix it using auto-body filler-like two-part polyester compound.
- Use two-part polyester-resin or auto-body fillers to repair holes in aluminium siding.
- Drill holes that are 1/8 inches in diameter into the surface before you fill the area.
- This article will focus on those products and the situations in which they are useful.
- Before painting, it's possible that you'll need to fill in some holes.
- When repairing drywall or plaster, joint compound is the most discreet option.
- Inside wooden doors, window casings, and trim, wood filler is most effective.
- Repairing stucco requires the proper knowledge, equipment, and expertise.
- When repairing gaps in wood moulding, wood filler is your best bet.
- Repairing nail holes, cracks, and gaps in external surfaces with elevated caulking is an efficient procedure.
- Despite this, the wood will always want to reach a state of equilibrium with its setting.
- Damaged wood is occasionally repaired with a hard compound; several of the cracks in the house I bought had been filled with render.
- The fix WILL fall apart, separate from the wood, and cease to operate.
- Repairing Splits And Cracks In Wood Using Moldable Fillers.
- Caulks, silicone, or butyl rubber bands should be able to successfully fix wood cracks at first.
- It is possible to compress and stretch the filling.
- As a rule, there are two problems that arise with wood fracture fillers.
FAQs About Wood Cracks
Cracking and checking is a normal part of timber frame buildings, fences, and furniture and is very rarely a result of any structural issues. Cracking and checking of timber is actually a very natural part of the life cycle of wood – even once it's been cut, shaped, and prepared for building.
Splits and cracks (known as wood checks in the industry) occur when wood shrinks as it dries. Wood shrinks roughly twice as much along with the growth rings (radially) as it does across the rings (tangentially). It is this uneven shrinkage that causes checks to develop.
Wood putty or wood filler sticks are easy to use and effective for covering over wide cracks in indoor and unstained wood. For a quick fix, a mixture of wood glue and sawdust seamlessly blends in small cracks and gaps in assembled furniture. Purchase epoxy to handle larger gaps, such as on outdoor projects.
You can keep wood from splitting by applying a sealant or stabilizer, using a salt paste, applying varnish, applying paintable wax, or applying boiled linseed oil. Those methods will help you to keep wood from splitting when nailing, screwing, drying, cutting, and sawing.
During winter the humidity of the atmosphere (76%) is significantly higher than the humidity in summer which is 66%. This humidity change causes wood to shrink or expand. Constant shrinking and expansion of wood with seasons cause the wood to crack.