
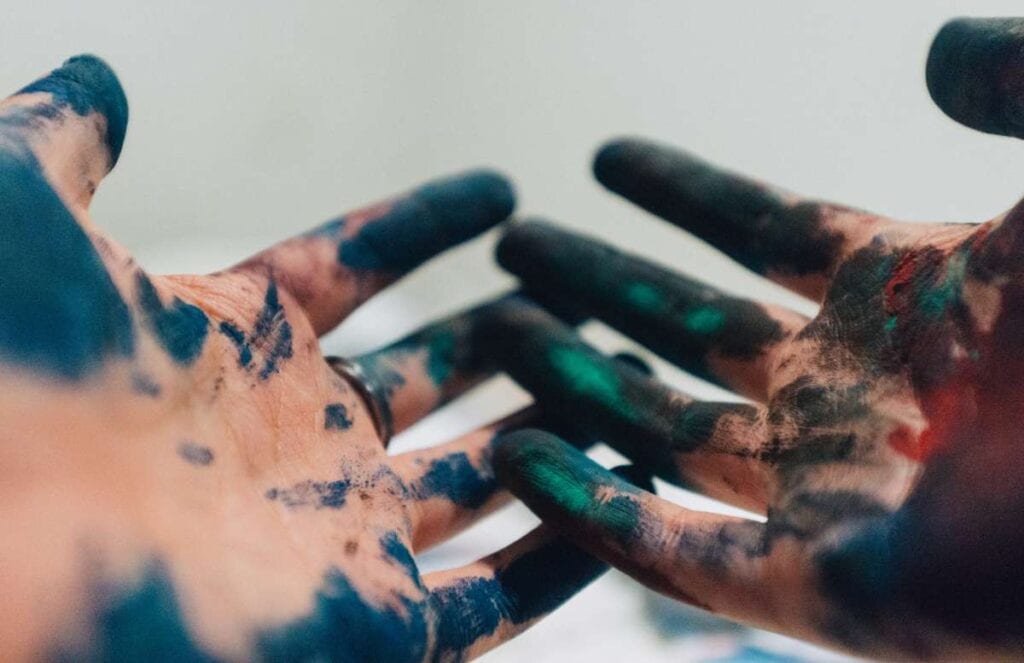
Plastering is a skill, a pain in the arse, and an endeavour that can set you back hundreds, if not thousands of dollars. Money is something that not all of us have, right?! We are fully aware that this is not the case.
If you want to save some money, why don't you try your hand at doing some of the plasterings yourself? In order to assist you in undertaking plastering projects on your own, we are going to share everything that he discovered as well as everything that we know.
If you are reading this, it is highly likely that you are interested in learning whether or not it is possible to do your own plastering as a DIY project and how to get started with it.
Plastering is unquestionably a skill, which is something you need to be aware of before you start working on the project. You can learn any skill you want, but it will take some time and some practise on your part to get good at it.
This suggests that you might need to come to terms with the fact that the quality of your plastering will not be comparable to that of the work done by a skilled professional who has spent thirty years working in the trade.
You can, however, start with a small area, develop your understanding, practise, and one wonderful benefit of plastering is that you can always discuss it if it does not quite go to plan! At Hitch Property Constructions, we have a wide range of property plaster repairs.
Plastering is one of those home improvement projects that you can absolutely tackle on your own if you put in the effort, research, and time. You merely need to make an effort to figure out how to proceed with this.
Therefore, we are going to walk you through everything that we know in great detail to get you started with your very first experience.
FAQs About Plaster Paint
Top tip: If you don't let the plaster dry and apply emulsion paint to wet plaster, it's likely to crack and peel off. Painting new plaster that's completely dry can also leave you with uneven brush strokes. So, the next course of action is to create your own mist coat paint.
Ideally, plaster needs to be fully dry prior to painting. Fresh plaster will take around 4-6 weeks to fully dry. Fresh plaster is porous and will therefore absorb moisture. If you attempt to paint over plaster that is still damp the paint is likely to peel off.
Use a white emulsion (it doesn't need to be high quality) as this provides a good base colour for any top coat. A common ratio is 7 parts paint and 3 parts water, but you can go 50-50 if the paint you are using is thick to start with. It's better to be too thin than too thick.
When it comes to painting over new plaster, you'll technically want three coats of paint – our two recommended coats plus a mist coat. A 'Contract matt' is specially designed for use on new plaster.
You can paint straight onto/over plasterboard in most cases, you simply need to cover the joints and any holes created by your fixings first. Being able to paint directly onto the surface of the new wall is convenient and saves time and money. You can also plaster over painted plasterboard at a later stage.
Step-to-step Guide To Plastering
Preparation
Before you begin working on the walls, make sure that your floors are protected by laying a dustsheet down on them. Additionally, this will assist you in collecting any plaster or debris that may fall at a later time.
The next thing you need to do is check to see if the area you intend to plaster is clean and free of any debris, such as dust or other particles that may be floating around.
It is especially important to keep this in mind whenever you are applying plaster to an older wall that already exists. In addition to this, you are responsible for repairing any cracks or holes that you find in the material.
Utilising a screen tape will allow you to achieve your goal in this regard. When you are applying plaster over newly installed plasterboards, make sure that all of the joints between the boards are masked with screen tape before you begin. This will ensure that the plaster adheres to the surface in the correct manner.
Apply PVA to walls
PVA produces the best results when used for bonding, and it ensures that the layer of plaster that you will later apply will dry out in an even manner regardless of its thickness. PVA can have its concentration lowered by being diluted with water in the proportion of one part water to four parts PVA.
Utilising either a roller or a paintbrush, apply the PVA mixture to the wall, making sure that the mixture covers the entirety of the wall.
As soon as the PVA glue has been allowed to dry and has reached the appropriate level of tackiness, the very first layer of plaster can be applied immediately afterwards. Always make sure to follow the directions that the manufacturer of the glue has provided for you, as doing so will guarantee that you get the best result possible.
Mix plaster
When opening the bags of plaster, be sure to put on a mask to protect your lungs from the dust. Combining the plaster with the cold water and vigorously whisking it up until it reaches the consistency of thick custard is how you make plaster.
It is imperative that there are no swellings. Plaster must be thoroughly mixed into the water at all times, and not the other way around.
Apply plaster
Now that you have everything you need, it's time to start applying the first coat of plaster using the hawk board, the trowel, and the float. Before beginning the actual job, it is recommended that you practise the motion on several different types of plasterboard to ensure that you are using the appropriate strategy.
To begin, using the trowel, spread plaster over the hawk board. After that, you make use of the float to apply the plaster that was taken from the hawk to the walls.
This should be done with the float in close proximity to the wall. While doing so, spread the plaster evenly upwards and make sure to flatten the float after each sweep.
You need to start in the lower left-hand corner and work your way up, filling in an area from the bottom up to the leading edge before moving on to the next area.
When applying plaster to a wall, the most effective method for achieving a smooth appearance and preventing excess plaster from falling off the wall is to use only a very small amount of the material at a time while exerting a lot of pressure on the float. It will take multiple applications of the treatment to cover the entire wall.
Skim and smooth
After applying the first coat of plaster, you will need to wait around twenty minutes in order to give the plaster time to dry out somewhat.
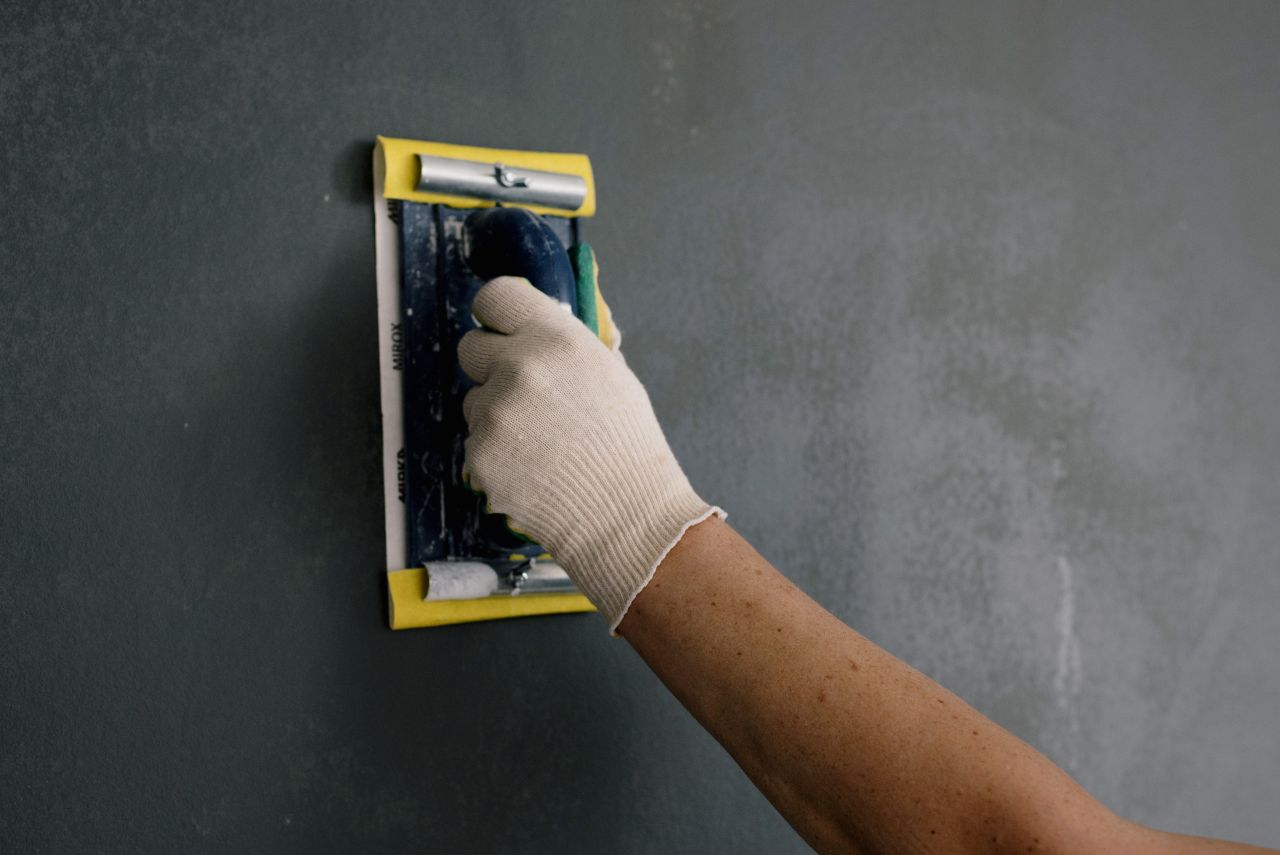
After that, use the trowel to smooth over the area in order to get rid of any swellings or bumps. You also need to travel to all of the nooks and crannies, including the bottom and top of the wall. In most cases, these are challenging areas to properly plaster. Applying even pressure with a wet brush will help smooth out the edges.
Scrape
This step is not required; however, some people like to scrape the surface before applying the second coat. You can choose whether or not to take this step. It is necessary to do this in order to ensure that the second coat will adhere correctly.
Using a tool known as a devilling float, which is specifically designed for this purpose; it's a wood float with nails in it, is the simplest and most effective way to accomplish this task.
Another option is to use an old fork from the kitchen area to scratch the surface. If you would rather skip this step, make sure that the first coat of plaster that you applied to the wall is still wet before proceeding to apply the second layer of plaster.
Apply plaster
You are able to apply a second and final coat of plaster after the first devilling or scratching the very first level of plaster.
Because this should have a thinner consistency than the very first coat, make sure to dilute the plaster mixture with some additional water before applying it. Aim to create a layer no thicker than 2 millimetres thick. The next step is to let the plaster slightly dry.
Completing touches
It is necessary for you to polish your work after the plaster has actually begun to dry slightly. You can accomplish this by using a spray gun to apply water to the surface of the object.
Spray the edges of the plaster, then use the trowel to smooth out the surface area of the plaster. When you are doing this, make sure to use strokes that go inward.
In addition to this, you can accomplish the task by using a wet brush, particularly around the more difficult edges. Finish up by running a clean float over the entire surface to smooth out any bulges or bumps that may have formed.
When the plaster has completely dried, you can use some sandpaper to remove any excess plaster that you might find on the surface.
Painting and wallpapering
When the plaster has completely dried, the surface can then be painted or covered with wallpaper without any further preparation.
Applying an undercoat and then priming the surface with a primer is something you need to do before painting over the freshly plastered surface.
The situation is exactly the same when it comes to hanging wallpaper, with the exception that you would need to make use of wallpaper adhesive in this instance. To prepare and protect the surface, prime and seal it with one or two coats of adhesive.
Repairing a Damaged Wall
Plastering a wall from top to bottom is not necessarily required in every situation. In the same vein, it is useful to be familiar with the process of using plaster to patch holes and any other imperfections that may appear.
The diameter of the holes is a necessary step that must be completed before work can begin. A filler can be used to patch up holes of a smaller size.
However, larger holes almost always necessitate the application of new plaster. In that case, the final result will not have a smooth surface.
First, clean up any loose dirt and dust that may be around and inside the hole. The completion of this procedure is essential because it ensures that the plaster will adhere to the wall in the correct manner.
Therefore, take your time, and check to see that the area has been thoroughly cleaned up before you proceed. It is possible that you will find success using a one-coat plaster to patch up holes.
It dries to a white colour, which is one of its primary benefits, as well as the fact that it eliminates the need to wait around for it to dry. However, it is not recommended to use only one coat of plaster when working on larger projects.
They are plastering a damaged wall
When you are ready to get started, you will need to incorporate water into the overall mixture. This is done for the same reason as before: to make sure that the wall does not absorb the moisture from the plaster too quickly.
The depth of the hole will determine how many layers of filler you will need to apply before it is complete. Any hole that is less than one-half inch in diameter must only require one coat. Two coats will be necessary for holes that are deeper.
Be sure to scratch the very first layer of plaster before applying another coat on top of it, just as you would when plastering an entire wall.
How to Mix Plaster
Shall we begin at the very beginning and work our way up? If the consistency of the icing is off, you won't be able to frost the cake. Because it is too lumpy and too thick, it is not going to happen.
Plastering a wall is impossible if you are unable to properly mix the plaster first. It's the first thing you need to do for a successful plastering job.
To begin, you will need a paddle to use with your drill, which will enable you to blend the plaster (alternatively, you can use an electric mixer if you have access to one). In addition to this, you will require two containers of a size that is reasonably adequate.
It is possible to acquire suitable plastering containers for this purpose, which is what we have, and this is the option that we would most likely recommend given that we have these ones. Need help with your home repairs? Look no further! Hitch Property Constructions has you covered.
How to Mix Plaster
There is a wide variety of plaster available, but the multi-finish variety is the kind that is used the most frequently. Put some plaster in one of your buckets, and then, while slowly adding water and working at a medium speed with your paddle and drill, begin to blend the plaster.
Continue adding water until the mixture has a creamy consistency and you should be able to leave peaks in your plaster.
Always check to see that the contents of the container's corners have been thoroughly combined as well and that there are no isolated dry areas. We always mix in the corners by hand using a pail trowel to inspect it!
Further, it is crucial to remember that each time you mix plaster, you should only use a small amount. Plaster becomes ineffective rapidly, so you'll either have to toss away a significant amount of it or try to utilise it and end up disappointed since it doesn't stick to the surface very well once it's hardened.
After you have filled your second bucket with water, give your mixer paddle a thorough cleaning by placing it in the water and operating the mixer at a high speed.
It is imperative that you keep your tools clean because you do not want any dried plaster flakes to fall off of them into the next batch of plaster that you make. You could also use a wet paintbrush to clean your mixer instead of using a dry one.
What Tools Do You Need for Plastering?
If you only have the tiniest of spaces to plaster (i.e. you're patch-plastering), you can get by with a cheapo plastering trowel, but if you're doing a whole wall, you should invest in an excellent trowel! There is in fact a distinction to be made.
Iinvesting in a trowel that is designed for professionals will not only make your life significantly easier but will also allow you to plainly see the difference! There's a good reason why professionals put money into buying high-quality tools!
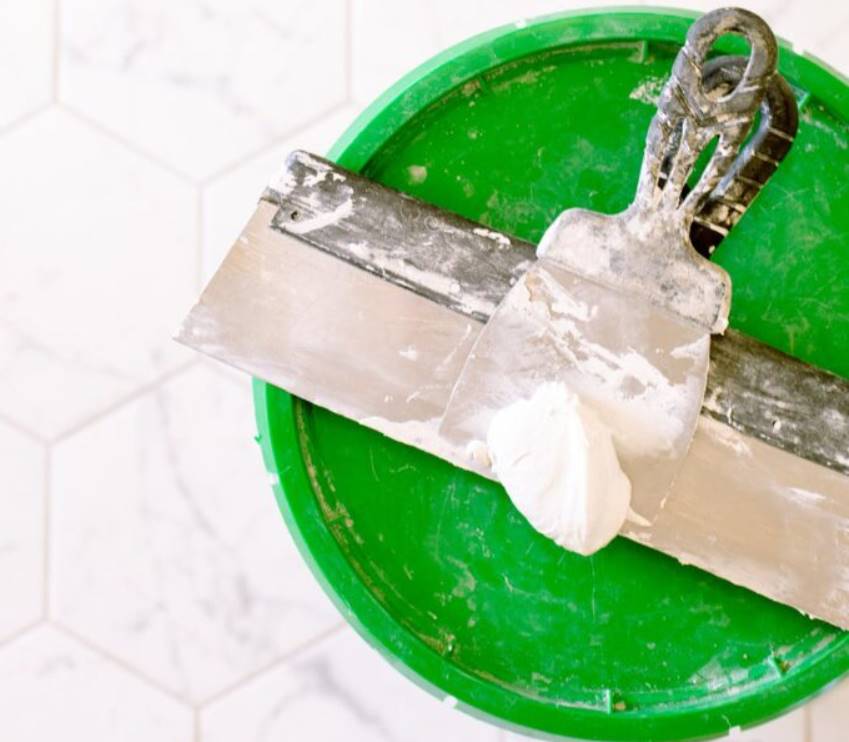
In addition to the mixing buckets and paddle that we discussed earlier, the following items are essential for DIY plastering: a hawk to hold your plaster, a pail trowel to transfer your plaster from the bucket onto the hawk, a paintbrush that you don't mind ruining, and it's also a good idea to have a spray bottle on hand.
Having a variety of trowel sizes, and especially a little trowel, can be useful. Working with larger trowels can be challenging in confined spaces. A tiny trowel can be of great assistance.
Keeping Your Tools Wet When Plastering
When you first begin to work with plaster, it is essential that you never allow your tools to dry while they still have plaster on them.
It will become a nightmare of dragging dry pieces of plaster over the wall and picking them off one by one if this happens to you when you're plastering.
Maintaining a damp environment for your tools will prevent the plaster from drying on them. This requires keeping a container of clean water close by as well as a paintbrush that has been dampened so that you can occasionally wipe down your trowel and hawk with water.
This is especially important to keep in mind when taking a break for some tea! Keeping everything in order will save you a lot of time and energy, as well as protect your walls from being damaged. At HP Constructions, we have the best home constructions selection to make your house a dream come true.
How To Keep Plaster Tools Wet
In addition to this, before you mix a new batch of plaster, you need to make sure that you clean the bucket in which the plaster is stored.
The plaster will dry out in a startlingly short amount of time, and any bits of dried plaster that remain at the top of the bucket will ruin the next batch of plaster you make. It is also a good idea to brush any dried flakes of plaster off of your clothing, as this will prevent them from sticking to your skin.
If you don't do that, there's a chance that it will slide off into the container containing the plaster. When working with plaster, it is essential to keep everything clean and organised.
Conclusion
You should be aware that plastering requires a certain level of ability. We offer comprehensive plaster repair services at Hitch Property Constructions. In order to help you get started on your first adventure, we will provide you with a comprehensive rundown of everything we know. When it comes to bonding, PVA yields the best results, and it also guarantees a uniform drying process for the plaster layer you'll apply later. Diluting PVA with water in the ratio of one part water to four parts PVA reduces its concentration.
In order to get a smooth finish while applying plaster to a wall, it is best to use a very tiny amount of material at a time and apply heavy pressure with the float. In order to completely cover the wall, many coats of the treatment will be required. Spray the plaster's perimeter and then smooth it with a trowel to remove any rough spots. Layers shouldn't be more than 2 mm in thickness. If you locate any excess plaster, you can rub it off with sandpaper.
The number of filler coats required to cover the hole depends on its depth. As long as the hole is smaller than half an inch in diameter, you should only need to apply one coat of plaster. Larger, deeper holes will require two coats of filler. Plaster should be used in very modest increments at each mixing stage. Plaster loses its effectiveness quickly, so you'll either have to throw away a lot of it or try to use it and be dissatisfied since it doesn't hold to the surface very well once it's set.
Content Summary
- Plastering is a skill, a pain in the arse, and an endeavour that can set you back hundreds, if not thousands of dollars.
- In order to assist you in undertaking plastering projects on your own, we are going to share everything that he discovered as well as everything that we know.
- If you are reading this, it is highly likely that you are interested in learning whether or not it is possible to do your own plastering as a DIY project and how to get started with it.
- Plastering is unquestionably a skill, which is something you need to be aware of before you start working on the project.
- At Hitch Property Constructions, we have a wide range of property plaster repairs.
- Therefore, we are going to walk you through everything that we know in great detail to get you started with your very first experience.
- Now that you have everything you need, it's time to start applying the first coat of plaster using the hawk board, the trowel, and the float.
- This should be done with the float in close proximity to the wall.
- After applying the first coat of plaster, you will need to wait around twenty minutes in order to give the plaster time to dry out somewhat.
- Applying even pressure with a wet brush will help smooth out the edges.
- If you would rather skip this step, make sure that the first coat of plaster that you applied to the wall is still wet before proceeding to apply the second layer of plaster.
- You are able to apply a second and final coat of plaster after the first devilling or scratching the very first level of plaster.
- You can accomplish this by using a spray gun to apply water to the surface of the object.
- Spray the edges of the plaster, then use the trowel to smooth out the surface area of the plaster.
- When the plaster has completely dried, the surface can then be painted or covered with wallpaper without any further preparation.
- In the same vein, it is useful to be familiar with the process of using plaster to patch holes and any other imperfections that may appear.
- A filler can be used to patch up holes of a smaller size.
- First, clean up any loose dirt and dust that may be around and inside the hole.
- It is possible that you will find success using a one-coat plaster to patch up holes.
- However, it is not recommended to use only one coat of plaster when working on larger projects.
- The depth of the hole will determine how many layers of filler you will need to apply before it is complete.
- Be sure to scratch the very first layer of plaster before applying another coat on top of it, just as you would when plastering an entire wall.
- Plastering a wall is impossible if you are unable to properly mix the plaster first.
- Put some plaster in one of your buckets, and then, while slowly adding water and working at a medium speed with your paddle and drill, begin to blend the plaster.
- After you have filled your second bucket with water, give your mixer paddle a thorough cleaning by placing it in the water and operating the mixer at a high speed.
- You could also use a wet paintbrush to clean your mixer instead of using a dry one.
- There's a good reason why professionals put money into buying high-quality tools!
- Having a variety of trowel sizes, and especially a little trowel, can be useful.
- When you first begin to work with plaster, it is essential that you never allow your tools to dry while they still have plaster on them.
- Maintaining a damp environment for your tools will prevent the plaster from drying on them.
- In addition to this, before you mix a new batch of plaster, you need to make sure that you clean the bucket in which the plaster is stored.
- When working with plaster, it is essential to keep everything clean and organised.