
Grout has a natural tendency to get grimy, filthy, and cracked with time; in extreme cases, it may even completely disappear.
Regrouting tile is a job that almost any homeowner can accomplish themselves. Removing part of the old grout to make way for the clean grout to bond to the surface is the key to a job that makes your tiled bathroom look as good as new.
This can be done by carefully and patiently chipping away at the existing grout. Complete or even almost complete grout removal is not required.
Nonetheless, new grout will have something to stick to if the old grout on the surface is removed. The grout can then be cleaned and used again. The cement in cement is what makes grout cement, after all.
Wearing a mask is highly recommended. A grout saw, which can be purchased at any hardware store or home improvement store, can be used to remove old grout.
In order for the new grout to adhere to the old, it is not required to remove a significant chunk of the grout, but rather to bring it down far enough from the surface. The best technique to get rid of loose dust and particles is to vacuum them up. You should give the wall a good scrub to get rid of the film and the dust you kicked up when cleaning the grout.
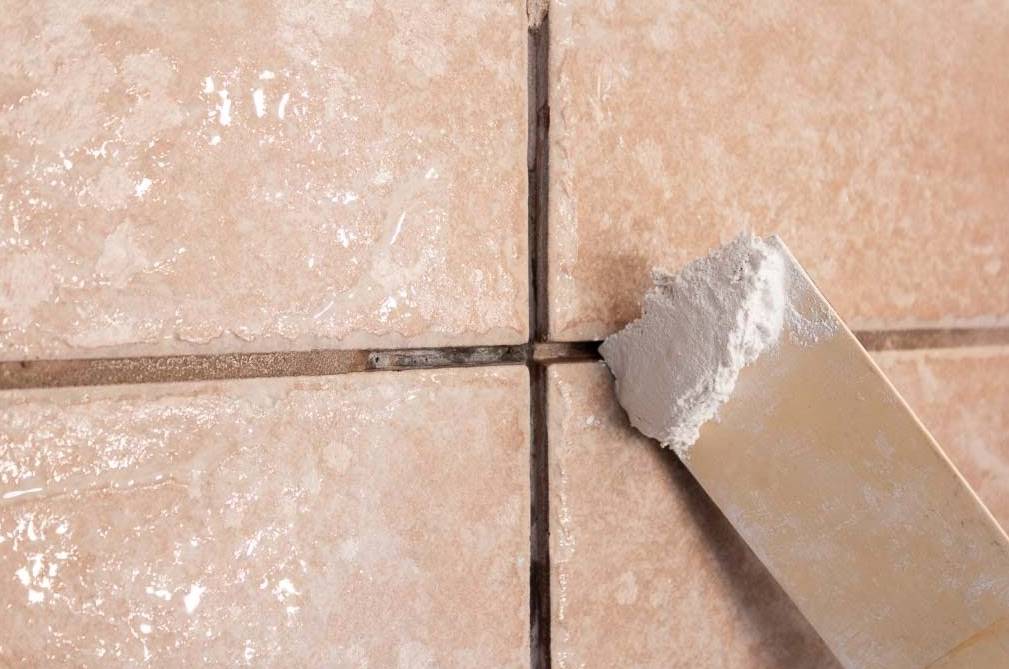
To prepare the grout, merely stick to the directions on the box. Use the grout float to spread the grout into the joints, and then wipe away any excess with the edge of the float as you would with a squeegee.
Grout on the tiles' surface can be washed away with a damp sponge, and the joints between them can be smoothed out at the same time.
The grout should be cleaned thoroughly with clean water once more after it reaches the hazy stage of drying. Buff the grout with a clean, dry towel once it has dried completely.
Allow the grout one week to completely dry out before proceeding. Hitch Property Constructions has a wide range of regrouting services.
How Do You Put New Grout over Old Grout?
With the help of experts, regrouting can be done properly.
When grout lines in the bathroom or kitchen start to seem discoloured or worn, it's time to call the pros. They'll be able to have the job done quickly and with minimal inconvenience.
If you want to save yourself time and energy, rather than spending your weekend working on house improvements, try hiring a professional.
If you choose the right material, you may not have to take out all of the previous grout. Sometimes this is why epoxy grout is suggested.
The main drawback of epoxy grout is its increased strength and resilience compared to cement grout. Epoxy grout can be put directly over cement grout, making both options viable. The correct type of grout removal tool will be needed for this task.
The failing grout can be removed by striking it out with this tool. When you have finished the work necessary to get the old grout suitable for the new grout, you can then apply the new grout.
Elevate the Aesthetic Appearance of Your Shower Area
Even if the grout lines in your shower are in good shape and are not deteriorating, you can modify them to give your bathroom a new look.
Grout is now available in a dizzying array of textures and colours, guaranteeing that your bathroom will look as good as it feels. This opens up a wide range of creative options for realising the perfect look.
Durability
There are a few more important details that you should think about. To increase its resistance and longevity, grout must be made from the right material.
Cement grout, if not sealed soon after installation, can deteriorate rapidly. The same holds true if the container is not sealed.
Cement grout is prone to absorbing grime and water because to its porous composition. Because of this, the grout's colour will shift and it will decay more quickly than other types of current grouts.
Therefore, if you want longevity and resilience, replacing the cement-based grout with a better substance may be your only alternative. When looking for the finest option for your bathroom, it's a good idea to get some expert advice on the types of materials that will provide the most value for your money in terms of both appearance and durability.
In order to ensure the success of your next grout project, it is recommended that you speak with reputable professionals in the industry.
5 Benefits Of Grout When Tiling Your Floor
Grout is a filler that is used to cover the spaces between tiles after they have been installed. Most grouts are made from a powdered combination of concrete, lime, and tinting material.
When sand is mixed with water and allowed to set for some time, a solid is formed. It is not advised to instal tiles without grout. It also helps the tiles adapt better to damp environments.
The many substances used to fill, seal, and otherwise maintain the area in the middle of each tile are collectively referred to as "grout."
For maximum effect, grout lines are frequently shaped into malleable and durable surface designs.
Use of Grout
Grout is applied between tiles after they have been set into a cement backer and have a gap between them.
Grout can assist keep things together if they're given room to grow. Whenever there is a shift in temperature, which happens most often in the summer and winter.
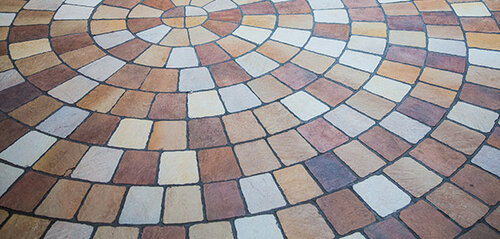
The grout lines between the tiles are sealed with a substance that is tough enough to resist most stains. You get a floor that is hardy, hygienic, and open to any design considerations, including the possibility of diagonal grout lines.
Benefits Of Grout When Tiling The Floor
It Lessens Your Work
Modernizing your tile and grout might cut your cleaning time by as much as half. The smooth surface that results from sealing the surface is significantly less of a chore to maintain.
When the surface is fixed, dirt can be scrubbed away without resorting to chemical cleaners.
It Keeps Your Floor Beautiful
By tiling your floor with grout, you may make it both attractive and simple to maintain. Permanently set tile and grout will not change colour or stain over time. You don't use any man-made chemicals or rough things that could scratch the surface.
Low Maintenance
Tiling a floor not only increases its longevity but also decreases the frequency of maintenance visits. When they get dirty, they'll be cleaned in a way that's not too dissimilar from how you'd clean any other household surface. There isn't much to stress over in terms of maintaining the quality of your tiles.
Grout Keeps Things Looking New
By repairing the grout, your floor will always look clean and fresh. Check out our range of tiling renovations in Melbourne at Hitch Property Constructions.
It Helps in Keeping out the mould.
Since the surface was warm and humid, mould and accumulation quickly spread. Avoiding dampness is facilitated by using a grout sealer that does not let water in.
Because mould and mildew won't be able to grow on the grout, you won't have to spend as much time cleaning it.
Not only is utilising grout while tiling your floor simple and inexpensive, but it also has several advantages.
It keeps the tile looking fresh and clean. Grout that has been repaired is not only more water-resistant, but also less likely to be damaged or stained.
As an added bonus, it helps keep mould and mildew at bay. Taking the time to fix the grout on your tile surface can decrease the amount of wear and tear and increase the longevity of your tile. It is also applicable to nonporous surfaces.
6 Simple Diy Steps On How To Grout Tile
Do you want to know the right approach to grout tile? When you think about the fact that grouting is one of those jobs where you only get one chance to get it right, you can see why this is a reasonable question to ask.
Applying grout between each tile joint is the final step after tiling a wall or floor in a grid or chevron pattern.
Though it's not the most luxurious thing you'll use in your renovation, grout plays a significant role in the final look of your tiled room. Grout can be used to make a place look homogeneous or to provide a bold contrast because it comes in so many different colours.
Choose your grout.
Most grout is one of three types: cement-based (with or without latex), epoxy, or urethane. Each one serves its purpose, and each has its own advantages and disadvantages.
Cement-Based Grout
The vast majority of grout used in building is made of cement. Dan stresses that these are also the most user-friendly options. Grout that doesn't need sanding can be used if the gaps between your tiles are smaller than 1/16 of an inch. But sanded grout is needed for joints larger than 1/16 of an inch.
Epoxy Grout
As two-component mixes, epoxy grouts often consist of both solids and colourants, making them quite costly. They are much more difficult to instal and necessitate more physical labour than cement-based grouts.
They find their principal use in industrial building. He warns that first-time users should avoid using this type of grout since it is prone to forming a haze that is difficult to remove. (He also notes the widespread misunderstanding that epoxies can't cause allergies.)
Urethane Grout
The components of urethane grouts come pre-blended in buckets, and the grouts themselves are very expensive. To use, you take off the top, mix the contents thoroughly, and then remove the necessary amount.
When you're done using the bucket, make sure to replace the cover so it may be used again. To prepare tiles for urethane grouting, wipe them down well with a dry sponge.
When considering using urethane grout in your only shower, keep in mind that it must cure for seven days before being exposed to water.
Mix your grout.
Grout mixing is not something you want to wing; it must be done precisely. Always use the product in accordance with the manufacturer's instructions, which should be found on the package or bag.
Don't add too much water; that would just ruin everything. Using less water in the grout-making process will yield a more uniform and durable end product.
Make sure the ingredients are well combined while also using as little water as possible. You can make sure the grout's colour is uniform throughout the entire batch if you mix the ingredients properly.
Do a practice run.
It's recommended that you practise grouting tiles beforehand. You ought to begin in a smaller, more limited region in order to gain experience first.
Making a prototype of the final product is a smart practise. Using a tiled board that's roughly 18 inches by 18 inches, you can see how the grouting will turn out. First, we recommend practising this so you can move on to the next step.
Apply grout in small sections.
As soon as you have spread between a half gallon and a gallon of the grout mixture over the tiles, you may begin your project.
Be sure to use a grout float at a 45-degree angle when pushing the grout into the joints. There is a lot riding on the correctness of the 45-degree angle at which you hold the float.
Use the grout to make graceful curves, filling in all of the spaces between the tiles. Work in portions rather than trying to grout the entire tiled wall or floor at once, and use your grout float to wipe away excess grout as you go.
Clean tiles thoroughly.
After waiting a few minutes for the grout to set, a grout sponge can be used to clean the tile surfaces. After the grout has dried, you should give it another wipe down with a damp cloth or towel to get rid of any residual grout haze.
Even at this stage, you should only use a tiny bit of water. If you wash your tiles with too much water, you risk erasing the grout joints.
When the grout has hardened, it will be easier to scrape off the tile. Don't forget to clean your sponges and water buckets on a regular basis because unclean water won't clean.
The Dos and Don’ts
Tile is a gorgeous and durable option for your home's flooring, but do you know how to preserve it in pristine condition?
Tile flooring can be kept in beautiful condition for longer with the help of a few simple maintenance procedures provided they are carried out regularly. At Hitch Property Constructions, we provide a wide range of home maintenance services.
When cleaning your tile and grout, you should use the same care you would with any other surface in your home. First, let's go over some basic rules for cleaning tile and grout:
Do
- Please wipe up any accidents right away. The porous nature of tile flooring makes it a huge issue if spills are allowed to sit, despite the fact that it gives off the impression that it can manage spills with ease. Liquids can soak into the tile, which can cause discoloration and unpleasant odours.
- Having your tile professionally sealed is a good idea. By having a professional apply sealer to your tile and grout after it has been cleaned, you may dramatically increase the longevity of your flooring. Each cleaning will restore the floor's like-new appearance.
- Keep up a pristine appearance all year round. Tile floors should be dusted and mopped daily or at least once a week, but there are many advantages to having a professional service clean your floors on a regular basis. At the absolute least, you'll spend less time and energy cleaning the area, but more importantly, you'll know that it's been done right.
- Cleaning sponges and terrycloth towels should be used. You may avoid scratching or otherwise damaging your tile and grout by washing it with soft, scratch-free products.
- Check That There Is Adequate Ventilation Cleaning tile and grout with chemical solutions requires certain precautions, including the use of fans and the opening of all nearby windows. Doing so will lessen the likelihood that you may inhale any of the chemical solution's potentially harmful components.
Don't
- The use of ammonia or bleach is also acceptable. Tiles may deteriorate and eventually come apart if exposed to these chemicals, as they have the ability to harm the grouting between them.
- Try Steel Wool. This substance will dull metals and scratch tile floors. To clean, please don't use anything too abrasive.
- Try using several coloured cleaning products. Due to the minute size of the tile's pores, it readily absorbs the colour of cleaning solutions. Choose clear solutions whenever possible to prevent the gradual discoloration of your tile and grout.
- Use an Abundance of Water. In the event of flooding, water may penetrate the tiles' porous surface and make their way to the subfloor. The result may be the hidden growth of mould and mildew.
- Stress due to the Chaos. If you have tile flooring and are concerned about the amount of maintenance it will demand, know that professional tile and grout cleaners are ready to help you with any and all of your cleaning needs.
Conclusion
Almost any property owner is capable of completing the task of regrouting their own tile. Over time, grout inevitably becomes dirty, discoloured, and brittle. The secret to a good regrouting work is to remove some of the old grout to make room for the new, clean grout. Grout is a filler used to infill the crevices between tiles once they have been set. Grout is often manufactured by grinding together concrete, lime, and colourant into a powder.
Grout's resilience and lifespan can be greatly improved by using high-quality materials in its construction. After tiles have been installed into a cement backer with a gap between them, grout is applied. Lines of grout are typically moulded into sturdy yet pliable surface patterns. Updating to newer tiles and grout might halve the time you spend cleaning. Fixing the grout on your tile surface can extend its life and make it less susceptible to wear and tear.
Since grout is available in such a wide range of colours, it may be used to create a unified space or to create striking contrast. You should clean the tiles well with a dry sponge before grouting them. In order for the urethane grout to cure, it must be kept dry for seven days. It's not a good idea to wing it while mixing grout; getting it properly the first time is crucial. Tile floors are quite problematic if liquids are allowed to sit because of their porous nature.
Discoloration and bad odours can be caused by liquids soaking into the tile and sitting there. It's recommended that tile be professionally sealed to prevent damage. The floor can look brand new again after each cleaning. When using chemical solutions to clean tile and grout, it's important to ventilate the area thoroughly by turning on fans and opening neighbouring windows. These chemicals have the potential to damage the grouting between tiles, which could lead to their eventual separation.
Content Summary
- Removing part of the old grout to make way for the clean grout to bond to the surface is the key to a job that makes your tiled bathroom look as good as new.
- The correct type of grout removal tool will be needed for this task.
- By tiling your floor with grout, you may make it both attractive and simple to maintain.
- Taking the time to fix the grout on your tile surface can decrease the amount of wear and tear and increase the longevity of your tile.
- Choose your grout.
- To prepare tiles for urethane grouting, wipe them down well with a dry sponge.
- Mix your grout.
- Apply grout in small sections.
- Clean tiles thoroughly.
- When cleaning your tile and grout, you should use the same care you would with any other surface in your home.
- Having your tile professionally sealed is a good idea.
- By having a professional apply sealer to your tile and grout after it has been cleaned, you may dramatically increase the longevity of your flooring.
- Tile floors should be dusted and mopped daily or at least once a week, but there are many advantages to having a professional service clean your floors on a regular basis.
- You may avoid scratching or otherwise damaging your tile and grout by washing it with soft, scratch-free products.
- Check That There Is Adequate Ventilation Cleaning tile and grout with chemical solutions requires certain precautions, including the use of fans and the opening of all nearby windows.
- Choose clear solutions whenever possible to prevent the gradual discoloration of your tile and grout.
- If you have tile flooring and are concerned about the amount of maintenance it will demand, know that professional tile and grout cleaners are ready to help you with any and all of your cleaning needs.
FAQs About Wood Rot
Roots absorb and transport water and minerals from the soil to the rest of the tree. Roots also anchor the portion of the tree above ground. It is important to keep the portion above ground healthy to ensure an adequate food supply for the roots to continue their important functions.
Yes, you can. Some types of green wood have slightly toxic effects to tender new growth, so only apply under mature trees. Make sure you don''t pile it up around the trunk; leave the root flare visible.
Popular herbicide brands, including Spectracide, Stump Stop, and Bonide, make tree stump killer solutions to use on your pesky stump. You can also use natural solutions, such as Epsom salt, saltpeter, and rock salt, to remove your tree stump.
Lateral roots near the soil surface thicken over successive years, eventually becoming the large woody roots of the framework root system of a mature tree - there are usually between four and eleven such roots which may become 30cm or more in diameter close to the stem.
Most tree roots spread 2-3 times the radius of the canopy, and often reach out 5 times the radius of the tree canopy or more in dry conditions. So, for example, if a tree is 6m wide, the radius of the canopy is 3m. The root spread = 2 (to 3) x canopy radius = 2 (to 3) x 3m = 6m (to 9m).