
What's in it for us to paint your weatherboard house? Comes close to spilling the beans. Deceive you. Redundantly. Nothing could be simpler than getting ready to paint. To make things simpler, we shall detail each action. Neither time nor experience is a bad thing to be short on.
Time. Important. Time. There is a lot more time involved than you might imagine in painting a weatherboard home. Professional exterior painting of a single-fronted house takes around 160 hours. Those who are experts at DIY should add 50% to the estimated time. Looking for weatherboard repair? Done! You're covered by Hitch Property Constructions.
In light of the fact that you will need 240 hours, or 15 weekends, to complete the task of painting your home, We will provide some insider tips.
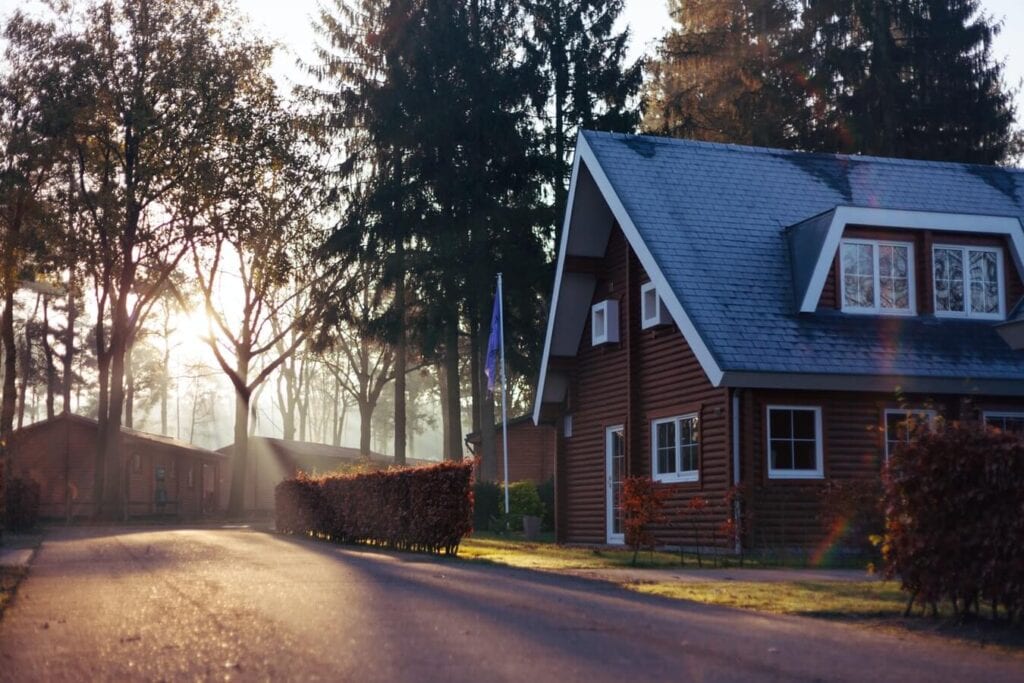
A home with weatherboards has an ageless, welcoming appearance. Weatherboards were exterior slats of wood that ran horizontally across a building's face. As a substitute for wood, fibre-cement weatherboards have become increasingly popular. Although weatherboard exteriors have a classic look, they require more maintenance than other siding types. The exterior of your home's appearance can be improved with the application of a few easy tricks.
Advice On Painting Weatherboards
Many of Australia's historic architectural forms, from beach bungalows to the more rustic "Queenslander" look, have weatherboard siding. However, like any other part of a house, the weatherboard needs regular maintenance and care to keep looking good for as long as possible. Applying a fresh coat of paint is the easiest and most cost-effective approach to restore your weatherboard home's exterior to its former glory if it is looking a little weathered and flaky.
Start Preparing The Boards
Weatherboards, like any other surface, require preparation before being painted. When painting over wood, you'll need to scrape or sand off any peeling paint. Sand down the peeling paint. All freshly installed fibre cement weatherboards must be either raw or pre-primed. Before painting, raw boards need to be prepped by cleaning, drying, and priming.
Don't Forget To Prime
Weatherboards, like any other surface, require preparation before being painted. When painting over wood, you'll need to scrape or sand off any peeling paint. Sand down the peeling paint. All freshly installed fibre cement weatherboards must be either raw or pre-primed. Before painting, raw boards need to be prepped by cleaning, drying, and priming.
To Avoid Bumpy Paint
If you're looking for the best paint on your weatherboards, the material you're painting on might make a huge difference. Flat or matte paints give a surface that is great for fungus, fungus, or dirt to adhere to, therefore they aren't a good choice. Go for a paint with a satin, quasi, or powdery texture instead. They are easier to keep clean since dust and mildew have a harder difficulty adhering to their normally smooth surface. However, a meticulous priming prior to application is needed for satin, tractor trailer, and shine finish paints to avoid appearing splotchy after application.
Elect A Pastel Tone
It's best to use lighter colours on the exterior of a weatherboard home. Incorporate two or more darker trim colours into a light weatherboard paint scheme. Buildings clad in weatherboard look classic and clean when painted white. In general, darker paint colours are more susceptible to sun damage and heat, while lighter colours are less likely to cause weatherboard problems like bubbling, flaking, and fading. The Melbourne weatherboards are in good hands with Hitch Property Constructions.
Learn the best practises for painting weatherboard with the help of this comprehensive guide.
The Right Colour Of Paint May Make All The Difference.
British Paints 4 Seasons is a specially formulated paint that has been tested to withstand the changing and seasonal demands from our harsh environment, including the sun's UV rays, rain, and humidity.
The 4 Seasons collection from British Paints includes matte, semigloss, and gloss finishes. A higher gloss level results in greater solar reflection off of the painted surface.
Make Sure Your Surface Is Ready To Go.
If you have a pressure hose sitting around, it can be used to blast away dust and peeling paint from your home's exterior. You can also use a scour brush and water from a container, scrubbing these spots well.
To ensure that the weatherboard is always smooth as ready for such a new coat of paint, it is best to sand off whatever old paint, grime, grit, and other pollutants by hand before painting.
Both Paint & Prim Outdoor & Four Season are self-priming, meaning they don't require any priming before being applied to most surfaces. Sometimes a different primer is required when working with dark wood. Before making a purchase, it is recommended that you look at the back of product label to see whether any specific undercoat is needed.
Attack The Wall Piece By Piece.
Make sure you have the right brush before starting the painting project. First, using a high-quality brush, cut into the bottom of the each board, reaching into every overlap. Only then should you move on to painting in even strokes. Proceed with the procedure.
Use the large gaps inside the weatherboards (including such corners, frames, or doors) to separate off the wall so you may paint in smaller increments and avoid getting your whole body in the way.
This method of operation will result in a uniform coating of paint when it has dried, with no vertically sign up markings between the regions painted.
From The Top Down, The Workplace
You should paint three board at a time, starting at the top of a wall and working your way down. Starting in a hole and working your way out is the best strategy.
By going to the top and working your way down, you can protect the freshly applied coats at the bottom from dust and grime.
Give Each Coat Time To Dry Before Applying The Next.
When you let paint dry for two hours, you get a perfectly even coat every time. For darker colours, it may take more coats than the quantity specified on the container to reach the desired hue.
What Criteria Should You Use When Deciding On An Exterior Paint Colour?
Curb appeal is a major factor in a home's value, and it can be increased by choosing an attractive colour scheme for the exterior. The exterior paint you choose for your home is the most noticeable expression of your personal style. Painting the exterior of your home can increase its value and kerb appeal, which in turn might alter how purchasers perceive it. There are literally thousands of options when it comes to exterior paint colours. Which do you think would look best in your house? What is the recommended number of paint coats for long-term protection? The power of modern technology to the rescue!
Visualizers allow you to see what colours will look like before you commit to them. Here are some suggestions and instructions for using a virtual paint app to experiment with colour schemes before you commit to a paint job.
How To Pick The Right Colors
Before deciding on a paint colour for your house, consult some useful resources. The essentials of using a home colour picturing tool are simple. It's important to think about the scale of your home before starting exterior painting. Size determines whether colours are dark or light. A home painted in a light colour will appear larger and more affected by light than one painted in a dark colour will appear smaller and more at one with its surroundings.
Think about the style of your home and the surrounding area when deciding on paint colors. Maintaining close adherence to the standard will help you create a stylish result.
Before You Go Out And Buy Paint, Try Using A Colour Visualizer.
Use a colour visualizer to zero down on the perfect exterior paint colour after you have a vision in mind. You can look for standard paint colours, popular paint brands, or even designer paint brands. This is an outdoor instrument used by paint manufacturers. While the user interfaces of these many paint programmes may look different, they nonetheless use essentially the same mechanisms to enable users to evaluate paint options. Submitting images of the outside of your property can help you choose what paint colours could look best. This is a fantastic tool for digitally trying out paint colours before committing to them in your own home.
Use Paint Samples To Confirm Your Color Selections
After using a virtual tool to reduce your options, you may test them out in a mock-up of your own home. Despite the usefulness of visualizers, nothing surpasses actually seeing the artwork in person. Get some paint swatches and display them in the yard. The light entering your home from the south and the north might be very different. See how the final product looks at various times of day by inspecting these regions.
You Shouldn't Restrict Your Colour Palette.
Field colour, accent colour, and trim colour are the three components of an external design. Select a pleasing field and trim colour scheme, and then complement it with an additional shade. Dare to stand out, but don't go crazy.
You may save yourself time, money, and headaches when selling your home by testing out the exterior paint colours first. Find the perfect paint colour for your house with one of the following colour visualizers. Whether you want to handle the work yourself or employ a professional, these digital resources will guarantee high-quality outcomes either way. The Melbourne weatherboard experts at Hitch Property Constructions.
Directions
- The first step is to assess the paint quality of the area you're working on. Cut an X into your current surface with a sharp knife, then cover it with tape. Assuming the paint chips when the film is manipulated, it is unsafe and must be completely erased.
- And similar to how lead-based paint treatments are more difficult to remove from older homes, so are the hazards associated with them. If you're unsure how to remove them properly, see a Dulux expert.
- Use a broom to sweep away dust and debris from the underside of your eaves and the seamless gutters on your home's weatherboards. Peeling paint can be removed with a paint scrape and some sandpaper in the absence of a high-pressure hose.
- At this point, you are ready to begin the painting process. Appear at the beginning and work your way down to achieve the best results. Start by painting the back of the boards, then move on to the front. Try working from side to side with broad, horizontal strokes.
- And that's it! Remember to use Dulux Envirosolutions Waste Painting Hardener on any remaining paint to make it more difficult to dispose of.
Conclusion
Weatherboards were horizontal wooden slats used on the exterior of a building. Weatherboards made of fibre cement are increasingly prefered as a wood substitute. Weatherboard siding has a timeless appeal, but it requires more upkeep than other siding options. The 4 Seasons formula of British Paints has been tried and trued in the face of the sun's UV rays, rain, and humidity. Weatherboard issues like bubbling, flaking, and fading are less likely to occur with lighter colours.
It's recommended that the exterior of a weatherboard house be painted in lighter tones. The value and kerb appeal of a home can be improved by painting the exterior. When it comes to exterior paint colours, you can choose from literally thousands of combinations. Before starting a real paint job, try out different colour combinations using a virtual paint app. It may take more coats than what is listed on the container if you want a darker color.
Color intensity is relative to the scale. Homes painted in light colours give the impression of more space and are more light-responsive. You can get advice on what colours might look best for the exterior of your home by sending in photos of the exterior. Before painting your walls, use a colour visualizer to see how the colours will look together. Using a paint scrape and some sandpaper, you can get rid of the peeling paint.
See a Dulux professional for advice on how to properly remove them. If there is any paint left over, use Dulux Envirosolutions Waste Painting Hardener on it. Hitch Property Constructions are the professionals to go to if you need any help with weatherboards in Melbourne.
Content Summary
- What's in it for us to paint your weatherboard house?
- Time.
- There is a lot more time involved than you might imagine in painting a weatherboard home.
- Professional exterior painting of a single-fronted house takes around 160 hours.
- In light of the fact that you will need 240 hours, or 15 weekends, to complete the task of painting your home, We will provide some insider tips.
- Applying a fresh coat of paint is the easiest and most cost-effective approach to restore your weatherboard home's exterior to its former glory if it is looking a little weathered and flaky.
- If you're looking for the best paint on your weatherboards, the material you're painting on might make a huge difference.
- Go for a paint with a satin, quasi, or powdery texture instead.
- Learn the best practises for painting weatherboard with the help of this comprehensive guide.
- The 4 Seasons collection from British Paints includes matte, semigloss, and gloss finishes.
- Make sure you have the right brush before starting the painting project.
- You should paint three board at a time, starting at the top of a wall and working your way down.
- The exterior paint you choose for your home is the most noticeable expression of your personal style.
- There are literally thousands of options when it comes to exterior paint colours.
- Here are some suggestions and instructions for using a virtual paint app to experiment with colour schemes before you commit to a paint job.
- Before deciding on a paint colour for your house, consult some useful resources.
- The essentials of using a home colour picturing tool are simple.
- Think about the style of your home and the surrounding area when deciding on paint colors.
- Use a colour visualizer to zero down on the perfect exterior paint colour after you have a vision in mind.
- Select a pleasing field and trim colour scheme, and then complement it with an additional shade.
- You may save yourself time, money, and headaches when selling your home by testing out the exterior paint colours first.
- Find the perfect paint colour for your house with one of the following colour visualizers.
- Directions The first step is to assess the paint quality of the area you're working on.
- If you're unsure how to remove them properly, see a Dulux expert.
- Use a broom to sweep away dust and debris from the underside of your eaves and the seamless gutters on your home's weatherboards.
- At this point, you are ready to begin the painting process.
FAQs About Weatherboard
Timber weatherboards are a very traditional cladding system and are available in a range of profiles and timber species. Various profiles can be installed horizontally, vertically and, in some cases, on the diagonal. Generally, they are not part of a proprietary.
Weatherboard shall be securely fixed to studs with one flat head nail per board at centres not exceeding 600mm. Corrosion resistant nails are essential. Tilling Timber recommends the use of silicon bronze or stainless steel flat head annular grooved nails for added withdrawal resistance.
Weatherside. Weatherside is a product made from wood and glue that was a popular cladding material in the early 1980s. In many cases the glue failed which let moisture come in contact with the wood fibre. The cladding then swelled, delaminated and turned to mush. The only way to fix it is to replace the cladding.
Engineered for durability, fibre cement is fire resistant, rot resistant and resistant to moisture damage, making it the ideal low maintenance alternative to traditional building materials. Fibre cement offers both contemporary and flexible design options and is used by many New Zealanders to create stunning facades.
weatherboards will crack/damage as a result of constant direct sunlight and b). bricks will keep your house cool initially but then will stay hotter for long which isn't ideal either. In this situation, the choice will come down to the house design and your lifestyle.