
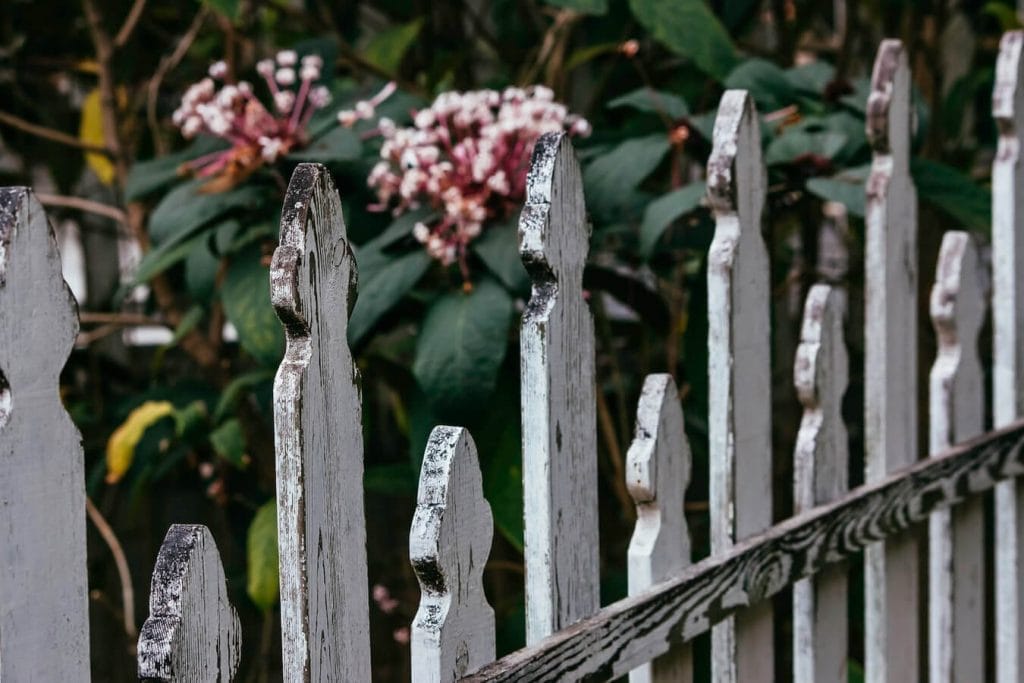
A fence's multiple uses go far beyond its primary one of delineating property lines. Livestock containment, kerb appeal, and safety and security are just some of the issues that may be addressed by fencing installation for landowners and homes. Even though there are numerous fencing materials to choose from, including wire, aluminium, chain link, vinyl, wood, and wrought iron, it is crucial to remember some dos and don'ts when erecting a fence.
Check with your HOA or city hall to see if there are any regulations pertaining to fencing that must be followed before you begin construction. The first two procedures should be routine for contractors, but this one should be kept in mind by anyone doing the work themselves. You should also call the relevant utility companies to have their underground wires located and marked before you start digging.
Looking for fencing services Melbourne services? Look no further! Hitch Property Constructions has you covered.
The style, materials, and purposes of a fence can be customised in many ways, but any competent installer can benefit from the author's advice in this educational essay to ensure a smooth and effective fence installation.
The Do's and Don'ts to Remember
Installing a fence around your property does more than just add kerb appeal; it also makes you feel safer and gives you more personal space. Although it is one of the most important things you can do for your property, you should be ready for the inevitable slip-ups and missed details that will inevitably occur. Fence installation is a job best tackled with the proper background knowledge. Read on to learn some of the dos and don'ts for this undertaking.
DO Choose the Correct Type of Wood
It's important to remember that different types of wood can have drastically varied effects on the long-term performance of fence posts. One of the most common choices is to work with pressure-treated wood due to its combination of durability and affordability. The naturally durable and beautiful species, such as cedar, cypress, and redwood, are also widely utilised but have a far higher price tag. Regional price differences might be rather large. They are all resilient to the destructive effects of water and insects because of the resins contained within them.
Spruce, oak, and pine can also be used, but only after being treated with a brush-on preservative. Only under these circumstances is it allowed. Heartwood is always preferable to sapwood, which is younger and lighter in colour, since it includes stronger defences, notably against wood-boring insects. The deeper colour and increased density of heartwood are its defining features. Last but not least, no matter what species you choose, you should always choose lumber that has been approved for in-ground use. Hitch Property Constructions has a wide range of Melbourne fencing services.
DO NOT Make Too Small of Postholes
It's possible that the minimum hole depth and post hole diameter required by law for your region's fences. When this is not the case, a good rule of thumb might be used as a reliable alternative. To be safe, it's best to dig a hole that's at least a third as deep as the post is in diameter.
This is done in part to guarantee that the posts are set deep enough in the ground to be safe against freezing. If you want to set a post that is six feet tall, you'll need to dig a hole that is two feet deep. However, the diameter needs to be three times the post's width. Consequently, a twelve-inch-wide hole is ideal for a common 4x4. The holes in the fence posts must be of a barrel shape, with flat walls and a diameter that is consistent from top to bottom.
An ordinary shovel will produce a hole in the shape of a cone. Instead, a posthole digger can make the job much easier and faster to do. In that situation, a clamshell digger should be used since, although it is slower, it is just as effective, especially in rocky ground.
DO Use a Gravel Base Layer
When a fence post gave way, it was probably because of decay brought on by prolonged exposure to water. When there are no obvious pests present, but the failure still occurs, this is the case. A posthole that has been filled with pea gravel or crushed stone will help prevent further degradation of the building.
To compact the gravel, tamp it down with an old plank of wood after adding enough to reach a depth of about three inches. A further three inches of gravel should be added to the hole, and this time the tamping down tool should be used to compact the gravel once again. This little modification greatly improves the ability of rainwater to seep into the ground. It's so effective that some contractors, even in milder areas, will exclusively use gravel to lay fence posts.
Though there are times when that approach is warranted, experts typically recommend a combination of gravel and concrete to form a sturdy, long-lasting building (for much-needed stability). Rapid-setting concrete, a special type of concrete designed for use in these circumstances, is highly effective.
DON'T Prepare the Incorrect Amount
Concrete that dries quickly does what it says it will do: it doesn't keep you waiting. CTS Rapid Set Concrete Mix hardens in as little as 15 minutes. With this in mind, it makes sense to plot out your moves. One must first consider the posthole's size in relation to the expected concrete output. Depending on the size of your home, you might need to mix several bags of CTS Rapid Set Concrete Mix at once, as a single bag weighs 60 pounds and yields only around 0.5 cubic feet. Concrete begins to set within 15 minutes of mixing, so don't make more than you can safely place in its final placement.
Once the desired amount of concrete has been calculated, the dry materials are combined with water according to the package's instructions. Repeat this process for another two or three minutes, or until the mixture is fully lump-free and smooth. The post may be set in its final location, and the posthole can now be filled with concrete. The concrete must be packed such that it is only slightly higher than the surrounding earth. Keep the concrete from pooling here by trowelling it so that it slopes away from the post. Check that the post hasn't shifted out of place, and then give the concrete a few minutes to harden.
DO Apply Caulk to Each Fence Post
A full hour is all it takes for CTS Rapid Set Concrete Mix to reach its final hardness. You may think you're done, but one last crucial step prevents the fence post from decaying. Start by looking at the hole's edge nearest to the protruding post. Can you spot the joint? This joint needs to be fixed since there is a chance that water will collect in the microscopic spaces between the wood and the concrete if it is not. This dampness has the potential to promote rot over time, however this is by no means guaranteed.
After all, caulk is a simple option that may be used to seal the crack. You should take preventative action: as soon as the concrete reaches the necessary hardness, you can apply exterior acrylic latex caulk straight to the seam, wrapping it completely around the post. Alternatively, you might use any silicone caulk that is safe for use with concrete. The cumulative effect of freeze-thaw cycles might cause the seam to widen, so it's important to remember that you'll probably need to recaulk the joint on a frequent basis.
DON'T Neglect to Do Due Diligence
Act like an adult. Consult with local authorities to ensure that your proposed fence meets all requirements of any relevant building rules or ordinances before beginning construction. Some local governments have extremely stringent laws.
Dig deep into the soil as you would for any construction project approximately a week before you intend to begin working. Before you begin digging on your property, call your local utility company to have a representative come out and roughly outline the location of any lines that may run beneath it. Any endeavour that calls for extensive groundwork must first take this vital step. There's no denying the dangers of digging when you have no idea what might be buried just a couple of feet below the surface.
If you don't disturb any buried wires and remain a safe distance from them, you shouldn't have to worry about them. The longevity of your fence can be greatly increased by regular checks and maintenance performed on the posts. If you want your fence to look good and last as long as possible, you should check the posts at least once a year, preferably in the spring or fall, and repaint or stain them if necessary.
Other Things to Keep In Mind
The Do's
- It is crucial to double-check that you have all the needed parts and supplies on hand before beginning construction.
- Verify that the concrete at the fence's corners and ends is fully hardened before tightening the monofilament line or hanging the fence mesh.
- To ensure that your posts are absolutely upright, use a level at all times.
- Mounding the soil around your posts can help keep water from collecting there.
- Use crushed stone or gravel to line the bottom of your postholes. This gives the posts a solid foundation, but it's not necessary if you're putting them in soil that has a lot of clay or rocks.
- If you want to make sure your gate's posts and bracing are installed properly, you should plan out its location before you start building.
- Dry-fitting all the components is required before any of them are drilled or put into place.
- The post extensions or post caps should always be put in place before the actual posts.
- Use at least one zip tie per foot along with your line posts.
- Put in a stake every five feet to keep the fence in place. Deer will always try to find a way over, under, or through a fence.
- Use a product with air-driven fence stapling, since this method provides a more secure attachment as well as better corrosion protection for the staples, making them a more long-lasting option.
The Don'ts
- Do not start building the fence until you have checked your property lines meticulously.
- It's not a good idea to rely on your eyes once the placement has been made. Get your measuring tape out and make sure your fence posts are evenly spaced before you start digging.
- Leaving out corner bracing is a bad idea. Since your fence's corner pillars must support its weight when it is pulled in both directions, additional bracing must be placed to both sides of your fence for maximum stability.
- Shoveling dirt around the line posts and stamping it down with your foot won't cut it. When adding soil in increments of six inches, tamp it down thoroughly after each addition using a wood post or other tamping instrument.
- Make sure the postholes you dig are deep enough. The corner posts should be installed a few inches below the frost line to prevent the problem of the posts heaving. This means that, in most cases, you'll need to dig a hole for your post that's 30 to 36 inches deep.
- Your line posts must not go in before the monofilament. If you start by putting in the monofilament line, you'll have an excellent reference point for where to put your posts.
- Put the post caps in there. If you don't protect your posts with caps, they could rot more quickly and become inundated with water.
- You shouldn't weave the monofilament line through the fence. A wavy look and bunching are the results of this method. In this case, hog rings or zip ties would be more appropriate.
How to Strengthen Fence Posts Without Pouring Concrete
A fence marks your property's edge and serves as a physical barrier between your home and the ones around it. Poured concrete is the standard method for setting fence posts in the ground. The solid block that is produced by this method makes it impossible to move the fence in the future, despite the fact that it does result in a durable anchor. Gravel is a key ingredient in concrete since it aids in the cement's binding properties.
While concrete is the traditional material for post bases, gravel can also be used if it is compacted adequately. If you decide you don't want a fence after all, you may easily remove the posts by burying them in gravel. Erosion can also be stopped in its tracks by using gravel. Check out our Melbourne fencing services services here.
- The post hole should be dug with post hole diggers, a digging bar, or a mechanical soil auger to a depth of at least 24 inches, but ideally the post would be set at a depth of at least 40 inches to reduce the likelihood of upheaval. It's recommended to drill a hole that's twice as wide as the fence post.
- To make fence posts that are exactly twice as long as their diameter, cut down a piece of lumber measuring either 1 by 4 inches or 2 by 4 inches.
- This part, known as a deadman post support, is used to further anchor the post into the earth. Whenever a hole for a post cannot be excavated deeper than 40 inches, this method comes in handy.
- Use 16d nails or 3-inch wood screws driven perpendicular to the fence post to secure the short piece of lumber to the base of the post. Instead of screwing the board into the post's base, it's preferable to attach it to the post's base along its length.
- The bottom of the post hole should be filled with gravel or crushed rock to a depth of about 6 inches. The best compaction results will be achieved using gravel that comprises of both uniformly sized pieces and some gravel dust.
- A flat end of a digger bar can be used to compact gravel or rock into a level base, and a tiny torpedo level can be used to double-check the base's levelness.
- Insert the post into the hole, check the plumb with a level, and make any required modifications. It's crucial that the horizontal board you're using fits snugly against the post hole's sides.
- The hole should be backfilled with gravel or crushed rock to a depth of about 6 inches all the way around the post. Apply some force to the gravel or rock and compact it around the deadman support so that no gaps remain. Pack the fill in as tightly as you can using the round end of a digger bar.
- First, make sure the post's sides are level with a level, and then make any necessary changes.
- Digging bar the aggregate down and checking for plumb before proceeding on to the next layer of gravel. Crushed rock or gravel, no more than six inches thick per layer, should be used to fill the remaining space in the hole.
Conclusion
A fence's fundamental function of defining property lines is only one of many possible applications. Challenges include securing the area, keeping the animals contained, and maintaining kerb appeal. There are certain things you should and should not do when putting up a fence. To protect against termites and other wood-boring insects, heartwood is always better than sapwood. However, a brush-on preservative is required for the usage of spruce, oak, and pine.
Select only lumber that has been tested and is safe for usage underground. For a strong and long-lasting structure, professionals advise using gravel and concrete. Effective in these situations is the specialised type of concrete known as rapid-setting concrete. In as little as 15 minutes, CTS Rapid Set Concrete Mix will reach its final hardness. Outside acrylic latex caulk can be applied once the concrete has reached the required hardness.
This seam could potentially widen as a result of repeated freeze-thaw cycles. Checking the fence posts once a year is recommended if you want your fence to survive as long as possible. All the parts must first be dry-fitted together before they are drilled or installed. Avoid having water pool around your posts by mounding the soil around them. If you want a more permanent fix, invest in a tool that uses air to drive fence staples.
Monofilament line makes a great guideline for setting up your posts. Installing fence posts usually entails pouring concrete into holes dug in the ground. Cut a piece of lumber in half such that the resulting fence posts are exactly twice as long as their diameter. Gravel or crushed rock should be used to fill the bottom six inches of the post hole. Using gravel with consistent particle size and a little gravel dust will yield the optimum compaction results. By pounding down with the flat end of a digger bar, you may crush gravel or rock into a solid foundation.
Content Summary
- Fence installation is a job best tackled with the proper background knowledge.
- Read on to learn some of the dos and don'ts for this undertaking.
- The holes in the fence posts must be of a barrel shape, with flat walls and a diameter that is consistent from top to bottom.
- Instead, a posthole digger can make the job much easier and faster to do.
- A further three inches of gravel should be added to the hole, and this time the tamping down tool should be used to compact the gravel once again.
- A full hour is all it takes for CTS Rapid Set Concrete Mix to reach its final hardness.
- Start by looking at the hole's edge nearest to the protruding post.
- Dig deep into the soil as you would for any construction project approximately a week before you intend to begin working.
- Mounding the soil around your posts can help keep water from collecting there.
- If you want to make sure your gate's posts and bracing are installed properly, you should plan out its location before you start building.
- Get your measuring tape out and make sure your fence posts are evenly spaced before you start digging.
- Put the post caps in there.
- Use 16d nails or 3-inch wood screws driven perpendicular to the fence post to secure the short piece of lumber to the base of the post.
- Instead of screwing the board into the post's base, it's preferable to attach it to the post's base along its length.
- The bottom of the post hole should be filled with gravel or crushed rock to a depth of about 6 inches.
- Insert the post into the hole, check the plumb with a level, and make any required modifications.
FAQs About House fence
Masonry wall fencing is the most durable fence material. This includes brick, concrete, stone, block, and even stucco. It's known for its longevity and can last over 100 years without any issues.
Fencing increases the value of your home by a fraction of the price of the fencing. If you have a $10,000 fence installed, your home value is likely to go up $6,000 or so. you want to make sure that fencing is in the back of the home, that it is well done, and that it is kept up well also.
Aluminum fences are often considered the easiest to install—you simply have to assemble the sections of rails rather than, say, chopping your own wood and then nailing it together.
If you are not wanting to dig to set your fence post, a metal spike anchor might be the easiest option. Instead of digging a hole to put the post in, you take a metal spike anchor like this one (Amazon link) and place it where you would like the hole for your fence post.
No, fence posts don't need to be set in concrete, and there are plenty of other ways to fix your posts if this feels a bit too permanent. If you are using wooden posts, concrete may actually be the worst option.